メインコンテンツにスキップ

Samsung SCH-A310 Keypad Replacement

必要な工具と部品

  1. Samsung SCH-A310 Keypad Replacement, Antenna: 手順 1、 1の画像 1
    • Remove the battery by pressing the button at the top of the case.

  2. Samsung SCH-A310 Keypad Replacement: 手順 2、 3の画像 1 Samsung SCH-A310 Keypad Replacement: 手順 2、 3の画像 2 Samsung SCH-A310 Keypad Replacement: 手順 2、 3の画像 3
    • Unscrew the antenna by twisting it counter-clockwise until it is loose.

    • Slide the antenna out of the phone.

    • The black casing can be removed from the old antenna and used for the new antenna.

  3. Samsung SCH-A310 Keypad Replacement, Keypad: 手順 3、 1の画像 1
    • Using a #00 Phillips Screwdriver, remove the 4 (3mm) black screws from each corner of the back casing.

    • Place these screws in a safe place. If you can, try to loosen the screws without removing them entirely to help keep track of them, they are easy to lose.

  4. Samsung SCH-A310 Keypad Replacement: 手順 4、 3の画像 1 Samsung SCH-A310 Keypad Replacement: 手順 4、 3の画像 2 Samsung SCH-A310 Keypad Replacement: 手順 4、 3の画像 3
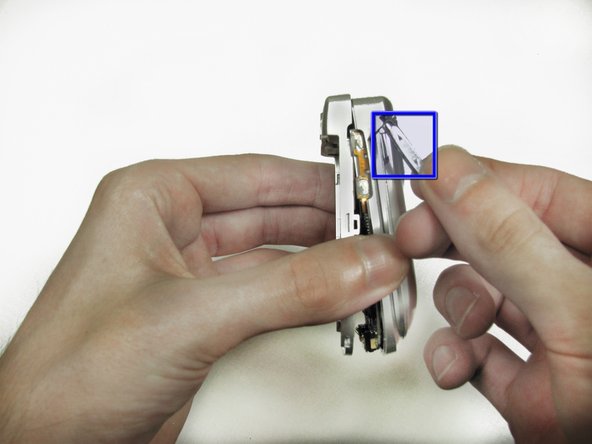
    • Use the wide plastic prying tool to open the back case.

    • To make this process easier, use the tool to push against this tab while gently pulling the back upward.

    • Repeat this process on the opposite side.

    • The volume button may fall out, but don't force it back in. Set it aside for reassembly.

    • When replacing the volume button, the rubber tab must be placed carefully into the space in the inner casing.

  5. Samsung SCH-A310 Keypad Replacement: 手順 5、 3の画像 1 Samsung SCH-A310 Keypad Replacement: 手順 5、 3の画像 2 Samsung SCH-A310 Keypad Replacement: 手順 5、 3の画像 3
    • Pull the back plate up by gently twisting slightly towards the top left corner. When you feel the catch release, you can fold the plate back like a book cover.

    • Be careful of the connectors. There are two very small wires which run to the back cover of the phone.

    • If you accidentally pull the wires out, don't panic. The connector can be pushed back into place very easily.

    • If you are confident in your ability to reassemble the device, pulling the connector out can make this process easier by getting the back casing out of the way.

  6. Samsung SCH-A310 Keypad Replacement: 手順 6、 2の画像 1 Samsung SCH-A310 Keypad Replacement: 手順 6、 2の画像 2
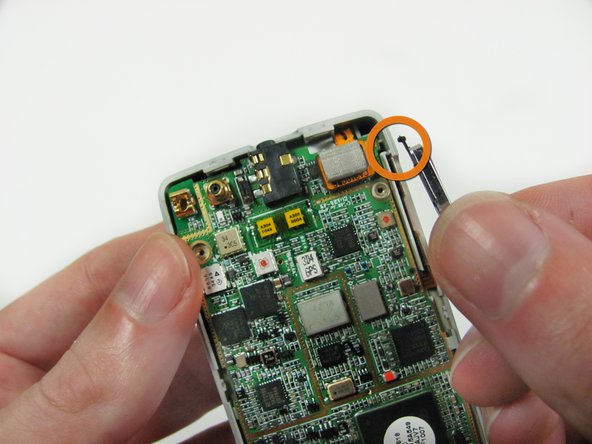
    • Fold the circuit board back like a book cover just as you did with the back plate.

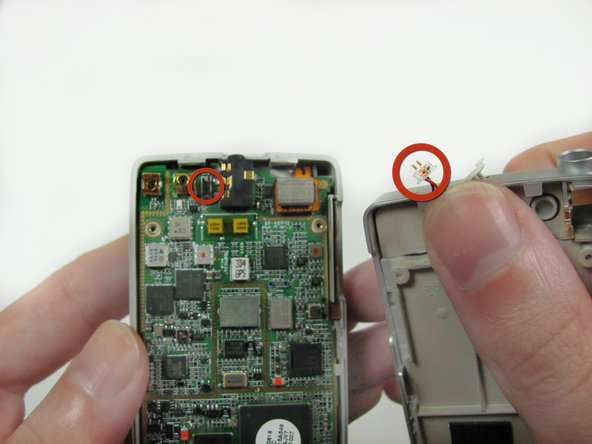
    • Be careful of this connector which goes to the front of the phone.

    • Unlike the connector in the previous step, this one should not be removed unless you plan to replace the motherboard.

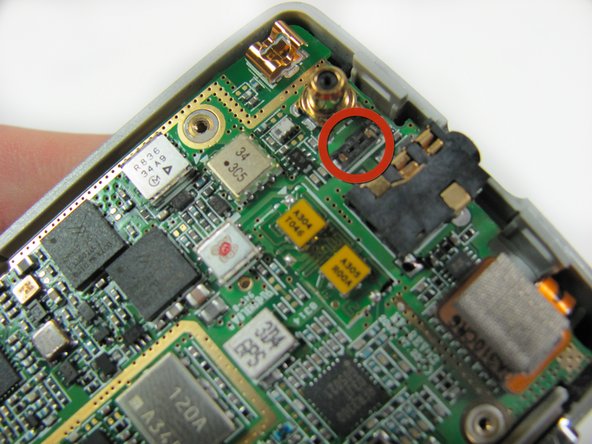
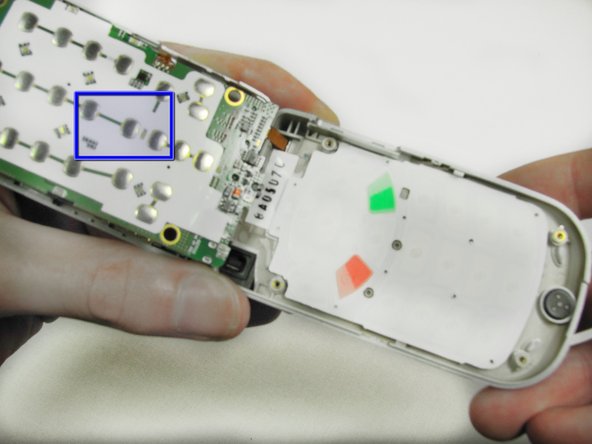
    • The silver contacts on the bottom of the motherboard are what recognize key presses; if the phone isn't responding to key presses, you will need to replace the motherboard here.

  7. Samsung SCH-A310 Keypad Replacement: 手順 7、 1の画像 1
    • Simply pop the keypad out of the case by pressing the keys through the frame.

    • If keys were sticky, give them a thorough cleaning with soap and water; if they are damaged, replace the keypad.

    • Make sure to dry the keypad very thoroughly before placing back in the frame.

終わりに

To reassemble your device, follow these instructions in reverse order.

作成者

5人の作成者と共同で作成されました。

Jacob

メンバー登録日: 01/20/12

1 ポイント

1ガイドが承認済み

チーム

Cal Poly, Team 11-23, Maness Winter 2012 Cal Poly, Team 11-23, Maness Winter 2012人のメンバー

CPSU-MANESS-W12S11G23

4 メンバー

10のガイドは作成済み

0 件のコメント

コメントを追加

統計データ:

過去 24時間: 0

過去 7 日: 0

過去 30 日: 2

今までの合計 1,353