メインコンテンツにスキップ

Samsung SCH-A310 Inside Screen Replacement

必要な工具と部品

  1. Samsung SCH-A310 Inside Screen Replacement, Display Casing: 手順 1、 3の画像 1 Samsung SCH-A310 Inside Screen Replacement, Display Casing: 手順 1、 3の画像 2 Samsung SCH-A310 Inside Screen Replacement, Display Casing: 手順 1、 3の画像 3
    • With the phone upright and folded shut, locate the two silver tabs at the top of the screen.

    • Using one hand, pinch the two tabs inward, and use your other hand to slide the front cover of the screen off of the phone.

    • Note: Do not apply too much of force. If you find it difficult to remove the front cover, try pinching the tabs in harder, and make sure you are sliding the front cover directly downward.

  2. Samsung SCH-A310 Inside Screen Replacement: 手順 2、 2の画像 1 Samsung SCH-A310 Inside Screen Replacement: 手順 2、 2の画像 2
    • Using the T6 Torx screwdriver, remove each of the 4mm screws located in the corners of the phone.

    • Be sure to keep track of the little screws, since they can be lost easily.

  3. Samsung SCH-A310 Inside Screen Replacement: 手順 3、 2の画像 1 Samsung SCH-A310 Inside Screen Replacement: 手順 3、 2の画像 2
    • Locate the tabs on either side of the phone. Pull the outer case away from each tab with the plastic opening tool.

  4. Samsung SCH-A310 Inside Screen Replacement: 手順 4、 3の画像 1 Samsung SCH-A310 Inside Screen Replacement: 手順 4、 3の画像 2 Samsung SCH-A310 Inside Screen Replacement: 手順 4、 3の画像 3
    • Hold the phone upside-down.

    • Two plastic tabs are located under the lip of your phone. Use a plastic opening tool to pop the outer case away from the tabs.

    • After the outside case is clear of the four tabs, removed it.

  5. Samsung SCH-A310 Inside Screen Replacement, Inside Screen: 手順 5、 3の画像 1 Samsung SCH-A310 Inside Screen Replacement, Inside Screen: 手順 5、 3の画像 2 Samsung SCH-A310 Inside Screen Replacement, Inside Screen: 手順 5、 3の画像 3
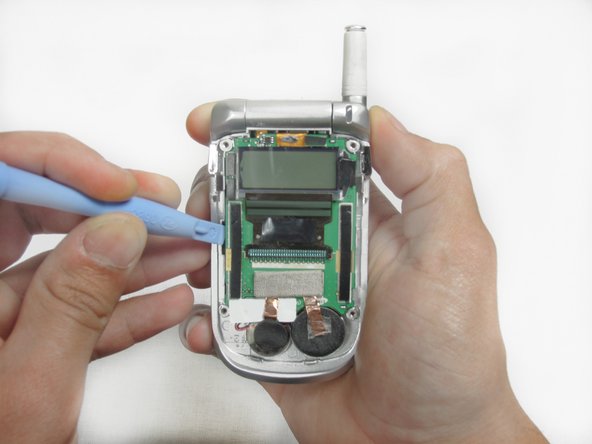
    • Pry the speakers from the casing, which are attached with only glue.

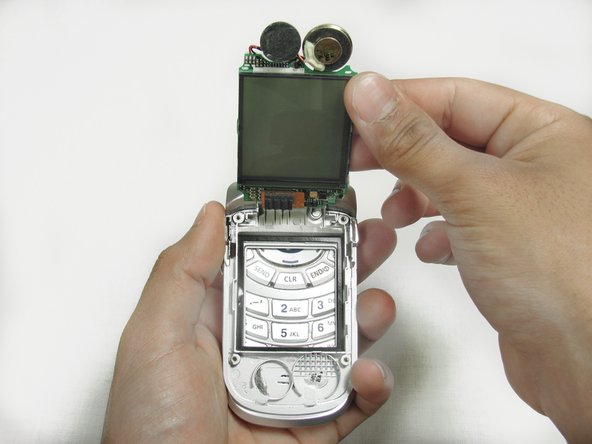
    • Pry the board (entire insides) from the casing using the pry tool.

    • The screen should be able to lift almost completely away as shown.

  6. Samsung SCH-A310 Inside Screen Replacement: 手順 6、 3の画像 1 Samsung SCH-A310 Inside Screen Replacement: 手順 6、 3の画像 2 Samsung SCH-A310 Inside Screen Replacement: 手順 6、 3の画像 3
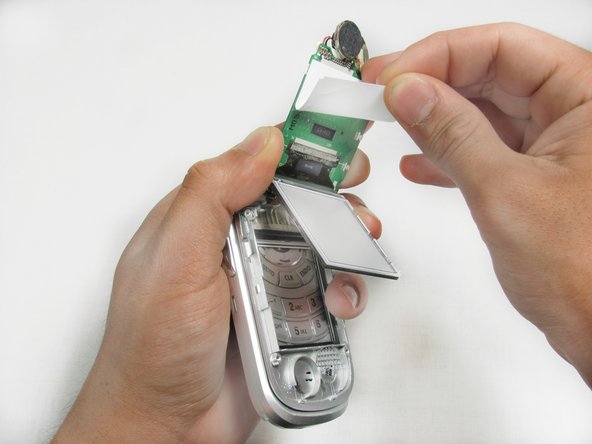
    • Peel the screen from the rest of the board using your fingers. Be careful not to break anything.

    • Lastly, peel the white paper up and away from the screen to reveal the screen's electrical connection.

    • Remove the screen's electrical tab, disconnecting the entire screen from the phone.

終わりに

To reassemble your device, follow these instructions in reverse order.

作成者

4人の作成者と共同で作成されました。

Alan Blevins

メンバー登録日: 01/20/12

1 ポイント

1ガイドが承認済み

チーム

Cal Poly, Team 11-23, Maness Winter 2012 Cal Poly, Team 11-23, Maness Winter 2012人のメンバー

CPSU-MANESS-W12S11G23

4 メンバー

10のガイドは作成済み

0 件のコメント

コメントを追加

統計データ:

過去 24時間: 0

過去 7 日: 1

過去 30 日: 2

今までの合計 1,336