メインコンテンツにスキップ

Samsung Propel Screen Replacement

アーカイブされたガイド
このガイドは将来的な使用のためにのみ保存されてます。ご自身の修理作業には更新バージョンをご利用ください。

必要な工具と部品

  1. Samsung Propel Screen Replacement, Battery: 手順 1、 1の画像 1
    • Press down the back and push up to remove back cover.

    • Insert finger into gap at the top left and remove battery.

  2. Samsung Propel Screen Replacement, Motherboard: 手順 2、 1の画像 1
    • Use a flat-head screwdriver to remove the back lid.

  3. Samsung Propel Screen Replacement: 手順 3、 1の画像 1
    • Locate the six screws and remove them with a Phillips #00 Screwdriver.

    • Insert the flat-head screwdriver into the crevice.

    • Slide and dislodge the snap-ons that are beneath the crevice.

    • Remove the back frame of the device.

  4. Samsung Propel Screen Replacement: 手順 5、 1の画像 1
    • Locate and remove the six screws with a Phillips #00 Screwdriver.

    • Separate the black middle frame from the front frame.

    • Be careful not to tear the phone bus.

  5. Samsung Propel Screen Replacement: 手順 6、 1の画像 1
    • Locate and remove the four screws with a Phillips #00 Screwdriver.

    • Insert the flat-head screwdriver into the crevice.

    • Slide the flat-head screwdriver and dislodge the snap-ons beneath the crevice.

    • Be careful not to rip the band.

  6. Samsung Propel Screen Replacement: 手順 8、 1の画像 1
    • Use your hands to remove both the phone buses from the linkages and remove the motherboard.

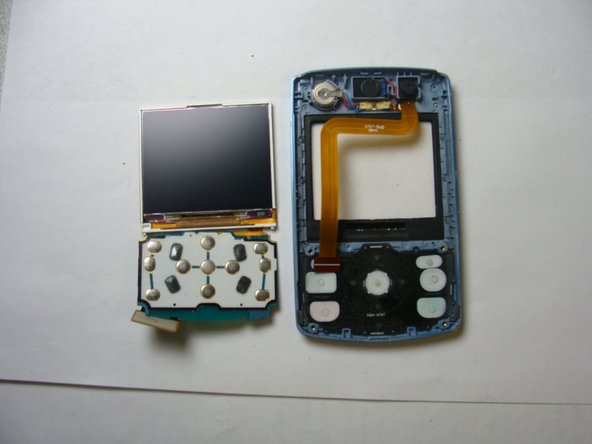
  7. Samsung Propel Screen Replacement, Screen: 手順 9、 2の画像 1 Samsung Propel Screen Replacement, Screen: 手順 9、 2の画像 2
    • Flip and pull eletric band from input.

    • Remove the screen from the front frame.

終わりに

To reassemble your device, follow these instructions in reverse order.

作成者

10人の作成者と共同で作成されました。

Jin

メンバー登録日: 04/28/11

101 ポイント

1ガイドが承認済み

チーム

CSU Los Angeles, Team 1-3, Nelson Spring 2011 CSU Los Angeles, Team 1-3, Nelson Spring 2011人のメンバー

CSULA-NELSON-S11S1G3

4 メンバー

4のガイドは作成済み

0 件のコメント

コメントを追加

統計データ:

過去 24時間: 0

過去 7 日: 0

過去 30 日: 0

今までの合計 1,735