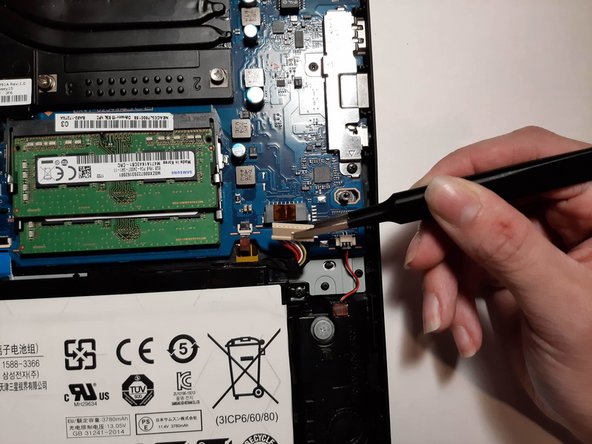
メインコンテンツにスキップ

Samsung Odyssey NP800G5M Battery Replacement

必要な工具と部品

  1. Samsung Odyssey NP800G5M Battery Replacement, Battery: 手順 1、 1の画像 1
    • Remove the eleven 6.6 mm screws on the back of the computer using the Phillips #0 screwdriver.

  2. Samsung Odyssey NP800G5M Battery Replacement: 手順 2、 2の画像 1 Samsung Odyssey NP800G5M Battery Replacement: 手順 2、 2の画像 2
    • Using the opening tool, gently pry apart the back corners until the plastic separates from the body of the laptop.

    • Work your way around the body of the laptop until the back cover is completely separated.

    • Remove the back casing.

  3. Samsung Odyssey NP800G5M Battery Replacement: 手順 3、 2の画像 1 Samsung Odyssey NP800G5M Battery Replacement: 手順 3、 2の画像 2
    • Disconnect the battery connector cable.

    • Working on the device without removing the battery connector cable can damage major components of the device.

  4. Samsung Odyssey NP800G5M Battery Replacement: 手順 4、 3の画像 1 Samsung Odyssey NP800G5M Battery Replacement: 手順 4、 3の画像 2 Samsung Odyssey NP800G5M Battery Replacement: 手順 4、 3の画像 3
    • Remove the four 6.6 mm screws using the Phillips #0 screwdriver.

    • Remove the battery from the device.

終わりに

To reassemble your device, follow these instructions in reverse order.

5 の人々がこのガイドを完成させました。

作成者

3人の作成者と共同で作成されました。

Sean Surrency

メンバー登録日: 09/16/19

807 ポイント

5のガイドは作成済み

チーム

0 件のコメント

コメントを追加

統計データ:

過去 24時間: 3

過去 7 日: 9

過去 30 日: 35

今までの合計 1,888