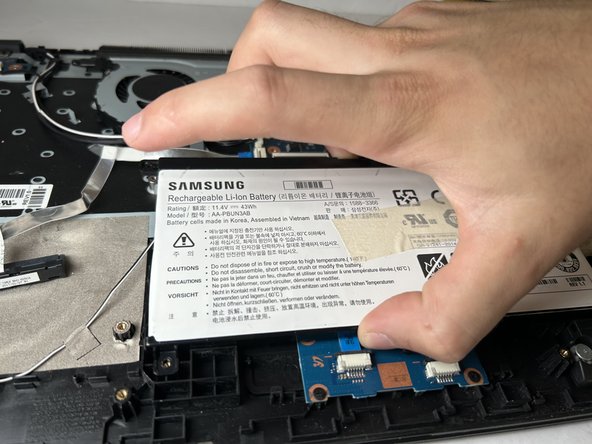
メインコンテンツにスキップ

Samsung Notebook 5 NP530E5M Internal Speaker Replacement

必要な工具と部品

  1. Samsung Notebook 5 NP530E5M Internal Speaker Replacement, Bottom Case: 手順 1、 1の画像 1
    • Flip the laptop over to access the bottom case.

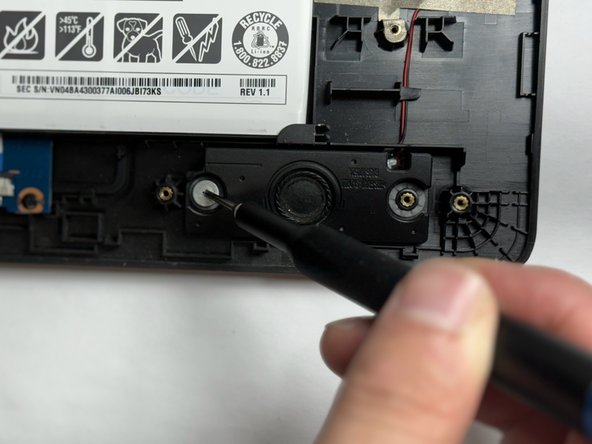
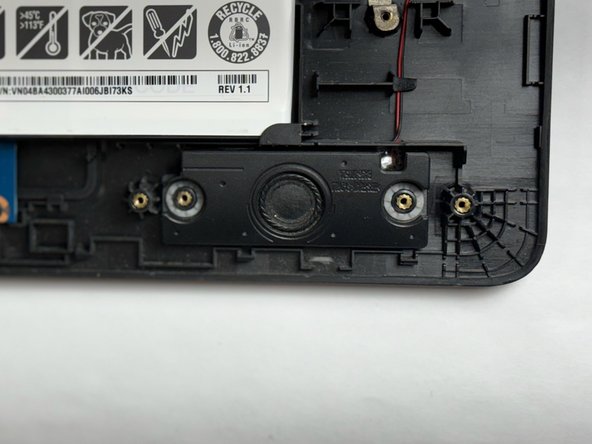
    • Using a Phillips #000 screwdriver, remove the ten 6mm screws that secure the bottom case.

  2. Samsung Notebook 5 NP530E5M Internal Speaker Replacement: 手順 2、 2の画像 1 Samsung Notebook 5 NP530E5M Internal Speaker Replacement: 手順 2、 2の画像 2
    • Pry along the seam using an iFixit opening tool.

    • Lift off the bottom case.

  3. Samsung Notebook 5 NP530E5M Internal Speaker Replacement, Battery: 手順 3、 1の画像 1
    • Locate the battery towards the bottom left corner of the laptop.

  4. Samsung Notebook 5 NP530E5M Internal Speaker Replacement: 手順 4、 3の画像 1 Samsung Notebook 5 NP530E5M Internal Speaker Replacement: 手順 4、 3の画像 2 Samsung Notebook 5 NP530E5M Internal Speaker Replacement: 手順 4、 3の画像 3
    • Using a spudger or iFixit opening tool, loosen the bundled power cable from its connector on the motherboard.

    • Disconnect the bundled cable connector.

  5. Samsung Notebook 5 NP530E5M Internal Speaker Replacement: 手順 5、 3の画像 1 Samsung Notebook 5 NP530E5M Internal Speaker Replacement: 手順 5、 3の画像 2 Samsung Notebook 5 NP530E5M Internal Speaker Replacement: 手順 5、 3の画像 3
    • Using the Phillips #000 screwdriver, remove the three 5 mm screws holding the battery in place.

    • The screws are towards three corners of the battery, although there is an extra screw mount on the battery that is not used in this model of laptop.

  6. Samsung Notebook 5 NP530E5M Internal Speaker Replacement: 手順 6、 2の画像 1 Samsung Notebook 5 NP530E5M Internal Speaker Replacement: 手順 6、 2の画像 2
    • There is a "lip" in the bottom right corner of the battery mount.

    • Gently grip the battery from the sides, lift up and and to the left to remove the battery from its place.

  7. Samsung Notebook 5 NP530E5M Internal Speaker Replacement, Internal Speaker: 手順 7、 3の画像 1 Samsung Notebook 5 NP530E5M Internal Speaker Replacement, Internal Speaker: 手順 7、 3の画像 2 Samsung Notebook 5 NP530E5M Internal Speaker Replacement, Internal Speaker: 手順 7、 3の画像 3
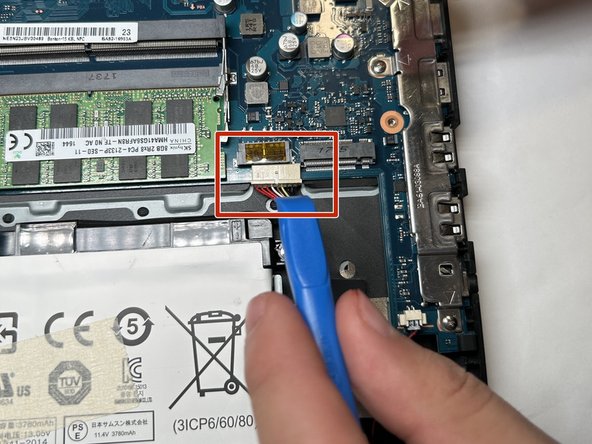
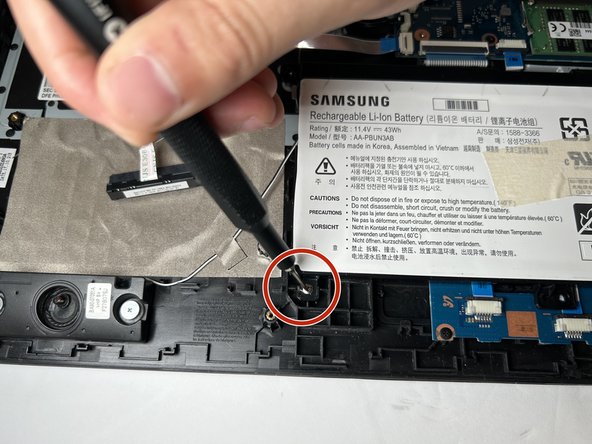
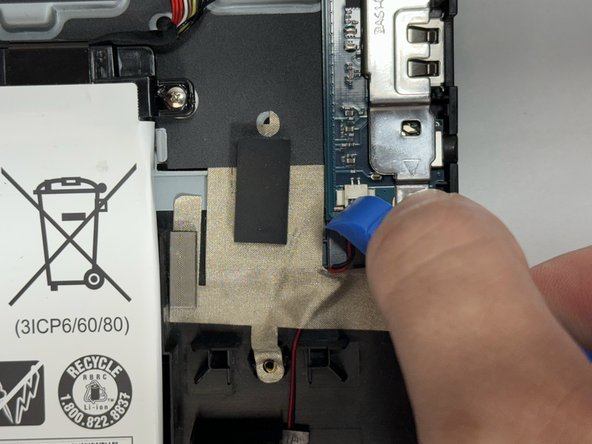
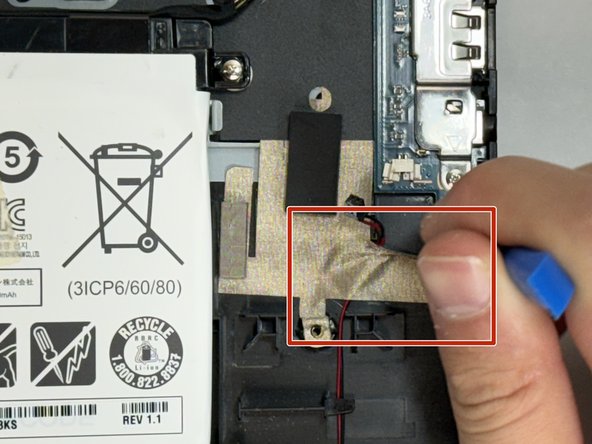
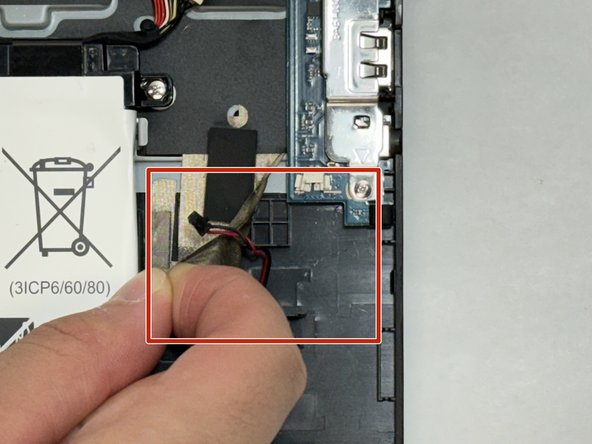
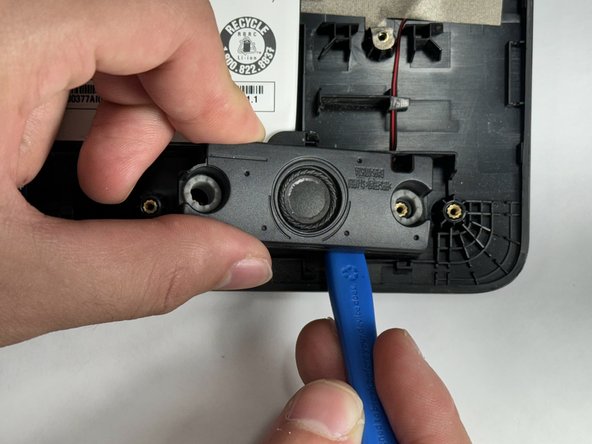
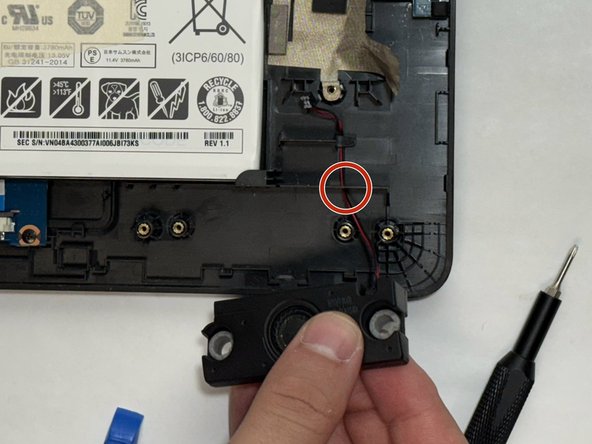
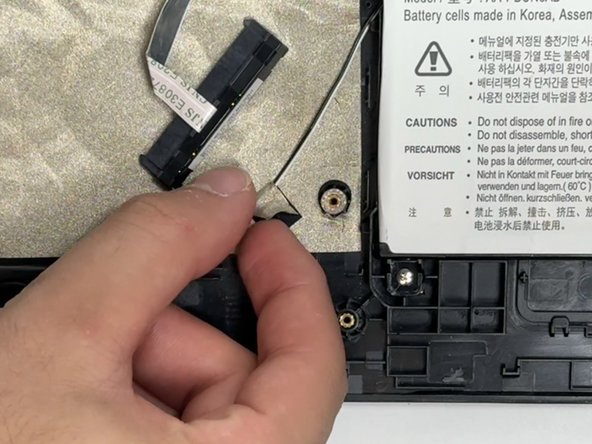
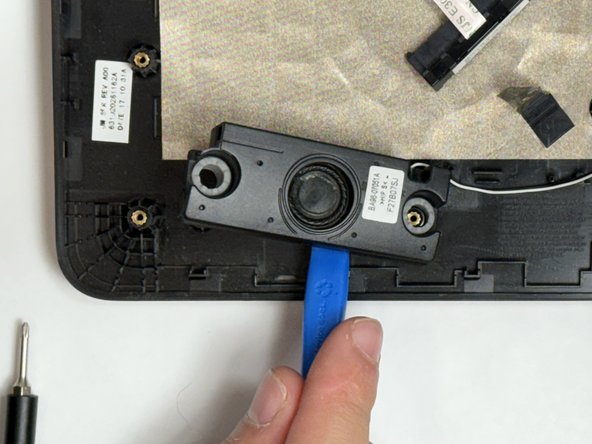
    • Using the pry tool, loosen the wire connecting the speaker to the motherboard.

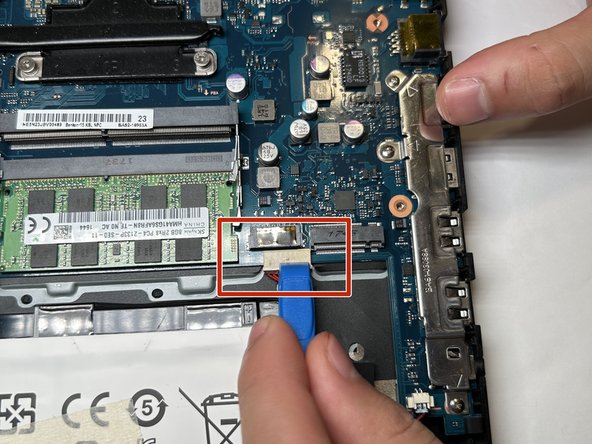
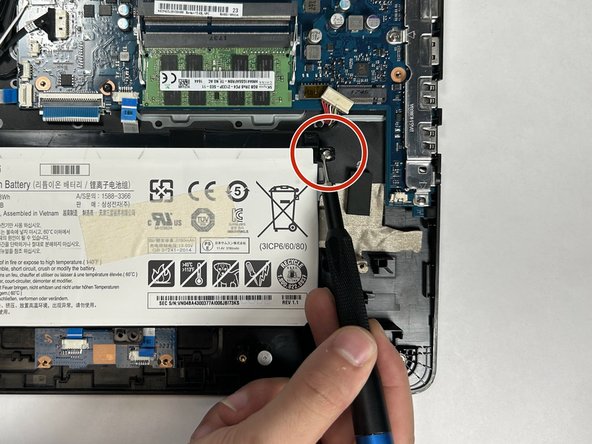
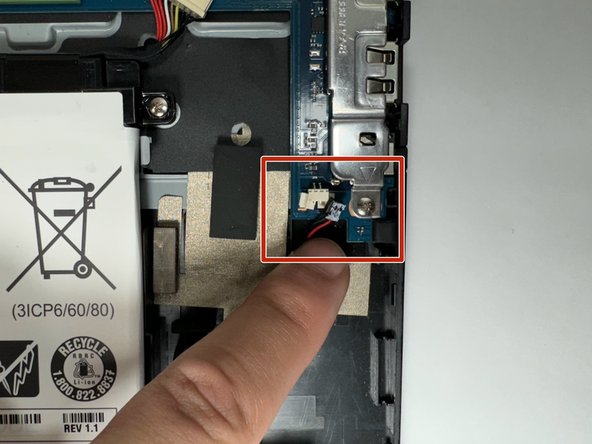
    • Carefully disconnect the right speaker wire from motherboard.

  8. Samsung Notebook 5 NP530E5M Internal Speaker Replacement: 手順 8、 3の画像 1 Samsung Notebook 5 NP530E5M Internal Speaker Replacement: 手順 8、 3の画像 2 Samsung Notebook 5 NP530E5M Internal Speaker Replacement: 手順 8、 3の画像 3
    • Peel back the tape securing the right speaker's wire to case.

    • Remove the wire from below the tape, and let the tape sit gently so you can reseal it over the wire of the new speaker later.

  9. Samsung Notebook 5 NP530E5M Internal Speaker Replacement: 手順 9、 3の画像 1 Samsung Notebook 5 NP530E5M Internal Speaker Replacement: 手順 9、 3の画像 2 Samsung Notebook 5 NP530E5M Internal Speaker Replacement: 手順 9、 3の画像 3
    • Using your Phillips #000 screwdriver, remove the two 4.5 mm screws securing the right speaker in place.

  10. Samsung Notebook 5 NP530E5M Internal Speaker Replacement: 手順 10、 3の画像 1 Samsung Notebook 5 NP530E5M Internal Speaker Replacement: 手順 10、 3の画像 2 Samsung Notebook 5 NP530E5M Internal Speaker Replacement: 手順 10、 3の画像 3
    • Using a pry tool, gently pry the speaker from its mount.

    • Remove the speaker slowly, as the wire will be fed through a small hole in the laptop case, just above the speaker.

    • Make sure to gently feed speaker wire through hole.

  11. Samsung Notebook 5 NP530E5M Internal Speaker Replacement: 手順 11、 1の画像 1
    • Using a spudger or iFixit opening tool, carefully disconnect the left speaker wire from the motherboard.

  12. Samsung Notebook 5 NP530E5M Internal Speaker Replacement: 手順 12、 3の画像 1 Samsung Notebook 5 NP530E5M Internal Speaker Replacement: 手順 12、 3の画像 2 Samsung Notebook 5 NP530E5M Internal Speaker Replacement: 手順 12、 3の画像 3
    • Peel back the tape securing the Left speaker's wire from under the HDD and move the speaker wire aside.

    • Let tape sit gently, so you may use it to secure the new speaker wire.

  13. Samsung Notebook 5 NP530E5M Internal Speaker Replacement: 手順 13、 3の画像 1 Samsung Notebook 5 NP530E5M Internal Speaker Replacement: 手順 13、 3の画像 2 Samsung Notebook 5 NP530E5M Internal Speaker Replacement: 手順 13、 3の画像 3
    • Using your Phillips #000 screwdriver, remove the two 4.5 mm screws holding left speaker to case.

  14. Samsung Notebook 5 NP530E5M Internal Speaker Replacement: 手順 14、 2の画像 1 Samsung Notebook 5 NP530E5M Internal Speaker Replacement: 手順 14、 2の画像 2
    • Using a spudger or iFixit opening tool, carefully pry the left speaker from the laptop casing.

    • Following these steps in reverse, you will be able to install your new speakers.

    • The left and right speaker are the same component, but will have different connecting wires, so be sure to mount them in the appropriate positions.

終わりに

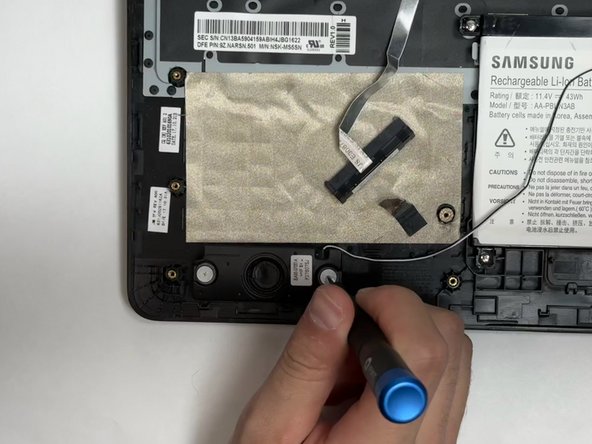
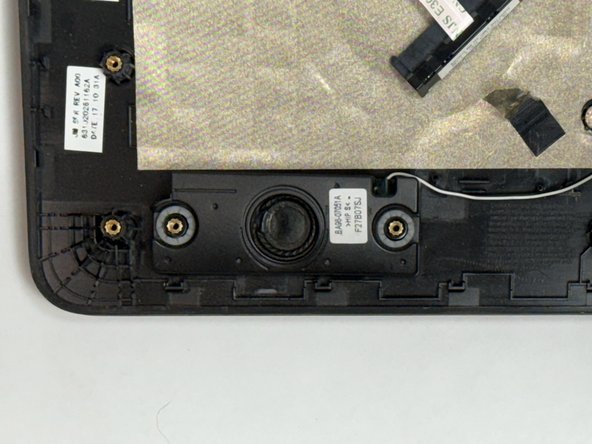
To reassemble your device, follow these instructions in reverse order.

作成者

3人の作成者と共同で作成されました。

Lucas Gil

メンバー登録日: 09/07/23

690 ポイント

5のガイドは作成済み

チーム

Gateway, Team 1-1, Gonzalez Fall 2023 Gateway, Team 1-1, Gonzalez Fall 2023人のメンバー

GCC-GONZALEZ-F23S1G1

4 メンバー

6のガイドは作成済み

0 件のコメント

コメントを追加

統計データ:

過去 24時間: 0

過去 7 日: 1

過去 30 日: 12

今までの合計 71