メインコンテンツにスキップ
リペアコミュニティに参加 - アカウントの作成

Samsung NX2000 Menu Buttons Replacement

必要な工具と部品

    1. Samsung NX2000 Menu Buttons Replacement, LCD: 手順 1、 1の画像 1
      • First begin by flipping your camera upside down.

      • Remove the seven 4mm screws from indicated circles shown using a Y0 screwdriver. There are three on the bottom, and two on each side

      • Remember to store the screws in a secure place.

      FixBotに聞いてみる

      コメントを追加

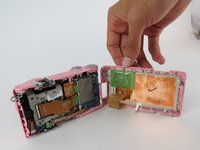
    2. Samsung NX2000 Menu Buttons Replacement: 手順 2、 3の画像 1 Samsung NX2000 Menu Buttons Replacement: 手順 2、 3の画像 2 Samsung NX2000 Menu Buttons Replacement: 手順 2、 3の画像 3
      • Insert a plastic opening tool into the gab between the camera body and the back panel. Carefully pry open the camera and separate the back panel.

      • When working with electronics, it's important to choose a tool that's ESD-safe to avoid accidental damage to the device. The metal spudger is great when you need serious prying power, but the regular black nylon spudger or a plastic opening tool should be used whenever possible.

      FixBotに聞いてみる

      コメントを追加

    3. Samsung NX2000 Menu Buttons Replacement: 手順 3、 3の画像 1 Samsung NX2000 Menu Buttons Replacement: 手順 3、 3の画像 2 Samsung NX2000 Menu Buttons Replacement: 手順 3、 3の画像 3
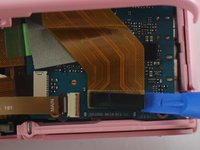
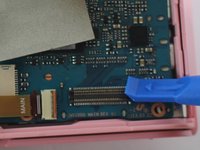
      • Before taking it apart you'll have to detach the display ribbon cable.

      • Use a plastic opening tool, lift up the black strip to release the ribbon cable from the connector.

      FixBotに聞いてみる

      コメントを追加

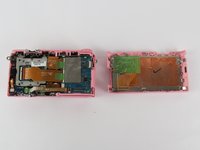
    4. Samsung NX2000 Menu Buttons Replacement: 手順 4、 3の画像 1 Samsung NX2000 Menu Buttons Replacement: 手順 4、 3の画像 2 Samsung NX2000 Menu Buttons Replacement: 手順 4、 3の画像 3
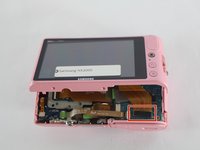
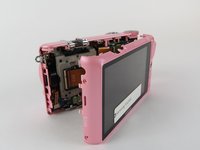
      • Separate the LCD half compartment of the camera from the main body.

      FixBotに聞いてみる
      コメントを追加

    5. Samsung NX2000 Menu Buttons Replacement: 手順 5、 1の画像 1
      • Remove the four 1mm screws with the Y0 screwdriver.

      FixBotに聞いてみる
      コメントを追加

    6. Samsung NX2000 Menu Buttons Replacement: 手順 6、 3の画像 1 Samsung NX2000 Menu Buttons Replacement: 手順 6、 3の画像 2 Samsung NX2000 Menu Buttons Replacement: 手順 6、 3の画像 3
      この手順で使用する道具:
      Tweezers
      $4.99
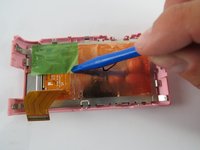
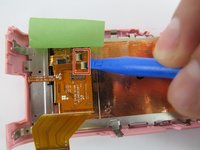
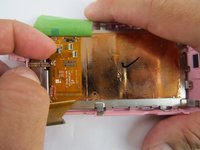
      • Use a plastic opening tool or tweezers to lift the green tape located on top of the LCD controller board.

      • Detach the two ribbon cables, by first lifting the black tab on top of the connector.

      • Pull the ribbon cables out of the connectors with tweezers or two fingers.

      FixBotに聞いてみる
      コメントを追加

    7. Samsung NX2000 Menu Buttons Replacement: 手順 7、 3の画像 1 Samsung NX2000 Menu Buttons Replacement: 手順 7、 3の画像 2 Samsung NX2000 Menu Buttons Replacement: 手順 7、 3の画像 3
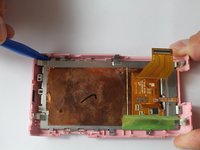
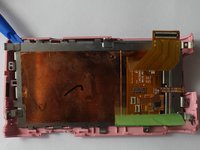
      • Place blue plastic spudger in between LCD screen and plastic surrounding.

      • Begin to lift up slowly, removing the LCD screen from the main frame.

      FixBotに聞いてみる

      コメントを追加

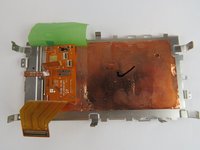
    8. Samsung NX2000 Menu Buttons Replacement: 手順 8、 1の画像 1
      • The LCD screen is now separated form the main frame.

      FixBotに聞いてみる

      コメントを追加

    1. Samsung NX2000 Menu Buttons Replacement, Menu Buttons: 手順 9、 3の画像 1 Samsung NX2000 Menu Buttons Replacement, Menu Buttons: 手順 9、 3の画像 2 Samsung NX2000 Menu Buttons Replacement, Menu Buttons: 手順 9、 3の画像 3
      この手順で使用する道具:
      Tweezers
      $4.99
      • Use the tweezers to pull out the home and playback buttons from the camera frame.

      FixBotに聞いてみる

      コメントを追加

    2. Samsung NX2000 Menu Buttons Replacement: 手順 10、 1の画像 1
      • Remove the home buttons from the camera frame.

      FixBotに聞いてみる

      コメントを追加

終わりに

To reassemble your device, follow these instructions in reverse order.

キャンセル: このガイドを終了できませんでした。

ある他の人がこのガイドを完成しました。

作成者

4人の作成者と共同で作成されました。

Katarina Raic

メンバー登録日: 02/09/16

288 ポイント

2のガイドは作成済み

チーム

USF Tampa, Team 7-4, Cheng Spring 2016 USF Tampa, Team 7-4, Cheng Spring 2016人のメンバー

USFT-CHENG-S16S7G4

4 メンバー

10のガイドは作成済み

0件のガイドコメント

コメントを追加

統計データ:

過去 24時間: 1

過去 7 日: 2

過去 30 日: 16

今までの合計 747