メインコンテンツにスキップ

Samsung NX1000 Back Panel Components Replacement

必要条件のみ
この修理ガイドは、他のガイドの前提条件として使用されます。それ自体は不完全で、単独で使用されることはありません。

必要な工具と部品

  1. Samsung NX1000 Back Panel Components Replacement, Back Panel Components: 手順 1、 2の画像 1 Samsung NX1000 Back Panel Components Replacement, Back Panel Components: 手順 1、 2の画像 2
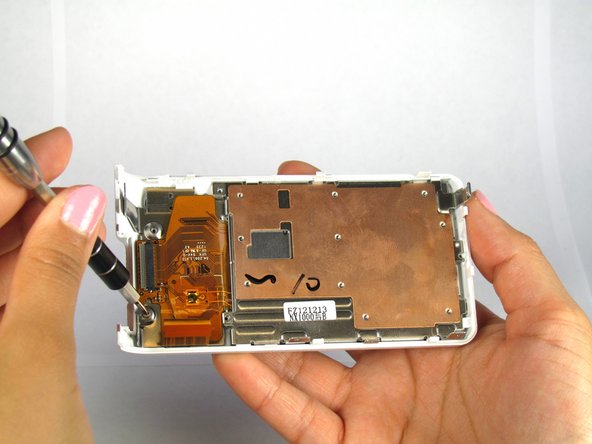
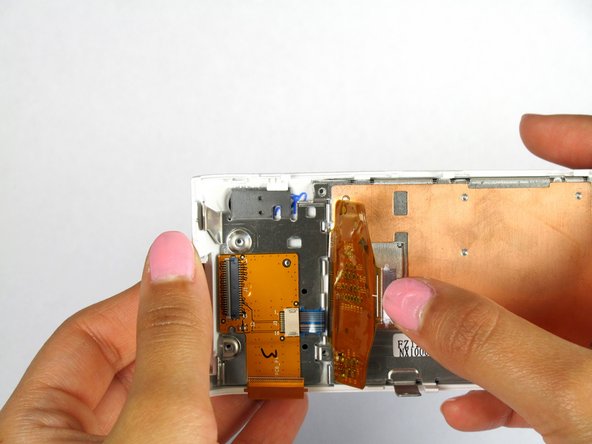
    • Remove all five 3mm Philips #000 screws from the inside of the back panel using the Philips #000 Screwdriver.

  2. Samsung NX1000 Back Panel Components Replacement: 手順 2、 3の画像 1 Samsung NX1000 Back Panel Components Replacement: 手順 2、 3の画像 2 Samsung NX1000 Back Panel Components Replacement: 手順 2、 3の画像 3
    • Lift up the grey tab on the ZIF connector with the spudger to remove the ribbon.

    • Using both thumbs push the ribbon out of the ZIF connection.

  3. Samsung NX1000 Back Panel Components Replacement: 手順 3、 1の画像 1
    • Use the metal spudger to pick the bottom of the plastic piece while simultaneously using your index finger to push down on the larger metal slab. This will cause the metal plate with the large ribbon to slide down and out of the plastic back panel.

    • Do not disconnect the blue ribbon.

終わりに

To reassemble your device, follow these instructions in reverse order.

作成者

5人の作成者と共同で作成されました。

Yesenia

メンバー登録日: 01/22/15

717 ポイント

6のガイドは作成済み

チーム

Cal Poly, Team 20-13, Maness Winter 2015 Cal Poly, Team 20-13, Maness Winter 2015人のメンバー

CPSU-MANESS-W15S20G13

4 メンバー

14のガイドは作成済み

0 件のコメント

コメントを追加

統計データ:

過去 24時間: 0

過去 7 日: 0

過去 30 日: 0

今までの合計 97