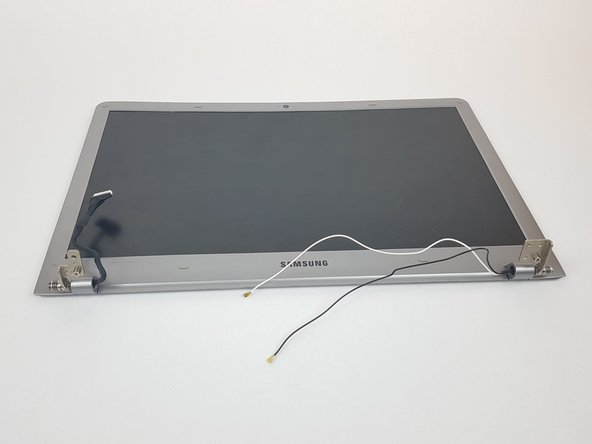
メインコンテンツにスキップ

Samsung NP510R5E-A01UB Display Replacement

必要な工具と部品

  1. Samsung NP510R5E-A01UB Display Replacement, Hard Drive: 手順 1、 1の画像 1
    • Make sure the device is powered off before beginning.

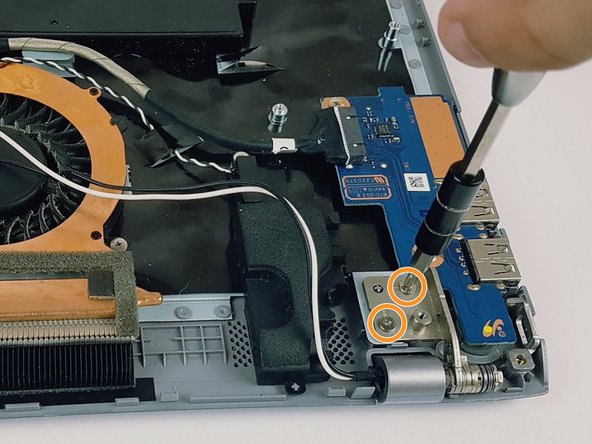
    • Using the Phillips #0 screwdriver, remove the 6.5mm long screw in the area circled.

  2. Samsung NP510R5E-A01UB Display Replacement: 手順 2、 1の画像 1
    • With the cover removed, unscrew all four of the 4.75mm long screws using the Phillips #0 screwdriver.

  3. Samsung NP510R5E-A01UB Display Replacement: 手順 3、 2の画像 1 Samsung NP510R5E-A01UB Display Replacement: 手順 3、 2の画像 2
    • Unplug the connector from the hard drive by pulling straight out.

  4. Samsung NP510R5E-A01UB Display Replacement, Display: 手順 4、 3の画像 1 Samsung NP510R5E-A01UB Display Replacement, Display: 手順 4、 3の画像 2 Samsung NP510R5E-A01UB Display Replacement, Display: 手順 4、 3の画像 3
    • Remove the two rubber feet with arrows by them on the back side to uncover two screws.

    • Unscrew the four silver 4.4mm long screws near the hard drive.

    • Unscrew the remaining nine black 6.5mm long screws. Then remove the back casing using a pry tool if needed.

  5. Samsung NP510R5E-A01UB Display Replacement: 手順 5、 2の画像 1 Samsung NP510R5E-A01UB Display Replacement: 手順 5、 2の画像 2
    • Disconnect the black and white cables by pulling up as pictured.

  6. Samsung NP510R5E-A01UB Display Replacement: 手順 6、 2の画像 1 Samsung NP510R5E-A01UB Display Replacement: 手順 6、 2の画像 2
    • Disconnect the black cable by pulling straight out.

  7. Samsung NP510R5E-A01UB Display Replacement: 手順 7、 3の画像 1 Samsung NP510R5E-A01UB Display Replacement: 手順 7、 3の画像 2 Samsung NP510R5E-A01UB Display Replacement: 手順 7、 3の画像 3
    • Unscrew the two 4.45mm long screws to disconnect the left hinge.

    • Unscrew the two 4.45mm long screws to disconnect the right hinge.

    • At this point the screen and plastic housing should be completely disconnected.

  8. Samsung NP510R5E-A01UB Display Replacement: 手順 8、 2の画像 1 Samsung NP510R5E-A01UB Display Replacement: 手順 8、 2の画像 2
    • Using the plastic opening tool, pry open the plastic housing that holds the display.

  9. Samsung NP510R5E-A01UB Display Replacement: 手順 9、 2の画像 1 Samsung NP510R5E-A01UB Display Replacement: 手順 9、 2の画像 2
    • Unscrew the four 3.55mm long screws that hold the display in place.

  10. Samsung NP510R5E-A01UB Display Replacement: 手順 10、 2の画像 1 Samsung NP510R5E-A01UB Display Replacement: 手順 10、 2の画像 2
    • Disconnect the last cable by pulling straight out.

終わりに

To reassemble your device, follow these instructions in reverse order.

作成者

2人の作成者と共同で作成されました。

Dominic Simpson

メンバー登録日: 02/14/18

245 ポイント

1ガイドが承認済み

チーム

USF Tampa, Team S6-G5, Eyestone Spring 2018 USF Tampa, Team S6-G5, Eyestone Spring 2018人のメンバー

USFT-EYESTONE-S18S6G5

3 メンバー

8のガイドは作成済み

0 件のコメント

コメントを追加

統計データ:

過去 24時間: 0

過去 7 日: 1

過去 30 日: 5

今までの合計 658