はじめに
Is your laptop's screen cracked or non responsive? Try replacing it! This guide will show you how to remove the screen's plastic casing so that you can access the screen itself.
必要な工具と部品
-
-
-
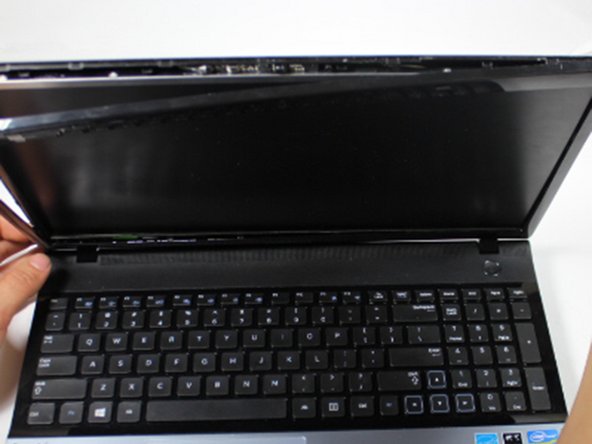
Turn the laptop over and open it so that you can see the keyboard and screen.
-
Using a Phillips #000 screwdriver, remove the two 4 mm Phillips #8 screws that are under the black covers on the front of your screen.
-
-
-
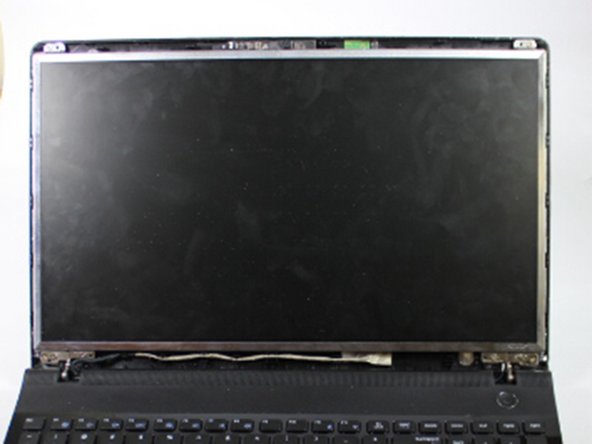
Using a Phillips #000 screwdriver, remove the top two 4 mm Phillips #8 screws that join the LCD screen to the plastic casing.
-
Using the same screwdriver, remove the bottom four 4 mm Phillips #8 screws that mount the screen onto the base of the laptop.
Forgot to mention the brackets on the sides of the old screen. These are Phillips head screws. 3 on each side. 6 total. Same #000 screwdriver.
Unless your ordered LCD comes with these brackets which most do not, not transferring these will cost you time and the screen will not fit properly.
-
-
-
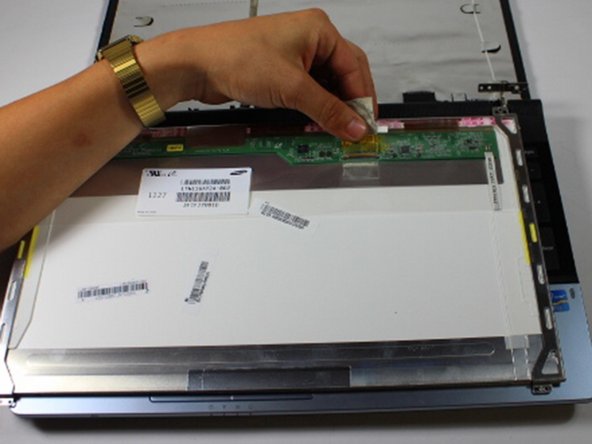
Gently lay the LCD on the keyboard, and lay down the back panel of the screen as well. They are not attached and will separate easily.
-
Remove the tape that secures the video connector to the LCD.
-
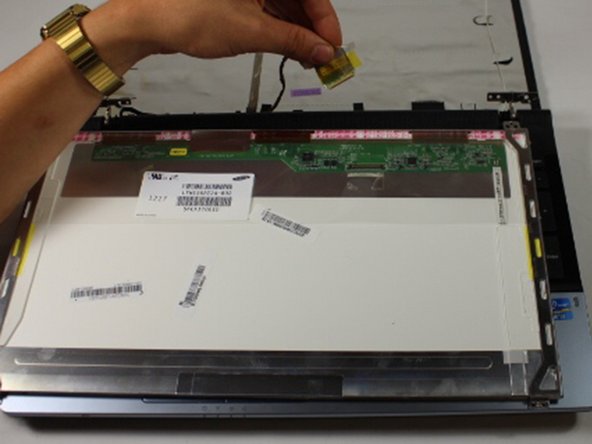
While maintaining a firm grip on the LCD, grasp the video connector at its base, and pull it away from you.
Great tutorial, many thanks. Only 1 thing to add: the brackets at both sides of the old screen (3 small screws each attaching them) need to be transferred to the new screen first. Regards
I did not read your comment because you chose to add it to the end of the tutorial, I said the exact same thing on the step where it would be relevant.
Another thing to note, would be that the 2 outermost screw holes are to remain empty when reassembling. Otherwise when you go to insert the final 2 screws in the bezel there will already be 2 underneath, requiring you to remove the bezel again to move them 2 screws.
Eddie -
-


To reassemble your device, follow these instructions in reverse order.
To reassemble your device, follow these instructions in reverse order.
10 の人々がこのガイドを完成させました。
チーム

Baylor, Team 10-13, Williams Fall 2015 Baylor, Team 10-13, Williams Fall 2015人のメンバー
BU-WILLIAMS-F15S10G13
3 メンバー
4のガイドは作成済み