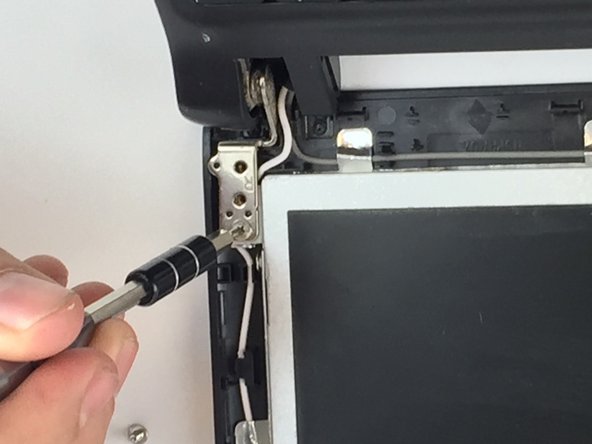
メインコンテンツにスキップ

Samsung NP-N102S-B05PH Display Replacement

必要な工具と部品

  1. Samsung NP-N102S-B05PH Display Replacement, Display: 手順 1、 3の画像 1 Samsung NP-N102S-B05PH Display Replacement, Display: 手順 1、 3の画像 2 Samsung NP-N102S-B05PH Display Replacement, Display: 手順 1、 3の画像 3
    • Take out the four 4.5mm Phillips #0 screws located at the corners of the screen.

  2. Samsung NP-N102S-B05PH Display Replacement: 手順 2、 2の画像 1 Samsung NP-N102S-B05PH Display Replacement: 手順 2、 2の画像 2
    • Now, use the blue opening tool to gently pry the front bezel off.

  3. Samsung NP-N102S-B05PH Display Replacement: 手順 3、 3の画像 1 Samsung NP-N102S-B05PH Display Replacement: 手順 3、 3の画像 2 Samsung NP-N102S-B05PH Display Replacement: 手順 3、 3の画像 3
    • Unscrew each of the four 6.5mm Phillips #0 screws securing the screen to the case.

  4. Samsung NP-N102S-B05PH Display Replacement: 手順 4、 3の画像 1 Samsung NP-N102S-B05PH Display Replacement: 手順 4、 3の画像 2 Samsung NP-N102S-B05PH Display Replacement: 手順 4、 3の画像 3
    • Using the black spudger tool and your fingertip, gently push on the ends of the ribbon cable to pop it out of the socket.

  5. Samsung NP-N102S-B05PH Display Replacement: 手順 5、 1の画像 1
    • The screen is can now be lifted away from the laptop.

終わりに

To reassemble your device, follow these instructions in reverse order.

ある他の人がこのガイドを完成しました。

作成者

4人の作成者と共同で作成されました。

Daniel Rudzik

メンバー登録日: 10/04/16

349 ポイント

3のガイドは作成済み

チーム

USF Tampa, Team 2-4, Nance Fall 2016 USF Tampa, Team 2-4, Nance Fall 2016人のメンバー

USFT-NANCE-F16S2G4

4 メンバー

5のガイドは作成済み

0 件のコメント

コメントを追加

統計データ:

過去 24時間: 0

過去 7 日: 1

過去 30 日: 11

今までの合計 742