メインコンテンツにスキップ

このバージョンは誤った内容を含んでいる可能性があります。最新の承認済みスナップショットに切り替えてください。

必要な工具と部品

  1. この手順は未翻訳です。 翻訳を手伝う。

    : 手順 1、 1の画像 1
    • Using your thumb, press down and slide the back cover away from the camera.

  2. この手順は未翻訳です。 翻訳を手伝う。

    : 手順 2、 1の画像 1
    • Remove the battery from the phone by using your plastic opening tool to find a gap at any edge of the battery and lifting the battery up.

  3. この手順は未翻訳です。 翻訳を手伝う。

    : 手順 3、 2の画像 1 : 手順 3、 2の画像 2
    • Use a Phillips #00 screwdriver to remove the six 4mm screws.

  4. この手順は未翻訳です。 翻訳を手伝う。

    : 手順 4、 2の画像 1 : 手順 4、 2の画像 2
    • Find a gap on the top side of the phone and pry apart the phone case using the plastic opening tool . Use moderate pressure to slowly maneuver around until the case is pryed apart.

    • Take the case off with your fingers

  5. この手順は未翻訳です。 翻訳を手伝う。

    : 手順 5、 2の画像 1 : 手順 5、 2の画像 2
    • The green film is located above the camera. It is the camera connector to the motherboard.

    • Disconnect the camera connector with the plastic opening tool.

  6. この手順は未翻訳です。 翻訳を手伝う。

    : 手順 6、 2の画像 1 : 手順 6、 2の画像 2
    • Take a close up of the picture for this step for a better view.

    • Use a plastic opening tool to disconnect the keyboard connector.

  7. この手順は未翻訳です。 翻訳を手伝う。

    : 手順 7、 2の画像 1 : 手順 7、 2の画像 2
    • The motherboard is held in place by the circular connector.

    • Using a plastic opening tool, disconnect the circular connector.

  8. この手順は未翻訳です。 翻訳を手伝う。

    : 手順 8、 3の画像 1 : 手順 8、 3の画像 2 : 手順 8、 3の画像 3
    • A LCD connector is located underneath the motherboard.

    • Lift the far edge of the motherboard gently upwards toward the center.

    • Using a plastic opening tool, disconnect the LCD connector.

  9. この手順は未翻訳です。 翻訳を手伝う。

    : 手順 9、 2の画像 1 : 手順 9、 2の画像 2
    • Lift the motherboard up with your fingers.

    • Place the motherboard in a secure area.

  10. この手順は未翻訳です。 翻訳を手伝う。

    : 手順 10、 3の画像 1 : 手順 10、 3の画像 2 : 手順 10、 3の画像 3
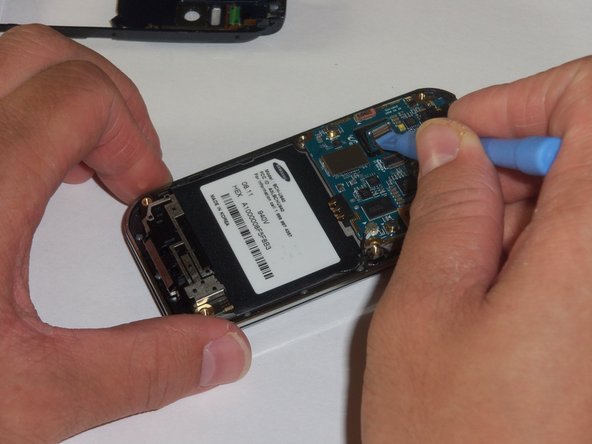
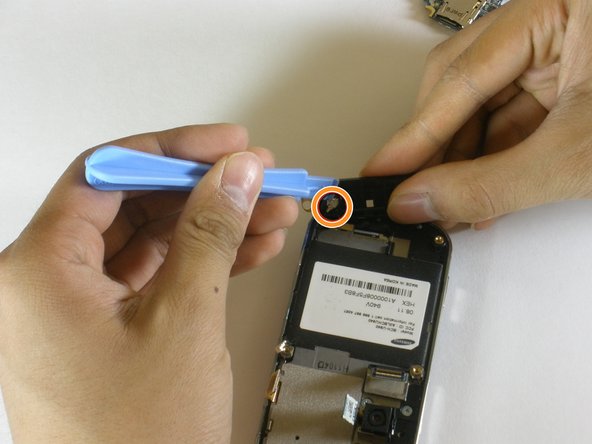
    • Look for the antenna which is located at the bottom end of the device. Prop the antenna out by using the plastic opening tool and slipping the tip of the tool into the edges of the antenna.

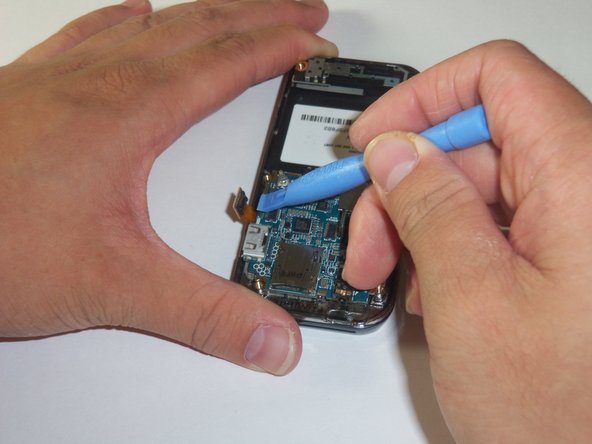
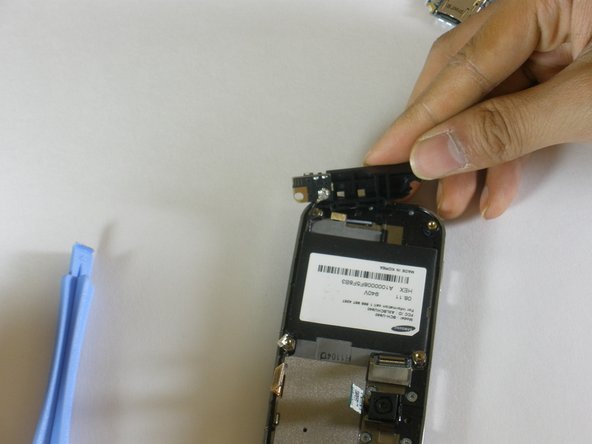
    • Using the plastic opening tool, disconnect the connector that leads from the phone to the antenna.

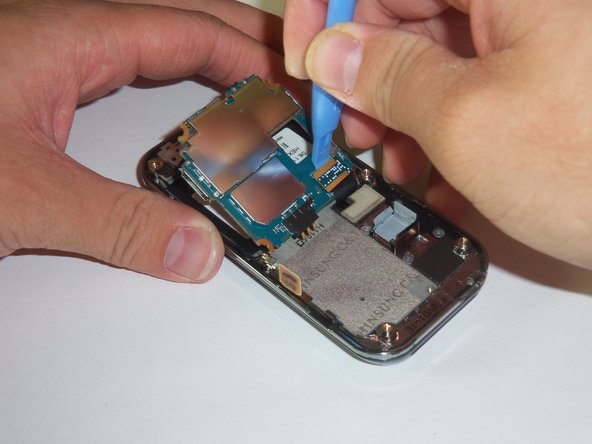
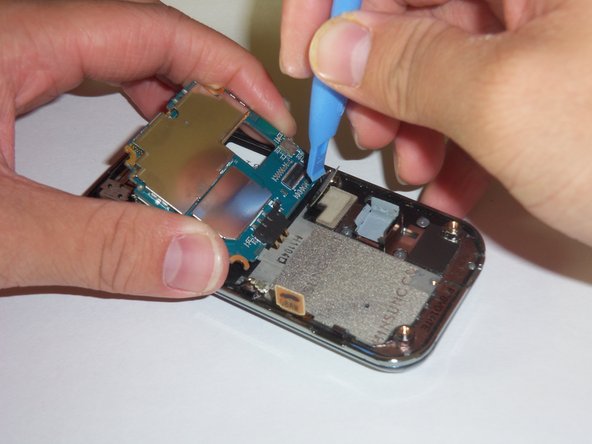
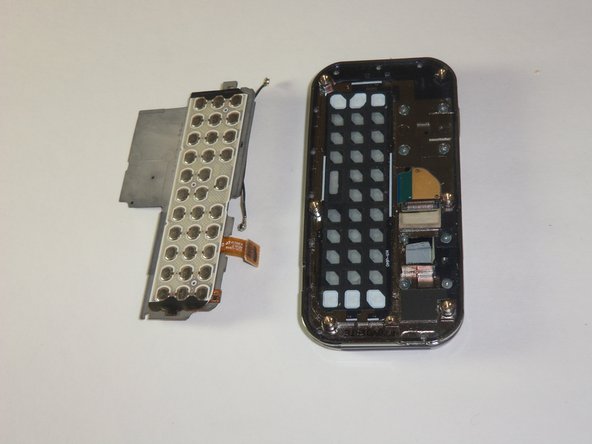
    • With your hands finish prying apart the antenna by lifting it up.

  11. この手順は未翻訳です。 翻訳を手伝う。

    : 手順 11、 2の画像 1 : 手順 11、 2の画像 2
    • The keyboard chip is located on top of the device. Pry the keyboard off of the case with the plastic opening tool.

ゴール

作成者

13人の作成者と共同で作成されました。

Cameron Law

メンバー登録日: 10/12/11

142 ポイント

5のガイドは作成済み

チーム

Cal Poly, Team 3-12, Regan Fall 2011 Cal Poly, Team 3-12, Regan Fall 2011人のメンバー

CPSU-REGAN-F11S3G12

4 メンバー

14のガイドは作成済み

0 件のコメント

コメントを追加

統計データ:

過去 24時間: 0

過去 7 日: 5

過去 30 日: 10

今までの合計 1,197