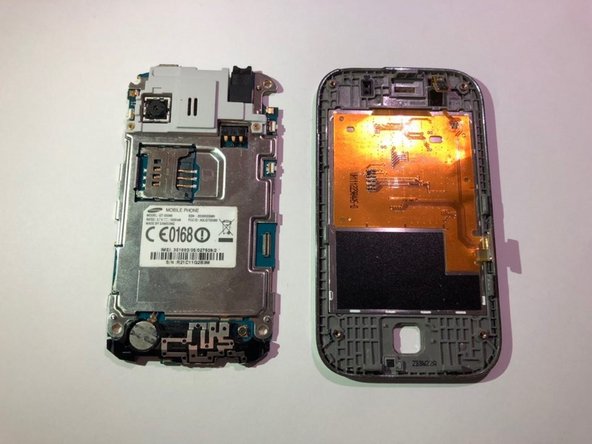
メインコンテンツにスキップ

Samsung Galaxy Y LCD Display Replacement

必要な工具と部品

  1. Samsung Galaxy Y LCD Display Replacement, Back Panel: 手順 1、 3の画像 1 Samsung Galaxy Y LCD Display Replacement, Back Panel: 手順 1、 3の画像 2 Samsung Galaxy Y LCD Display Replacement, Back Panel: 手順 1、 3の画像 3
    • Use the blue plastic opening tool to pry the back-panel off of the device.

  2. Samsung Galaxy Y LCD Display Replacement, LCD Display: 手順 2、 3の画像 1 Samsung Galaxy Y LCD Display Replacement, LCD Display: 手順 2、 3の画像 2 Samsung Galaxy Y LCD Display Replacement, LCD Display: 手順 2、 3の画像 3
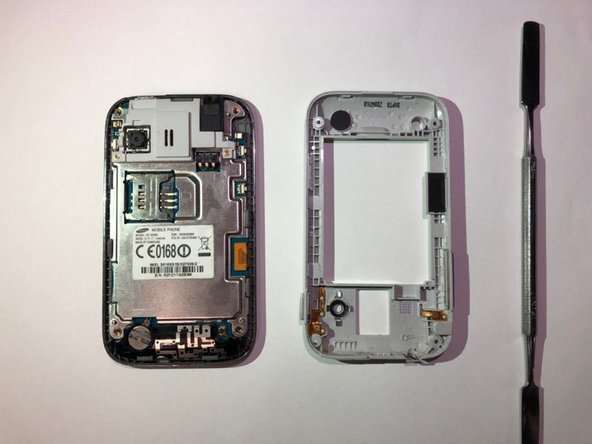
    • Use a Phillips #000 screwdriver to remove the four 5mm screws located in the corner of the interior back panel.

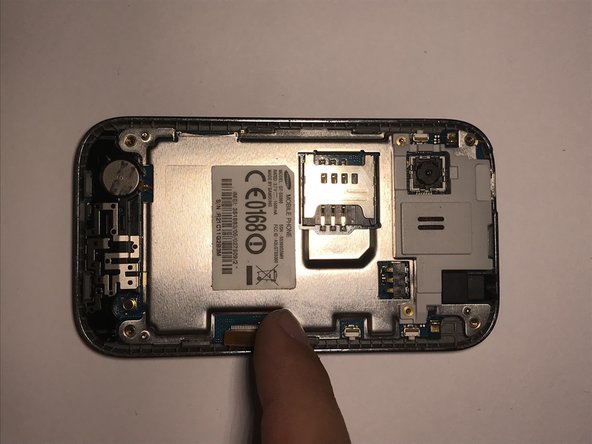
    • Remove the SD card as well by sliding the card out of it's slot.

  3. Samsung Galaxy Y LCD Display Replacement: 手順 3、 2の画像 1 Samsung Galaxy Y LCD Display Replacement: 手順 3、 2の画像 2
    • Use the metal pry tool to separate the interior back panel from the interior hardware and screen.

  4. Samsung Galaxy Y LCD Display Replacement: 手順 4、 3の画像 1 Samsung Galaxy Y LCD Display Replacement: 手順 4、 3の画像 2 Samsung Galaxy Y LCD Display Replacement: 手順 4、 3の画像 3
    • Disconnect the orange motherboard connection, then remove the interior hardware from the front screen display.

  5. Samsung Galaxy Y LCD Display Replacement: 手順 5、 2の画像 1 Samsung Galaxy Y LCD Display Replacement: 手順 5、 2の画像 2
    • Gently remove the LCD screen lens from the outer screen using a pair of tweezers and the metal pry tool. Replace the faulty LCD.

    • The LCD maybe be glued in place, so the device might need to be heated to remove the part.

終わりに

To reassemble your device, follow these instructions in reverse order.

作成者

1人の作成者と共同作成されました。

Aidan Kurz

メンバー登録日: 09/21/18

411 ポイント

3のガイドは作成済み

チーム

University of North Texas, Team S5-G4, Thompson Fall 2018 University of North Texas, Team S5-G4, Thompson Fall 2018人のメンバー

UNT-THOMPSON-F18S5G4

4 メンバー

6のガイドは作成済み

0 件のコメント

コメントを追加

統計データ:

過去 24時間: 0

過去 7 日: 2

過去 30 日: 8

今までの合計 543