このバージョンは誤った内容を含んでいる可能性があります。最新の承認済みスナップショットに切り替えてください。
必要な工具と部品
-
-
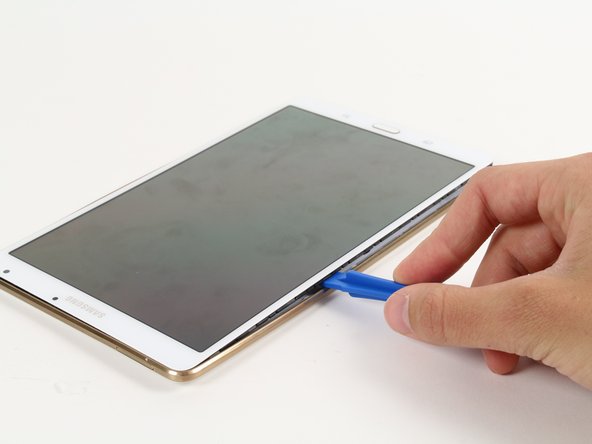
この手順は未翻訳です。 翻訳を手伝う。
-
The battery is glued down, usually with double-sided tape along the sides. The goal is to lift the battery out by pulling on the folded white tab in the top right corner. It may be necessary to first loosen the adhesive by running a flat, thin plastic tool under the edges of the battery.
-


65 の人々がこのガイドを完成させました。
チーム

Cal Poly, Team 12-15, Maness Fall 2015 Cal Poly, Team 12-15, Maness Fall 2015人のメンバー
CPSU-MANESS-F15S12G15
4 メンバー
12のガイドは作成済み
11 件のコメント
Mine, the T320, the battery was held in place by 4 screws. Otherwise same steps.
The cover was tricky to get off, the plastic bends a bit but it took some careful force.
Thanks , Easy to understand and perform. I think the battery connector is loose from mother board. How do I fix that?
I'm sure it's a solder job to reattach the connector to the motherboard. From the picture above it looks like a PIH connector but it may be an SMT, hard to tell without physically seeing it close up. At any rate, being this is a newer device, the solder used is lead free (RoHS compliant, the motherboard should have the letters Pb inside a circle with a line through, screen printed on it) so unless you have some experience in soldering with lead free, you'll probably need to do some searching in your area for electronics repair shops (be sure to ask about their experience with lead free soldering). Lead free soldering requires more heat that can cause extensive damage to the substrate if not done properly.
-experience: 22 years electronics manufacturing and repair (3 leading global electronics manufacturers and the U.S. Navy)
Well written with precise instructions. The pictures included in these instruction for each stage of the process are clear and shoe exactly what needs to be done. What at first seems a bit of a daunting task to an amateur is a relatively easy tasks when equipped with these instructions. Thank you to the author.