メインコンテンツにスキップ

このバージョンは誤った内容を含んでいる可能性があります。最新の承認済みスナップショットに切り替えてください。

必要な工具と部品

  1. この手順は未翻訳です。 翻訳を手伝う。

    : 手順 1、 2の画像 1 : 手順 1、 2の画像 2
    • Be gentle, the front panel is connected to sensitive wiring that may snap if too much pressure is applied.

    • Insert a plastic opening tool into the crevice between the screen and the side of the tablet.

    • Go around the entire crevice with the plastic opening tool.

    • Set aside the separated front and rear panels of the device.

  2. この手順は未翻訳です。 翻訳を手伝う。

    : 手順 2、 2の画像 1 : 手順 2、 2の画像 2
    • Remove the six 4 mm Phillips #00 screws that hold the battery in place.

  3. この手順は未翻訳です。 翻訳を手伝う。

    : 手順 3、 3の画像 1 : 手順 3、 3の画像 2 : 手順 3、 3の画像 3
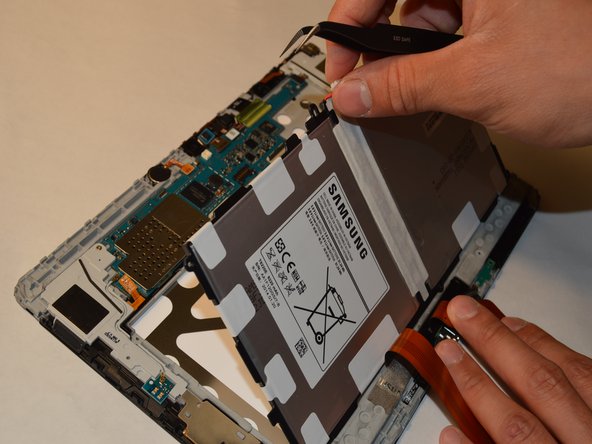
    • Remove the tape that runs along the length of the battery.

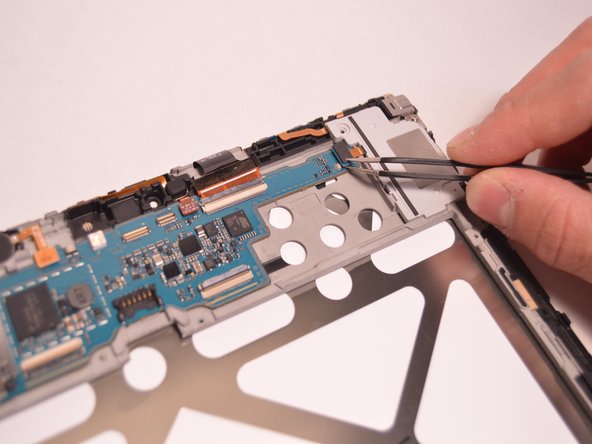
    • Lift the retaining flaps of the ZIF connectors on each side of the battery connector.

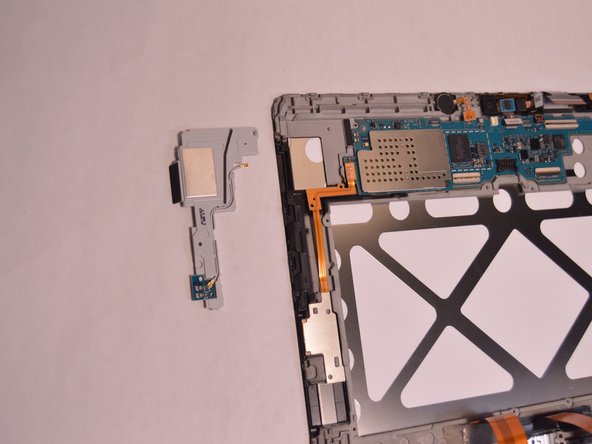
    • Remove the two ribbon cables that lay across the width of the battery and are connected to the motherboard. Place your finger underneath the ribbon cable and gently lift the cable upwards and off.

  4. この手順は未翻訳です。 翻訳を手伝う。

    : 手順 4、 2の画像 1 : 手順 4、 2の画像 2
    • Use a plastic tweezer and remove the top center 6 pin power connector that is attached to the edge of the motherboard.

    • Detach the battery by gently lifting the battery out of the panel.

  5. この手順は未翻訳です。 翻訳を手伝う。

    : 手順 5、 3の画像 1 : 手順 5、 3の画像 2 : 手順 5、 3の画像 3
    • Use plastic tweezers to carefully detach the front-facing camera from the motherboard.

  6. この手順は未翻訳です。 翻訳を手伝う。

    : 手順 6、 3の画像 1 : 手順 6、 3の画像 2 : 手順 6、 3の画像 3
    • Use plastic tweezers and carefully detach the rear-facing camera from the motherboard.

  7. この手順は未翻訳です。 翻訳を手伝う。

    : 手順 7、 2の画像 1 : 手順 7、 2の画像 2
    • Remove the five ribbon cables holding the motherboard together with a plastic tweezer.

  8. この手順は未翻訳です。 翻訳を手伝う。

    : 手順 8、 2の画像 1 : 手順 8、 2の画像 2
    • Remove the Phillips #00 screws from the plastic part holding down the motherboard.

  9. この手順は未翻訳です。 翻訳を手伝う。

    : 手順 9、 1の画像 1
    • Gently lift the motherboard from the front panel enclosure.

ゴール

4 の人々がこのガイドを完成させました。

作成者

5人の作成者と共同で作成されました。

Stephen Yeung

メンバー登録日: 08/26/15

1,526 ポイント

6のガイドは作成済み

3 件のコメント

very useful,thanks a lot.

Singh

bandna kaur matta - 返信

ارغب باصلاح شريحة الاتصال

mazinmandour - 返信

Thanks for this manual. Can you help me recognise the Wifi/BT module? I have a problem with that - with some luck it is just the connector....

Arno - 返信

コメントを追加

統計データ:

過去 24時間: 1

過去 7 日: 9

過去 30 日: 21

今までの合計 6,387