メインコンテンツにスキップ

Samsung Galaxy Tab E 9.6 Verizon Front Panel Replacement

必要な工具と部品

  1. Samsung Galaxy Tab E 9.6 Verizon Front Panel Replacement, Back Casing: 手順 1、 1の画像 1
    • Remove any micro-SD or SIM cards before continuing.

    • Verify your device is turned OFF.

    • Disconnect all external devices from your tablet.

  2. Samsung Galaxy Tab E 9.6 Verizon Front Panel Replacement: 手順 2、 3の画像 1 Samsung Galaxy Tab E 9.6 Verizon Front Panel Replacement: 手順 2、 3の画像 2 Samsung Galaxy Tab E 9.6 Verizon Front Panel Replacement: 手順 2、 3の画像 3
    • Insert the plastic opening tool by wedging it between the device's screen and back cover.

    • Move the plastic tool around the edges of the device to undo the plastic lips holding the casing together.

    • This step may require more force than expected. If difficult, try using a suction cup on the screen.

  3. Samsung Galaxy Tab E 9.6 Verizon Front Panel Replacement: 手順 3、 3の画像 1 Samsung Galaxy Tab E 9.6 Verizon Front Panel Replacement: 手順 3、 3の画像 2 Samsung Galaxy Tab E 9.6 Verizon Front Panel Replacement: 手順 3、 3の画像 3
    • This process will become easier as more clips are separated.

    • Use your hands to gently pull the back cover off the device after about half of the clips are separated.

    • A suction cup can be used in this step as well to assist in pulling the device apart.

  4. Samsung Galaxy Tab E 9.6 Verizon Front Panel Replacement, Front Panel: 手順 4、 2の画像 1 Samsung Galaxy Tab E 9.6 Verizon Front Panel Replacement, Front Panel: 手順 4、 2の画像 2
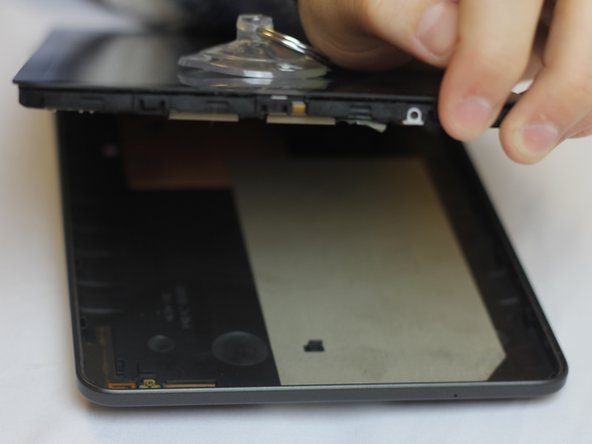
    • Turn the device over so the screen is facing down. Locate the front panel assembly connector at the top left corner of the motherboard.

    • To remove the connector, first use a pair of tweezers and flip the connector lock upwards towards the battery.

  5. Samsung Galaxy Tab E 9.6 Verizon Front Panel Replacement: 手順 5、 1の画像 1
    • Once you've undone the connector lock, use a pair of tweezers to pull the cable front its housing.

  6. Samsung Galaxy Tab E 9.6 Verizon Front Panel Replacement: 手順 6、 1の画像 1
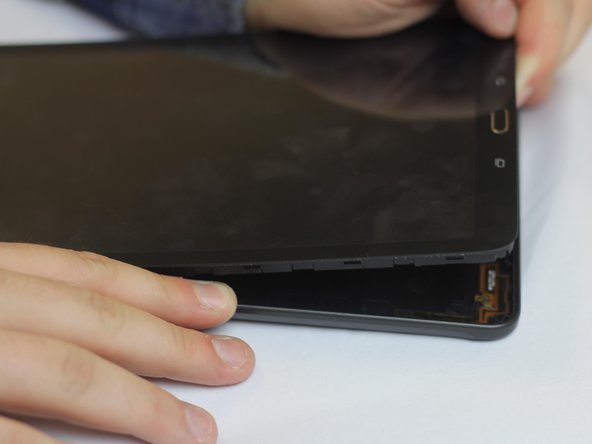
    • Turn the device back over and use a plastic opening tool to detach the adhesive glue securing the front casing.

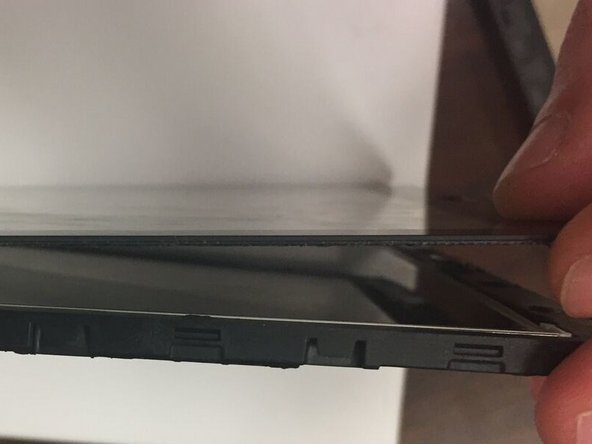
    • You will need to wedge a plastic opening tool in between the front casing and the screen. Then move the tool around the perimeter of the device to break the adhesive.

    • Once you've loosed the front panel enough with the prying tool, you can use your hands to pull the front panel off of the device.

終わりに

To reassemble your device, follow these instructions in reverse order.

6 の人々がこのガイドを完成させました。

作成者

2人の作成者と共同で作成されました。

Dave Dorzback

メンバー登録日: 09/28/16

626 ポイント

4のガイドは作成済み

チーム

USF Tampa, Team 1-4, Cagle Fall 2016 USF Tampa, Team 1-4, Cagle Fall 2016人のメンバー

USFT-CAGLE-F16S1G4

3 メンバー

14のガイドは作成済み

コメント 1 件

To install the new screen, install the connector at the top first and dry fit before installing and make sure you align the Button and Camera.

Oscar C - 返信

コメントを追加

統計データ:

過去 24時間: 0

過去 7 日: 1

過去 30 日: 6

今までの合計 4,335