メインコンテンツにスキップ

Samsung Galaxy Tab A Earphone Jack Replacement

必要な工具と部品

  1. Samsung Galaxy Tab A Earphone Jack Replacement, Earphone Jack: 手順 1、 1の画像 1
    • Make sure the device is turned off before attempting to disassemble it.

    • At the top portion of the memory card slot, use the small metal spudger to create separation between the back cover and the rest of the device.

    • The small metal spudger is only used to create separation between the back cover and the rest of the device, not to remove the back cover.

  2. Samsung Galaxy Tab A Earphone Jack Replacement: 手順 2、 2の画像 1 Samsung Galaxy Tab A Earphone Jack Replacement: 手順 2、 2の画像 2
    • Use the intermediate metal spudger in place of the small metal spudger to remove the back cover. This is done by sliding the intermediate metal spudger around the perimeter of the device, beginning at the top portion of the memory card slot.

    • The second picture shows the internal portion of the device once the back cover is removed.

  3. Samsung Galaxy Tab A Earphone Jack Replacement: 手順 3、 2の画像 1 Samsung Galaxy Tab A Earphone Jack Replacement: 手順 3、 2の画像 2
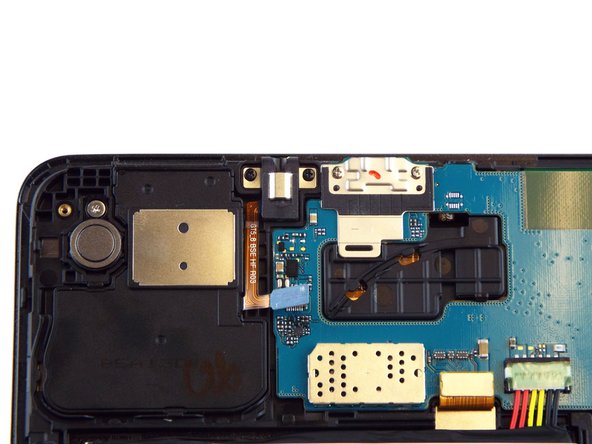
    • Use the spudger to disconnect the earphone jack from the motherboard.

    • To prevent any damage to either the earphone jack or motherboard, it is recommend to remove the jack at its blue rubber portion.

    • The connected and disconnected earphone jack is shown in the first and second picture, respectively.

  4. Samsung Galaxy Tab A Earphone Jack Replacement: 手順 4、 2の画像 1 Samsung Galaxy Tab A Earphone Jack Replacement: 手順 4、 2の画像 2
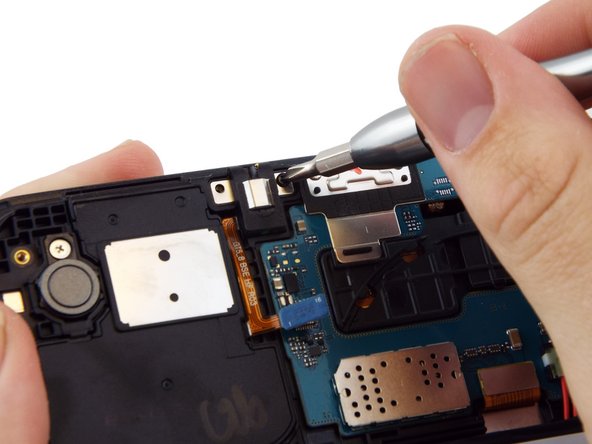
    • Use the PH0 screwdriver bit to remove the 2.5 mm screws attaching earphone jack to the rest of the device.

    • The second picture shows this process in action.

  5. Samsung Galaxy Tab A Earphone Jack Replacement: 手順 5、 3の画像 1 Samsung Galaxy Tab A Earphone Jack Replacement: 手順 5、 3の画像 2 Samsung Galaxy Tab A Earphone Jack Replacement: 手順 5、 3の画像 3
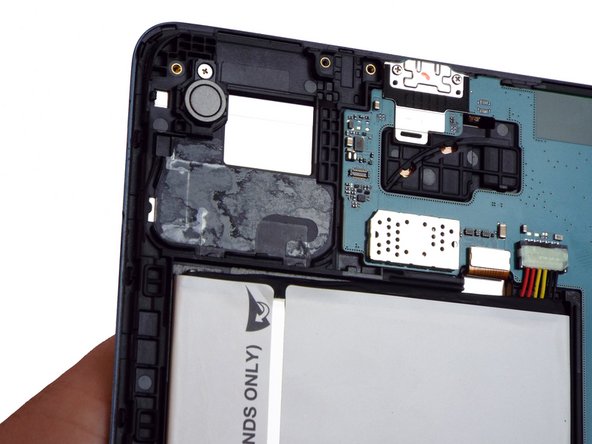
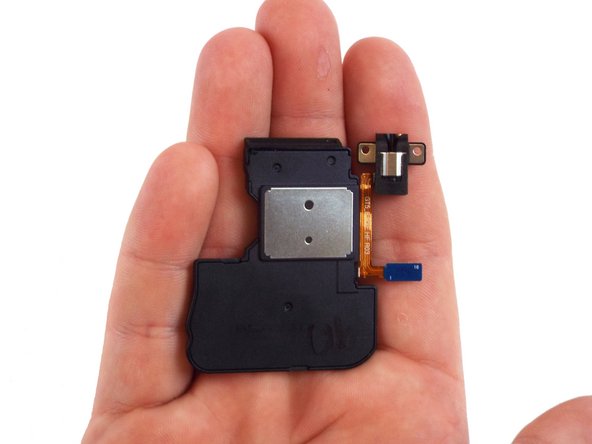
    • Use the spudger to fully remove the earphone jack from the rest of the device.

    • The second picture shows what the device should look like once the earphone jack has been removed.

終わりに

To reassemble your device, follow these instructions in reverse order.

3 の人々がこのガイドを完成させました。

作成者

4人の作成者と共同で作成されました。

Michael Wozny

メンバー登録日: 02/04/16

3,690 ポイント

5のガイドは作成済み

チーム

USF Tampa, Team 17-4, Blackwell Winter 2016 USF Tampa, Team 17-4, Blackwell Winter 2016人のメンバー

USFT-BLACKWELL-W16S17G4

4 メンバー

11のガイドは作成済み

0 件のコメント

コメントを追加

統計データ:

過去 24時間: 0

過去 7 日: 3

過去 30 日: 14

今までの合計 5,201