はじめに
If your device display is unresponsive or cracked, it may cause further damage to the device or physical injury. This guide will outline how to properly remove the display of the Samsung Galaxy Tab A 9.7 without damaging other parts of the device. The difficulty of this guide is moderate and requires special attention to details. Take caution when removing the display in order to inhibit the possibility of cracking the screen.
You will want to work on a clean and flat table where you will easily be able to locate all parts and tools.
必要な工具と部品
-
-
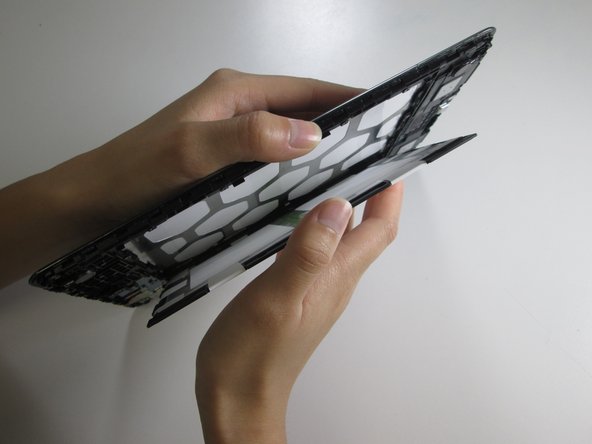
Insert a metal spudger between the back case and the screen of the device.
-
Move the spudger along the perimeter of the device while it is in between the back case and the screen to open each snap.
-
-
-
-
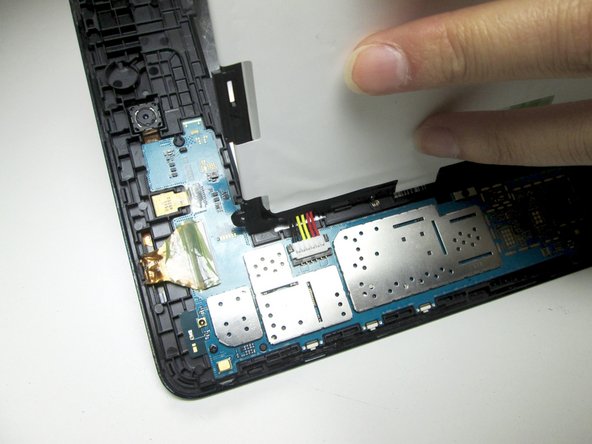
Gently remove the tape covering the screen ribbon cable, located at the top of the devise.
-
With the plastic spudger, disconnect the ribbon cable from the motherboard, located at the middle of the device.
-


To reassemble your device, follow these instructions in reverse order.
To reassemble your device, follow these instructions in reverse order.
3 の人々がこのガイドを完成させました。

チーム

The Citadel Military College of South Carolina, Team S2-G13, Eggleston Spring 2020 The Citadel Military College of South Carolina, Team S2-G13, Eggleston Spring 2020人のメンバー
CMCSC-EGGLESTON-S20S2G13
2 メンバー
3のガイドは作成済み