メインコンテンツにスキップ

Samsung Galaxy Tab 4 Motherboard Replacement

必要な工具と部品

  1. Samsung Galaxy Tab 4 Motherboard Replacement, Motherboard: 手順 1、 2の画像 1 Samsung Galaxy Tab 4 Motherboard Replacement, Motherboard: 手順 1、 2の画像 2
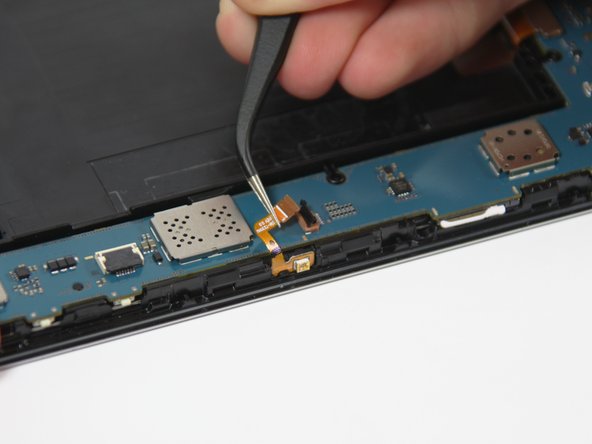
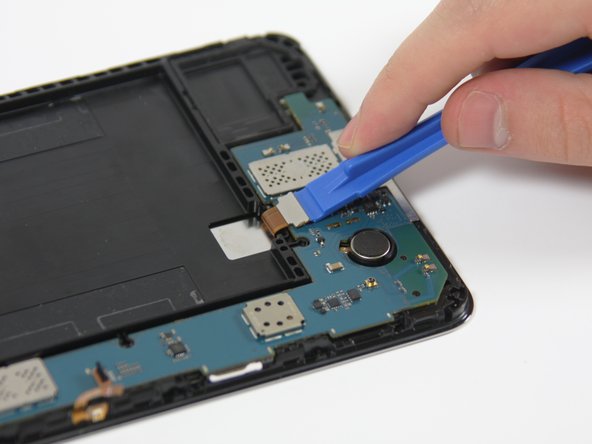
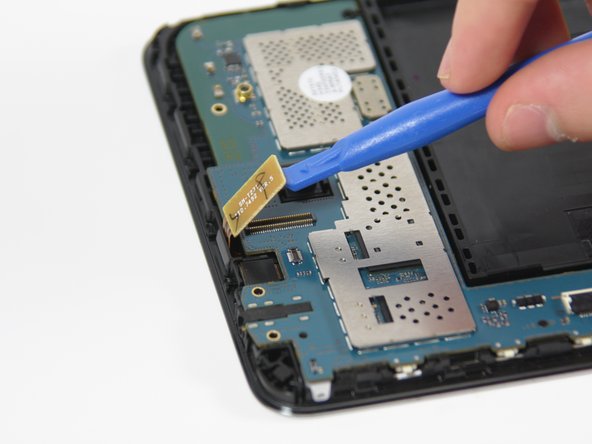
    • Insert the plastic opening tool into the gap between the device frame and the back panel on any side of the device.

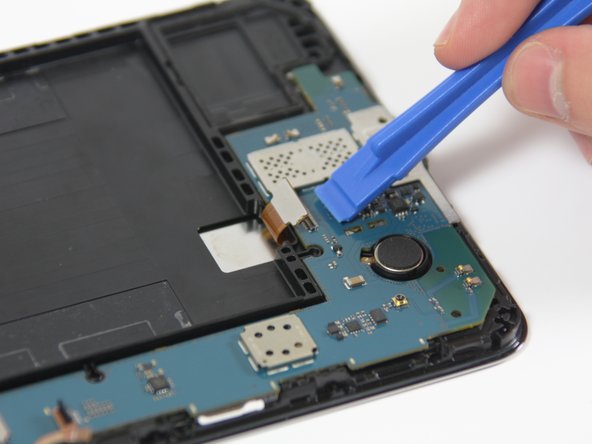
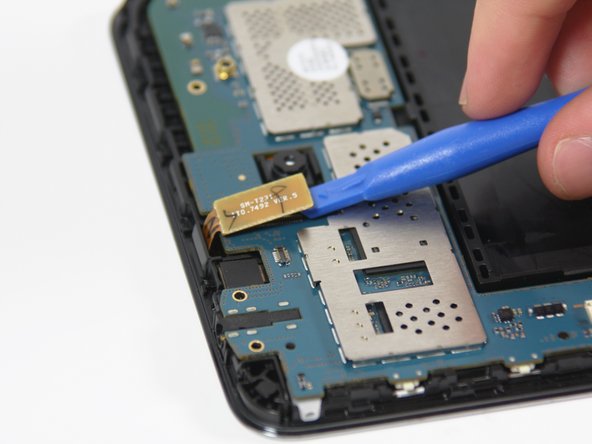
    • Slide the opening tool around the edges of the device to disconnect the back panel from the frame.

  2. Samsung Galaxy Tab 4 Motherboard Replacement: 手順 2、 3の画像 1 Samsung Galaxy Tab 4 Motherboard Replacement: 手順 2、 3の画像 2 Samsung Galaxy Tab 4 Motherboard Replacement: 手順 2、 3の画像 3
    • Carefully remove the back panel from the frame of the device.

  3. Samsung Galaxy Tab 4 Motherboard Replacement: 手順 3、 3の画像 1 Samsung Galaxy Tab 4 Motherboard Replacement: 手順 3、 3の画像 2 Samsung Galaxy Tab 4 Motherboard Replacement: 手順 3、 3の画像 3
    • Using a Phillips #00 Screwdriver, remove the five 4 mm screws connecting the motherboard to the frame of the device.

  4. Samsung Galaxy Tab 4 Motherboard Replacement: 手順 4、 3の画像 1 Samsung Galaxy Tab 4 Motherboard Replacement: 手順 4、 3の画像 2 Samsung Galaxy Tab 4 Motherboard Replacement: 手順 4、 3の画像 3
    • Use the plastic opening tool to unlock the battery wire from the motherboard by flipping-up the small retaining flap.

    • Use the tweezers to carefully remove the battery wire from the motherboard by pulling it away from the retainer flap.

  5. Samsung Galaxy Tab 4 Motherboard Replacement: 手順 5、 3の画像 1 Samsung Galaxy Tab 4 Motherboard Replacement: 手順 5、 3の画像 2 Samsung Galaxy Tab 4 Motherboard Replacement: 手順 5、 3の画像 3
    • Use the plastic opening tool to unlock the wire on the narrow section of the motherboard by flipping-up the retaining flap.

    • Use the tweezers to carefully remove the wire from the motherboard by sliding it away from the retaining flap.

  6. Samsung Galaxy Tab 4 Motherboard Replacement: 手順 6、 3の画像 1 Samsung Galaxy Tab 4 Motherboard Replacement: 手順 6、 3の画像 2 Samsung Galaxy Tab 4 Motherboard Replacement: 手順 6、 3の画像 3
    • Disconnect the wire near the bottom of the motherboard by placing the plastic opening tool under the edge of the connector to flip it up.

  7. Samsung Galaxy Tab 4 Motherboard Replacement: 手順 7、 3の画像 1 Samsung Galaxy Tab 4 Motherboard Replacement: 手順 7、 3の画像 2 Samsung Galaxy Tab 4 Motherboard Replacement: 手順 7、 3の画像 3
    • Disconnect the wire near the top of the motherboard by placing the plastic opening tool under the edge of the connector to flip it up.

  8. Samsung Galaxy Tab 4 Motherboard Replacement: 手順 8、 3の画像 1 Samsung Galaxy Tab 4 Motherboard Replacement: 手順 8、 3の画像 2 Samsung Galaxy Tab 4 Motherboard Replacement: 手順 8、 3の画像 3
    • Gently remove the motherboard from the frame of the device by grabbing the top and bottom ends and pulling it toward you.

    • Several plastic tabs keep the motherboard in place, so you will have to apply some force.

終わりに

To reassemble your device, follow these instructions in reverse order.

3 の人々がこのガイドを完成させました。

作成者

4人の作成者と共同で作成されました。

Peter Oliver

メンバー登録日: 10/03/16

227 ポイント

1ガイドが承認済み

チーム

Cal Poly, Team 18-3, Forte Fall 2016 Cal Poly, Team 18-3, Forte Fall 2016人のメンバー

CPSU-FORTE-F16S18G3

4 メンバー

5のガイドは作成済み

0 件のコメント

コメントを追加

統計データ:

過去 24時間: 0

過去 7 日: 0

過去 30 日: 2

今までの合計 1,707