メインコンテンツにスキップ

Samsung Galaxy Tab 4 8.0 Vibration Motor Replacement

必要な工具と部品

  1. Samsung Galaxy Tab 4 8.0 Vibration Motor Replacement, Rear Case: 手順 1、 3の画像 1 Samsung Galaxy Tab 4 8.0 Vibration Motor Replacement, Rear Case: 手順 1、 3の画像 2 Samsung Galaxy Tab 4 8.0 Vibration Motor Replacement, Rear Case: 手順 1、 3の画像 3
    • Before disassembling your Samsung Galaxy Tab 4 8.0, be sure it is powered off and you remove the SIM and Micro SD cards.

    • At the top of the tablet, nudge the blue plastic opening tool between the back plastic casing and the front panel's metal rim.

    • Do not use excessive force when prying the clips, fastening the casing together, open because they can easily break.

  2. Samsung Galaxy Tab 4 8.0 Vibration Motor Replacement: 手順 2、 2の画像 1 Samsung Galaxy Tab 4 8.0 Vibration Motor Replacement: 手順 2、 2の画像 2
    • Continue prying the blue plastic opening tool along the perimeter of the tablet to separate the back plastic casing from the front assembly panel.

    • As right-handers, we found it easiest to move clockwise and use more pressure around the corners to facilitate the process.

    • You might hear several popping noises caused by the plastic clips coming undone.

  3. Samsung Galaxy Tab 4 8.0 Vibration Motor Replacement: 手順 3、 2の画像 1 Samsung Galaxy Tab 4 8.0 Vibration Motor Replacement: 手順 3、 2の画像 2
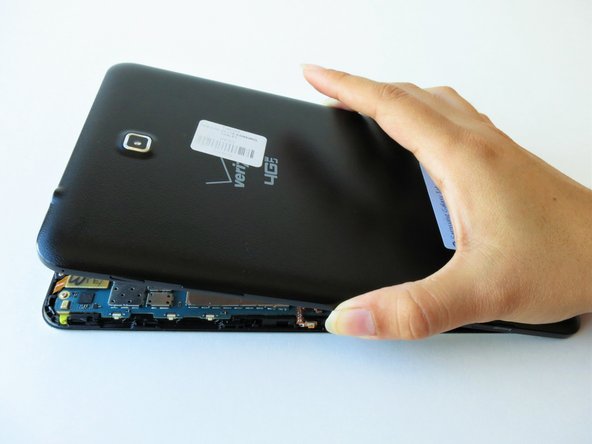
    • To avoid damaging the screen, gently set the tablet with the LCD screen faced down.

    • Firmly grasp the back plastic casing and lift it away from the front assembly panel.

  4. Samsung Galaxy Tab 4 8.0 Vibration Motor Replacement, Battery: 手順 4、 3の画像 1 Samsung Galaxy Tab 4 8.0 Vibration Motor Replacement, Battery: 手順 4、 3の画像 2 Samsung Galaxy Tab 4 8.0 Vibration Motor Replacement, Battery: 手順 4、 3の画像 3
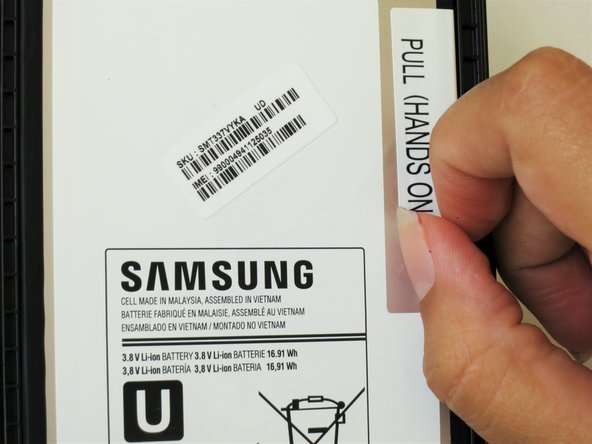
    • Peel up the detachable corner of the white plastic sticker that reads “pull (hands only).”

    • Remove the sticker to form a tab.

  5. Samsung Galaxy Tab 4 8.0 Vibration Motor Replacement: 手順 5、 1の画像 1
    • Using your thumb and index finger, pinch the tab and pull it up to remove the top right corner of the battery from the front panel assembly.

    • If battery resistance is encountered due to adhesive, use the flat end of a spudger to run in between the battery and the front panel assembly.

    • Do not completely detach the battery just yet, doing so can cause damage to the red and blue cables loacted at the bottom of the battery.

  6. Samsung Galaxy Tab 4 8.0 Vibration Motor Replacement: 手順 6、 2の画像 1 Samsung Galaxy Tab 4 8.0 Vibration Motor Replacement: 手順 6、 2の画像 2
    • Starting at the bottom left side of the battery, gently remove the green tape.

    • Salvage the green tape if the replacement battery does not include one.

  7. Samsung Galaxy Tab 4 8.0 Vibration Motor Replacement: 手順 7、 3の画像 1 Samsung Galaxy Tab 4 8.0 Vibration Motor Replacement: 手順 7、 3の画像 2 Samsung Galaxy Tab 4 8.0 Vibration Motor Replacement: 手順 7、 3の画像 3
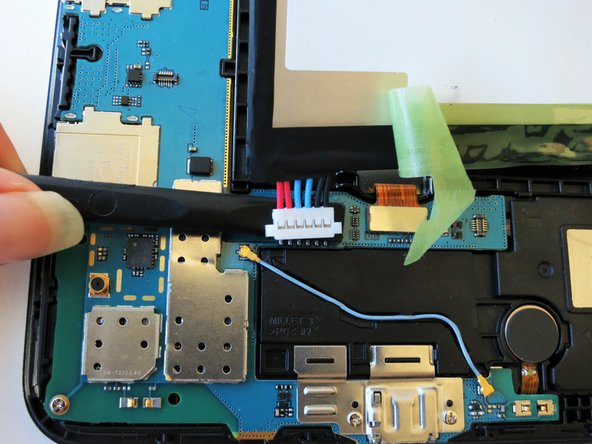
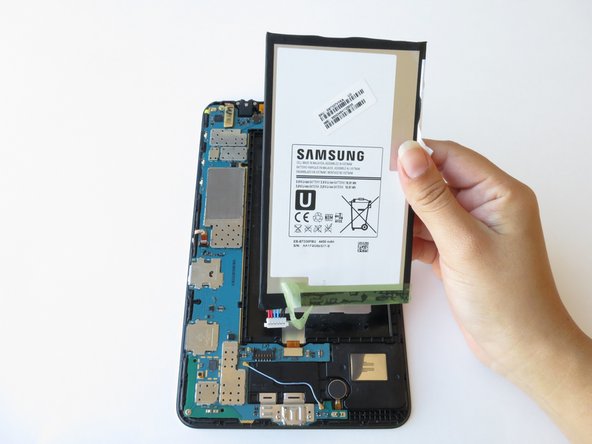
    • Run the spudger under the battery to disconnect the red and blue cable connector from the circuit.

    • Lift the battery towards you, away from the front panel.

  8. Samsung Galaxy Tab 4 8.0 Vibration Motor Replacement, Motherboard: 手順 8、 3の画像 1 Samsung Galaxy Tab 4 8.0 Vibration Motor Replacement, Motherboard: 手順 8、 3の画像 2 Samsung Galaxy Tab 4 8.0 Vibration Motor Replacement, Motherboard: 手順 8、 3の画像 3
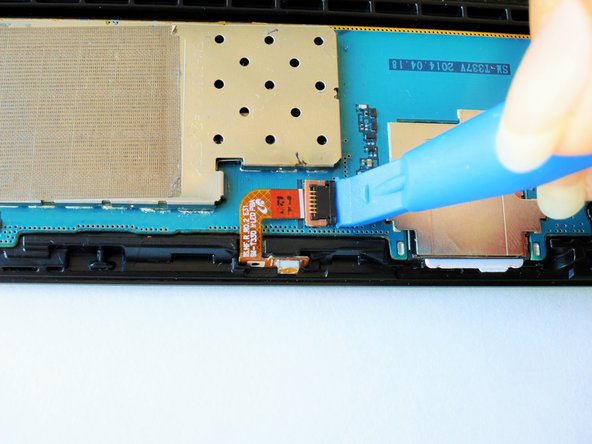
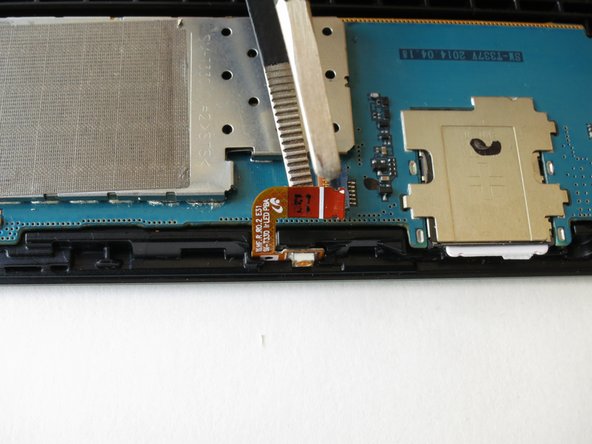
    • Slightly apply pressure and move the blue plastic opening tool downwards to pop the metallic rectangular connector from its socket on the mother board.

  9. Samsung Galaxy Tab 4 8.0 Vibration Motor Replacement: 手順 9、 3の画像 1 Samsung Galaxy Tab 4 8.0 Vibration Motor Replacement: 手順 9、 3の画像 2 Samsung Galaxy Tab 4 8.0 Vibration Motor Replacement: 手順 9、 3の画像 3
    • Slightly apply pressure and move the blue plastic opening tool downwards to pop the gold rectangular connector from its socket on the mother board.

  10. Samsung Galaxy Tab 4 8.0 Vibration Motor Replacement: 手順 10、 3の画像 1 Samsung Galaxy Tab 4 8.0 Vibration Motor Replacement: 手順 10、 3の画像 2 Samsung Galaxy Tab 4 8.0 Vibration Motor Replacement: 手順 10、 3の画像 3
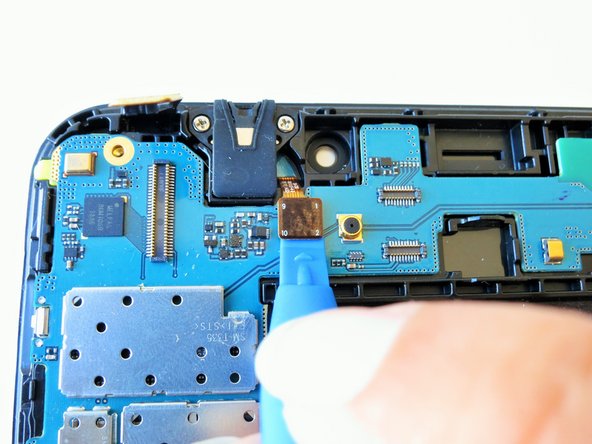
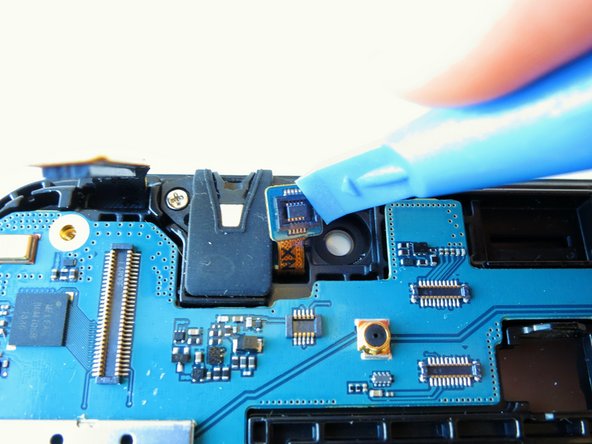
    • Slightly apply pressure and move the blue plastic opening tool downwards to pop the gold square connector from its socket on the mother board.

  11. Samsung Galaxy Tab 4 8.0 Vibration Motor Replacement: 手順 11、 3の画像 1 Samsung Galaxy Tab 4 8.0 Vibration Motor Replacement: 手順 11、 3の画像 2 Samsung Galaxy Tab 4 8.0 Vibration Motor Replacement: 手順 11、 3の画像 3
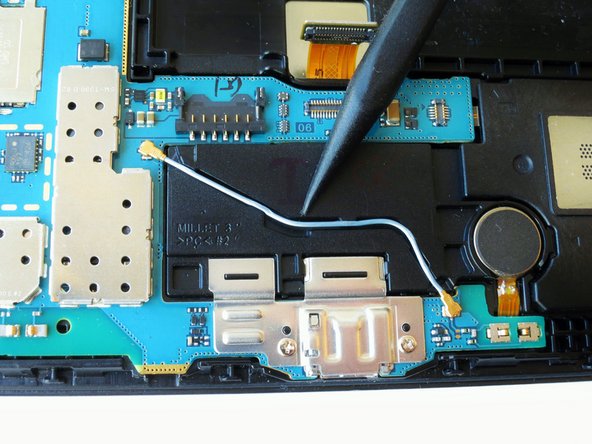
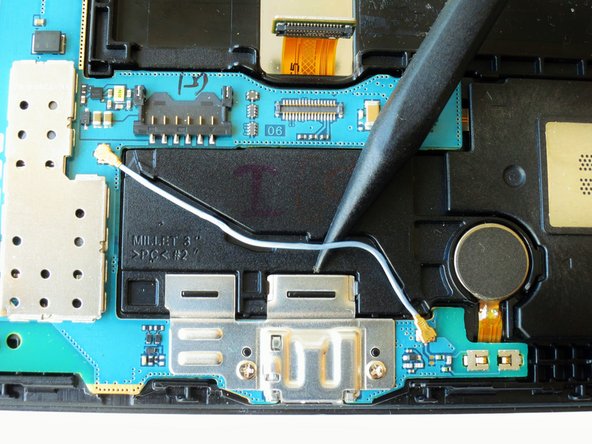
    • Using the spudger gently wedge the blue wire out of its compartment.

  12. Samsung Galaxy Tab 4 8.0 Vibration Motor Replacement: 手順 12、 1の画像 1
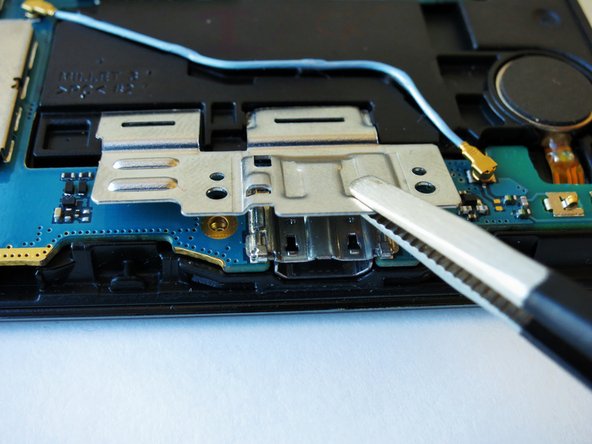
    • Remove two 2 mm #000 Phillips screws securing the metallic charger port cover to both the logic board and the front panel.

  13. Samsung Galaxy Tab 4 8.0 Vibration Motor Replacement: 手順 13、 3の画像 1 Samsung Galaxy Tab 4 8.0 Vibration Motor Replacement: 手順 13、 3の画像 2 Samsung Galaxy Tab 4 8.0 Vibration Motor Replacement: 手順 13、 3の画像 3
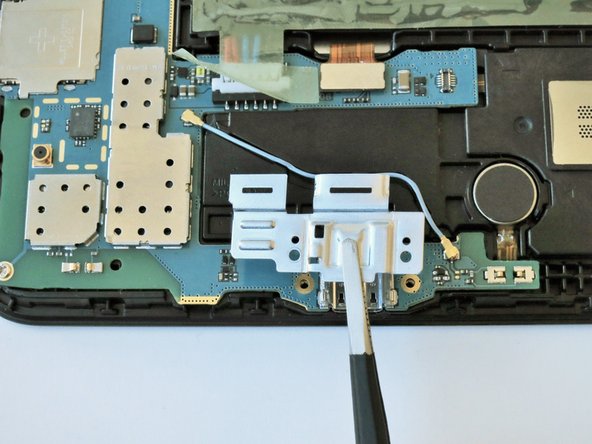
    • Squeeze the metal charger port cover piece with the tweezers to gently lift it from it's place.

  14. Samsung Galaxy Tab 4 8.0 Vibration Motor Replacement: 手順 14、 3の画像 1 Samsung Galaxy Tab 4 8.0 Vibration Motor Replacement: 手順 14、 3の画像 2 Samsung Galaxy Tab 4 8.0 Vibration Motor Replacement: 手順 14、 3の画像 3
    • Carefully insert the flat end of the blue plastic opening tool under the black plastic fastener and lift.

    • Rotate your tablet counter clockwise to facilitate the process.

  15. Samsung Galaxy Tab 4 8.0 Vibration Motor Replacement: 手順 15、 2の画像 1 Samsung Galaxy Tab 4 8.0 Vibration Motor Replacement: 手順 15、 2の画像 2
    • Squeeze the golden cable with the tweezers and gently pull the cable to the left to free the end of the golden cable.

    • The golden cable is delicate so use gentle force.

  16. Samsung Galaxy Tab 4 8.0 Vibration Motor Replacement: 手順 16、 1の画像 1
    • Remove three 2 mm #000 Phillips screws securing the mother board to the front panel.

  17. Samsung Galaxy Tab 4 8.0 Vibration Motor Replacement: 手順 17、 2の画像 1 Samsung Galaxy Tab 4 8.0 Vibration Motor Replacement: 手順 17、 2の画像 2
    • Using your hands, hold the opposite ends of the mother board corners, and lift.

  18. Samsung Galaxy Tab 4 8.0 Vibration Motor Replacement, Vibration Motor: 手順 18、 1の画像 1
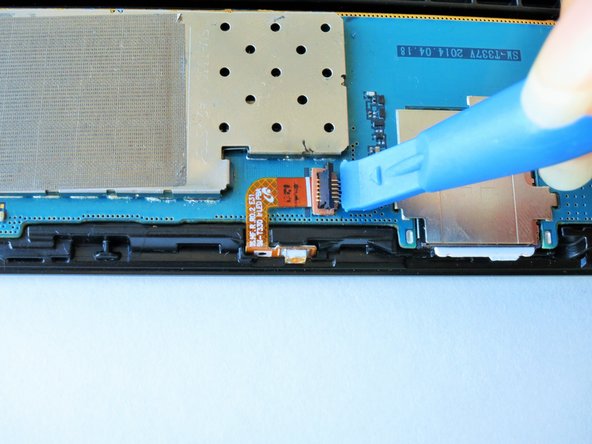
    • Use the angled tweezers to lift up the orange rectangular electrical connector, this will disconnect the vibration motor from the motherboard.

  19. Samsung Galaxy Tab 4 8.0 Vibration Motor Replacement: 手順 19、 2の画像 1 Samsung Galaxy Tab 4 8.0 Vibration Motor Replacement: 手順 19、 2の画像 2
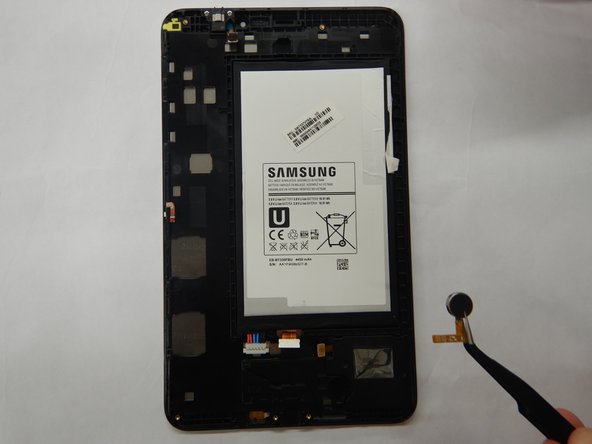
    • Slide one arm of the angled tweezers beneath the orange electrical tape and the motor.

    • Gently pull upwards on the motor and electrical tape and remove the speaker from the device.

終わりに

To reassemble your device, follow these instructions in reverse order.

ある他の人がこのガイドを完成しました。

作成者

4人の作成者と共同で作成されました。
Chandler Davis Beale

メンバー登録日: 02/20/20

331 ポイント

3のガイドは作成済み

0 件のコメント

コメントを追加

統計データ:

過去 24時間: 0

過去 7 日: 1

過去 30 日: 3

今までの合計 214