はじめに
This guide shows how to open your tablet to replace the back case. Please be careful in following all instructions provided. You don't want to damage anything.
必要な工具と部品
-
-
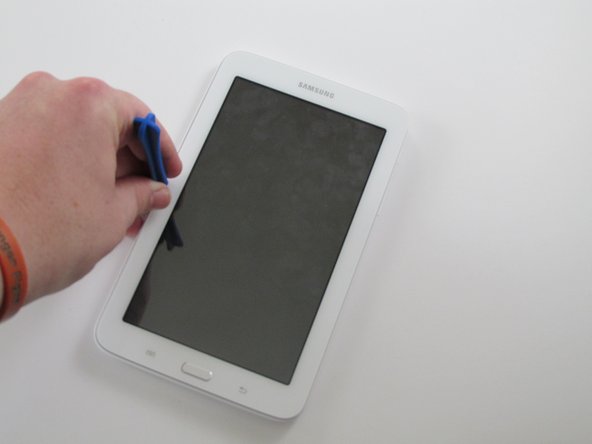
Using a plastic opening tool, wedge in the seam between the screen and the case.
-
Rock the tool by moving it towards and away from the middle of the screen, trying to separate the tape holding the screen and case together.
-
This is a long process, so don't try and rush it. Also, be careful about applying pressure.
-
-


To reassemble your device, snap the screen into the case.
To reassemble your device, snap the screen into the case.
12 の人々がこのガイドを完成させました。
チーム

USF Tampa, Team 11-1, Cheng Spring 2016 USF Tampa, Team 11-1, Cheng Spring 2016人のメンバー
USFT-CHENG-S16S11G1
4 メンバー
12のガイドは作成済み