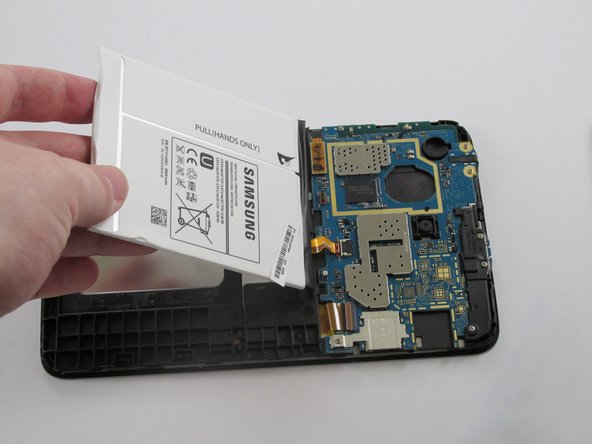
メインコンテンツにスキップ

Samsung Galaxy Tab 3 Lite Battery Replacement

必要な工具と部品

  1. Samsung Galaxy Tab 3 Lite Battery Replacement, Rear Case: 手順 1、 3の画像 1 Samsung Galaxy Tab 3 Lite Battery Replacement, Rear Case: 手順 1、 3の画像 2 Samsung Galaxy Tab 3 Lite Battery Replacement, Rear Case: 手順 1、 3の画像 3
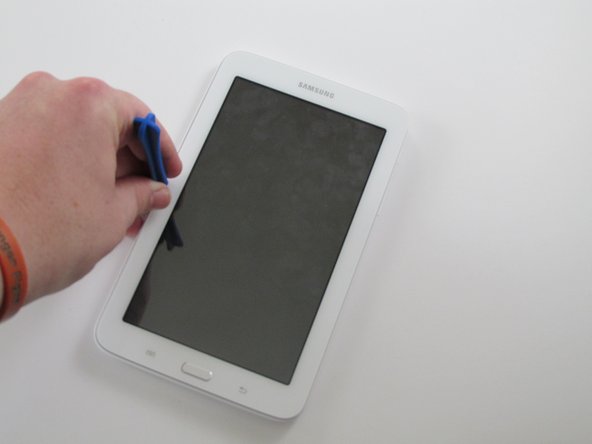
    • Using a plastic opening tool, wedge in the seam between the screen and the case.

    • Rock the tool by moving it towards and away from the middle of the screen, trying to separate the tape holding the screen and case together.

    • This is a long process, so don't try and rush it. Also, be careful about applying pressure.

  2. Samsung Galaxy Tab 3 Lite Battery Replacement: 手順 2、 3の画像 1 Samsung Galaxy Tab 3 Lite Battery Replacement: 手順 2、 3の画像 2 Samsung Galaxy Tab 3 Lite Battery Replacement: 手順 2、 3の画像 3
    • After separating the tape holding the screen and case together, slowly start taking the screen off the case from the opposite side of the side with the buttons

  3. Samsung Galaxy Tab 3 Lite Battery Replacement, Battery: 手順 3、 3の画像 1 Samsung Galaxy Tab 3 Lite Battery Replacement, Battery: 手順 3、 3の画像 2 Samsung Galaxy Tab 3 Lite Battery Replacement, Battery: 手順 3、 3の画像 3
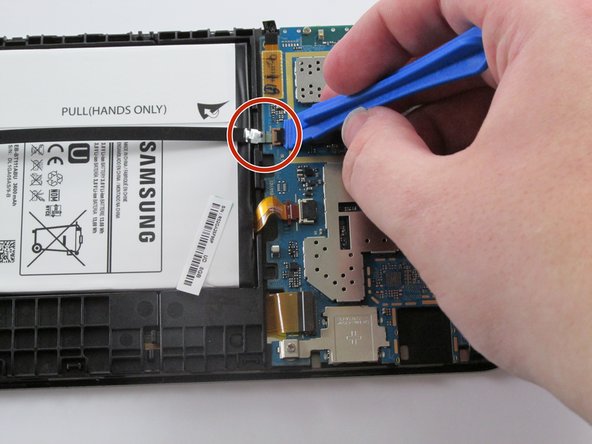
    • Locate the ZIF ( zero insertion force) connector highlighted by the red circle, as shown in the provided picture.

    • Use the plastic opening tool to gently lift the black ZIF connector shown within the red circle. It should just pop out with relative ease.

    • Use the precision tweezers and gently pull out the black cable out of its slot.

  4. Samsung Galaxy Tab 3 Lite Battery Replacement: 手順 4、 2の画像 1 Samsung Galaxy Tab 3 Lite Battery Replacement: 手順 4、 2の画像 2
    • Use the plastic opening tool to gently lift black flap shown within the red circle. It should just pop out with relative ease.

    • Now gently pull out the yellowish orange ribbon cable, similar to how you did in Step 1.

  5. Samsung Galaxy Tab 3 Lite Battery Replacement: 手順 5、 3の画像 1 Samsung Galaxy Tab 3 Lite Battery Replacement: 手順 5、 3の画像 2 Samsung Galaxy Tab 3 Lite Battery Replacement: 手順 5、 3の画像 3
    • Use the plastic opening tool and gently pry out the battery from the left-hand side.

    • Grab the battery and lift it up.

    • It should come off with no extra effort, since both the black and yellowish orange cables have been pulled out.

終わりに

To reassemble your device, follow these instructions in reverse order.

15 の人々がこのガイドを完成させました。

作成者

3人の作成者と共同で作成されました。

Kevin Hicks

メンバー登録日: 02/09/16

1,557 ポイント

2のガイドは作成済み

チーム

USF Tampa, Team 11-1, Cheng Spring 2016 USF Tampa, Team 11-1, Cheng Spring 2016人のメンバー

USFT-CHENG-S16S11G1

4 メンバー

12のガイドは作成済み

0 件のコメント

コメントを追加

統計データ:

過去 24時間: 0

過去 7 日: 4

過去 30 日: 40

今までの合計 13,476