必要な工具と部品
-
-
With a plastic opening tool, gently insert the prying end in between the glass digitizer and the silver frame from the front of the device.
-
-
-
Working slowly and carefully, move around the entirety of the face of the device. Small plastic clips should release, if not, apply gentle outwards pressure until you hear the clips popping off.
I used a dull knife blade and just slide it along the grove. You may have to slide the knife back and forth a couple of times but, the cover will unsnap.
-
-
-
To begin actual removal of the battery itself, remove the four designated screws with your screwdriver.
-
Once the screws are removed, use either the tip of your screwdriver or a pair of tweezers to pull up the battery connector. Pull directly up and the connector should pop out.
-
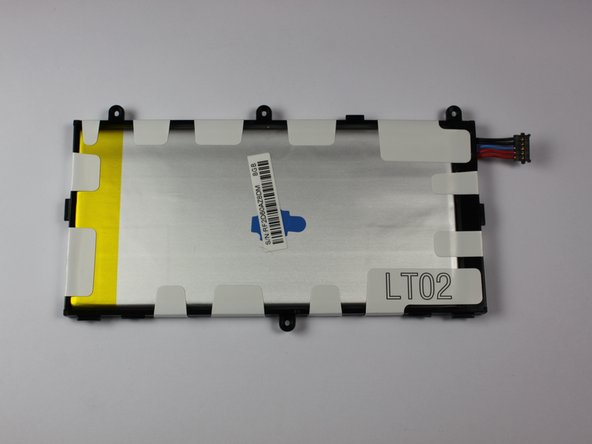
Once the battery is removed, it should look as it does in the third picture.
Gently lift the battery from the inside edge using the battery connector. The battery is hinged on the outside edge by two plastic protrusions which fit into the plastic frame where the battery is located.
Because I was only removing the cameras, I did not have to touch the battery. However on the motherboard; there are 4 screws up top you have to remove. Where your headphones plug in; gently pull up the connector away from the board. Tilt the motherboard up at a 45-60 degree angle. With a pair of tweezers, pull both cameras up (one at a time) while pulling side to side. The connectors will slide out. Then make sure the bottom of motherboard is slipped under small tabs then replace screws up top. Snap connector for earphones back into place.
-
-
-
-
To finish battery replacement, place your new battery where the old battery was in your device, as shown in the picture.
Don't forget to insert the battery on the outside edge first, locating the plastic protrusions into the frame around the battery. Use the tip of your screwdriver to push down on the protrusions to locate them in the frame. Once the battery is located correctly, it should sit flush with the frame that surrounds it.
No explanation of how to separate the glass from the body in order to access the battery.
Its the 1st step, pry tool down between glass and edge, all the way round. It has pressure clips
-
-
-
Begin replacement of the motherboard by releasing all connections holding down the motherboard, shown in the first picture.
-
To do this, use your spudger, tweezers, or a plastic opening tool and gently lift the connections up from their ports.
-
Once you separate all connections, the back of your device should look as it does in the third picture.
-
-
-
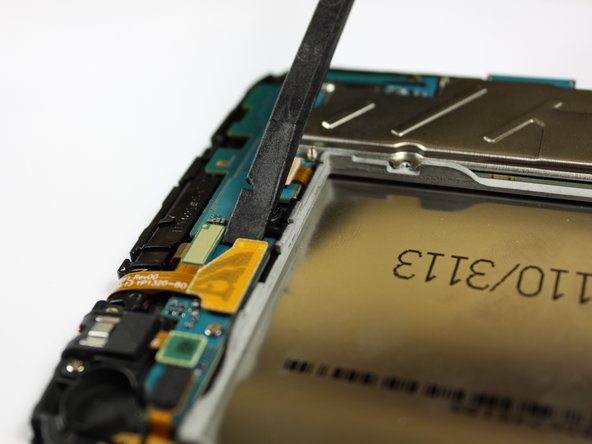
To remove the rear camera, use tweezers or the pointy end of your spudger to lift the glued down connector designated in the first picture.
-
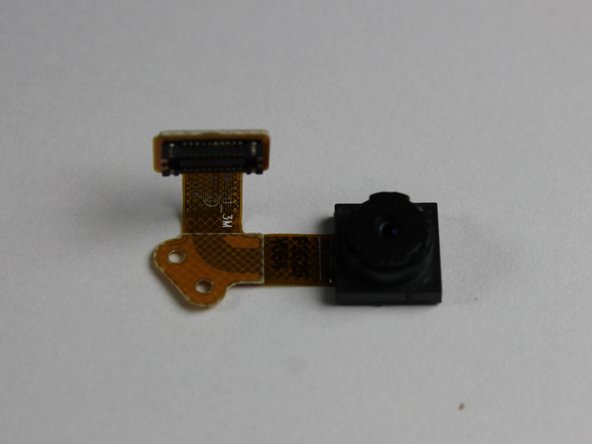
Once the connector is released from the device, the rear camera can be taken out, as shown in the second picture.
-
After this step is complete, you can replace the rear camera with a new one in the spot on the device where the old camera was, as shown in the third picture.
-
-
-
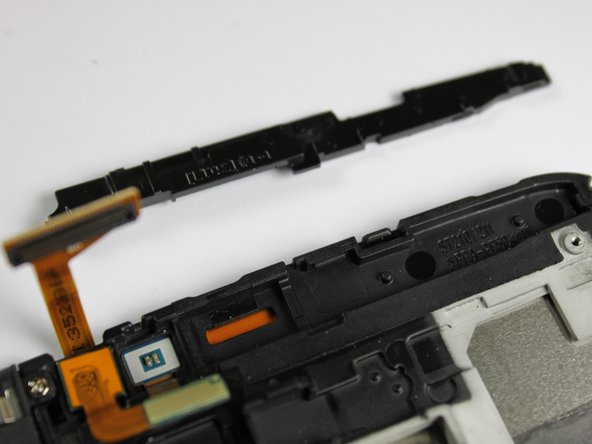
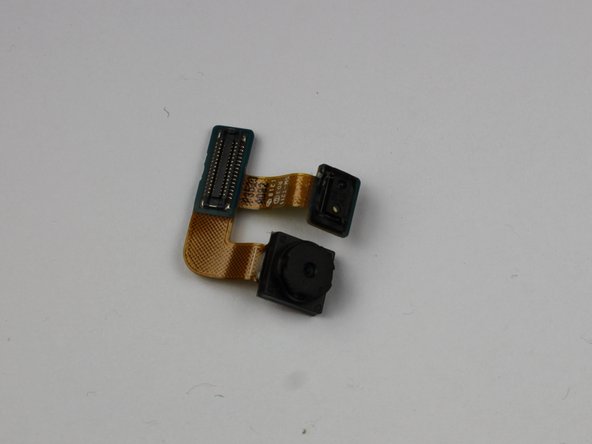
To remove the front camera, begin by popping off the plastic stopper with your spudger, as shown in the first picture. To do this, simply push your spudger between the stopper and the device, and use your spudger as a lever to lift the stopper up.
-
Once the plastic stopper is removed, gently lift the front camera's connection, which is glued down. After lifting the connection from the glue, the front camera can be lifted and removed.
-
After this step is complete, you can replace the old front camera with a new, working one for your device.
-


To reassemble your device, follow these instructions in reverse order.
To reassemble your device, follow these instructions in reverse order.
9 の人々がこのガイドを完成させました。
チーム

Cal Poly, Team 7-20, Regan Spring 2014 Cal Poly, Team 7-20, Regan Spring 2014人のメンバー
CPSU-REGAN-S14S7G20
4 メンバー
10のガイドは作成済み
コメント 1 件
For some reason, after I removed the cameras from my Galaxy Tab A; the rear speaking no longer worked. I reopened the case to investigate but could not find the problem. I'm not worry about this due to the speaker on the Galaxy Tab A is a piece of junk. However, headphones still work well. I would like to get some feed back on what others may think the problem is.
I tried this with my Galaxy Tab A. I only wanted to remove the front and rear cameras.
wmcarroll13 - 返信
How hard do i need to push the plastic part? i tried it but i wont pop off.
Emil Klock - 返信