メインコンテンツにスキップ

Samsung Galaxy Tab 2 7.0 Auxiliary Port Replacement

必要な工具と部品

  1. Samsung Galaxy Tab 2 7.0 Auxiliary Port Replacement, Auxiliary Port: 手順 1、 1の画像 1
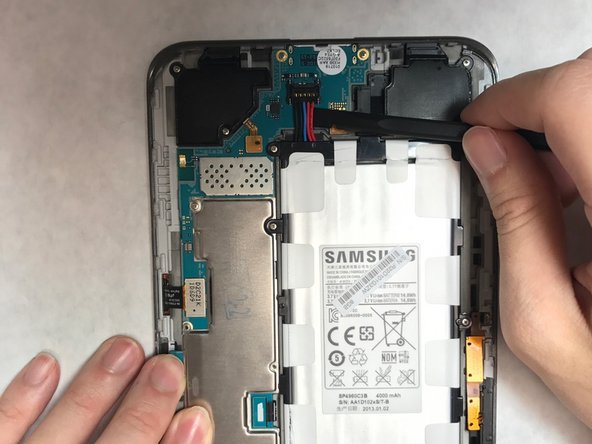
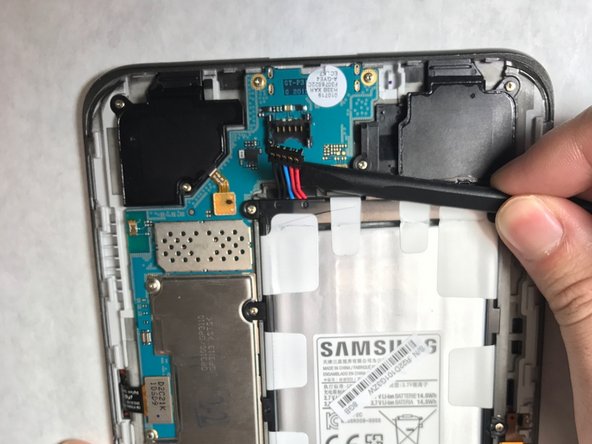
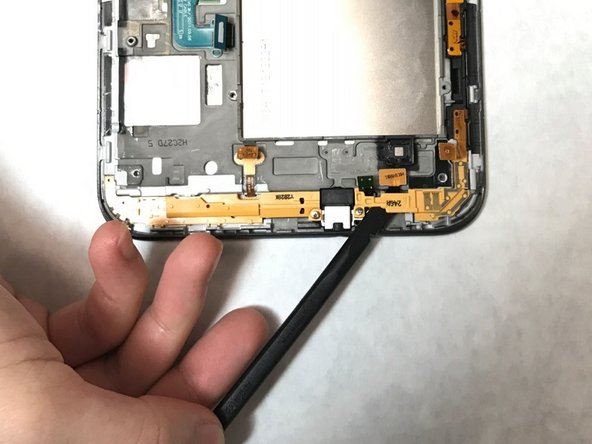
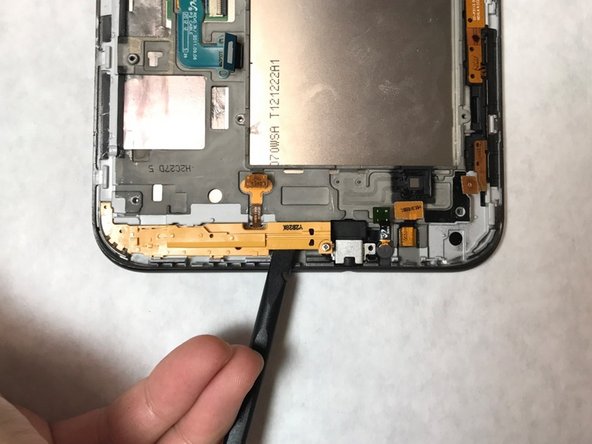
    • Using a nylon spudger or flat plastic opening tool, pry open the back of the device.

    • It is easy to begin this process by starting at the micro SD card insert.

  2. Samsung Galaxy Tab 2 7.0 Auxiliary Port Replacement: 手順 2、 1の画像 1
    • Using a Phillips head screwdriver, remove the 6 4mm screws holding holding the battery on the device.

  3. Samsung Galaxy Tab 2 7.0 Auxiliary Port Replacement: 手順 3、 3の画像 1 Samsung Galaxy Tab 2 7.0 Auxiliary Port Replacement: 手順 3、 3の画像 2 Samsung Galaxy Tab 2 7.0 Auxiliary Port Replacement: 手順 3、 3の画像 3
    • Gently detach the set of wires clips connecting the battery to the device using a nylon spudger.

    • Remove the battery and set it aside.

  4. Samsung Galaxy Tab 2 7.0 Auxiliary Port Replacement: 手順 4、 1の画像 1
    • Using a Phillips head screwdriver, remove the 6 4mm screws holding the motherboard in the device.

  5. Samsung Galaxy Tab 2 7.0 Auxiliary Port Replacement: 手順 5、 3の画像 1 Samsung Galaxy Tab 2 7.0 Auxiliary Port Replacement: 手順 5、 3の画像 2 Samsung Galaxy Tab 2 7.0 Auxiliary Port Replacement: 手順 5、 3の画像 3
    • Locate the flex cables attached to the motherboard. Using a nylon spudger, gently detach each flex cable from the motherboard.

    • Be careful when detaching flex cables. Excessive force and sharp tools have the potential to damage these components.

    • Lift the motherboard from the device and set it aside.

  6. Samsung Galaxy Tab 2 7.0 Auxiliary Port Replacement: 手順 6、 3の画像 1 Samsung Galaxy Tab 2 7.0 Auxiliary Port Replacement: 手順 6、 3の画像 2 Samsung Galaxy Tab 2 7.0 Auxiliary Port Replacement: 手順 6、 3の画像 3
    • Locate the yellow brackets at the bottom of the device.

    • Using a phillips head screwdriver, remove the single 4mm screw on each bracket, located on either side of the auxiliary port.

    • Lift the brackets from the device and set them aside.

    • You may need to use a nylon spudger, or any flat tool, to lift the brackets out of their place.

  7. Samsung Galaxy Tab 2 7.0 Auxiliary Port Replacement: 手順 7、 1の画像 1
    • Using a nylon spudger, or any flat tool, gently pry and lift the small metal covering off of the auxiliary port.

    • This will reveal a rubber covering.

  8. Samsung Galaxy Tab 2 7.0 Auxiliary Port Replacement: 手順 8、 1の画像 1
    • Using a nylon spudger, or any flat tool, gently pry and lift the small rubber covering to expose the auxiliary port.

    • This will reveal the auxiliary port.

  9. Samsung Galaxy Tab 2 7.0 Auxiliary Port Replacement: 手順 9、 1の画像 1
    • Lift the auxiliary port with a nylon spudger.

    • Remove the auxiliary component.

    • It is easiest to lift this piece from the innermost side of the port, opposite of the opening.

終わりに

To reassemble your device, follow these instructions in reverse order.

5 の人々がこのガイドを完成させました。

作成者

4人の作成者と共同で作成されました。

Katija Tarailo

メンバー登録日: 03/02/17

460 ポイント

3のガイドは作成済み

チーム

IUPUI, Team S3-G1, Harley Spring 2017 IUPUI, Team S3-G1, Harley Spring 2017人のメンバー

IUPUI-HARLEY-S17S3G1

4 メンバー

3のガイドは作成済み

0 件のコメント

コメントを追加

統計データ:

過去 24時間: 0

過去 7 日: 0

過去 30 日: 14

今までの合計 2,018