メインコンテンツにスキップ

Samsung Galaxy Sol Rear Camera Replacement

必要な工具と部品

  1. Samsung Galaxy Sol Rear Camera Replacement, Battery: 手順 1、 1の画像 1
    • Remove the back case of the phone by using an opening tool or fingernail to lift the divot on the top left side.

  2. Samsung Galaxy Sol Rear Camera Replacement: 手順 2、 1の画像 1
    • Remove the battery by lifting from the bottom up with an opening tool or a small flat tool such as a credit card.

  3. Samsung Galaxy Sol Rear Camera Replacement, Rear Camera: 手順 3、 1の画像 1
    • Remove the grey back of the phone by unscrewing all ten 0.4mm screws with a Phillips #00 screw bit.

  4. Samsung Galaxy Sol Rear Camera Replacement: 手順 4、 1の画像 1
    • After you have removed all the screws, take a credit card or plastic tool to lift the screen. You will go all around the border of the phone.

  5. Samsung Galaxy Sol Rear Camera Replacement: 手順 5、 3の画像 1 Samsung Galaxy Sol Rear Camera Replacement: 手順 5、 3の画像 2 Samsung Galaxy Sol Rear Camera Replacement: 手順 5、 3の画像 3
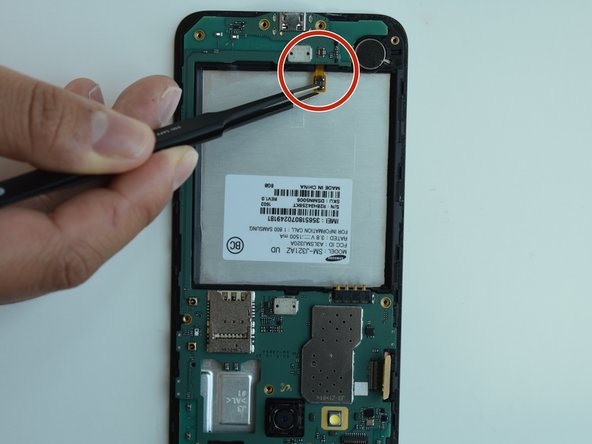
    • After removing the grey part of the phone, you will need to remove the motherboard by detaching all the chips.

  6. Samsung Galaxy Sol Rear Camera Replacement: 手順 6、 1の画像 1
    • Once you detach the chips, remove the hard drive to access the rear camera.

  7. Samsung Galaxy Sol Rear Camera Replacement: 手順 7、 2の画像 1 Samsung Galaxy Sol Rear Camera Replacement: 手順 7、 2の画像 2
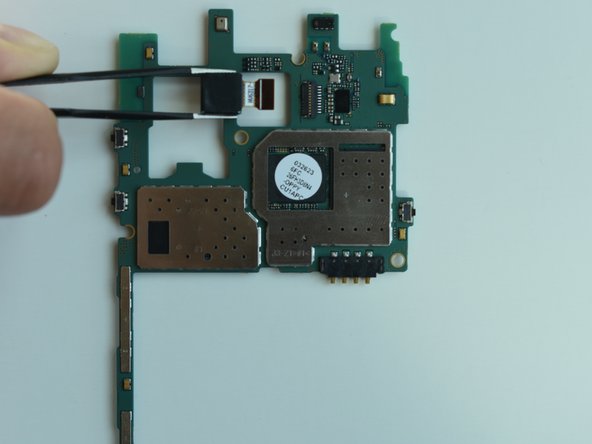
    • To remove the rear camera, flip the tab upward and then pull the camera straight out.

終わりに

To reassemble your device, follow these instructions in reverse order.

作成者

2人の作成者と共同で作成されました。

Samantha Garcia Aguilera

メンバー登録日: 04/05/18

356 ポイント

2のガイドは作成済み

チーム

0 件のコメント

コメントを追加

統計データ:

過去 24時間: 0

過去 7 日: 0

過去 30 日: 1

今までの合計 468