メインコンテンツにスキップ

Samsung Galaxy SIII Mini VE Rear Camera Replacement

必要な工具と部品

  1. Samsung Galaxy SIII Mini VE Rear Camera Replacement, Removing Rear Casing: 手順 1、 3の画像 1 Samsung Galaxy SIII Mini VE Rear Camera Replacement, Removing Rear Casing: 手順 1、 3の画像 2 Samsung Galaxy SIII Mini VE Rear Camera Replacement, Removing Rear Casing: 手順 1、 3の画像 3
    • Flip your phone so you are facing the back.

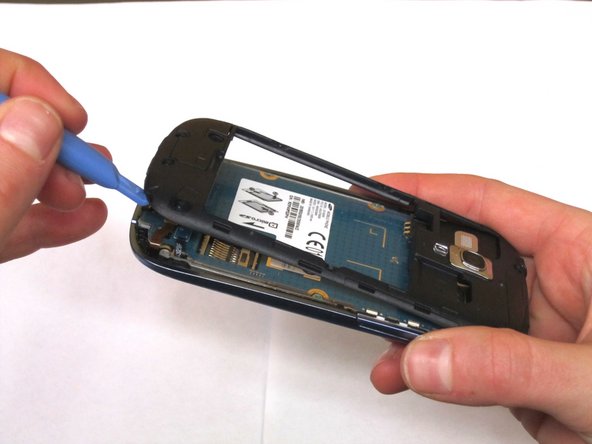
    • Locate the notch at the top and gently use your finger or an opening tool to remove the rear casing.

  2. Samsung Galaxy SIII Mini VE Rear Camera Replacement, Removing Battery: 手順 2、 2の画像 1 Samsung Galaxy SIII Mini VE Rear Camera Replacement, Removing Battery: 手順 2、 2の画像 2
    • Use your finger or an opening tool to pry the battery out of the phone.

  3. Samsung Galaxy SIII Mini VE Rear Camera Replacement, Removing Screws: 手順 3、 1の画像 1
    • Use the Phillips #000 Screwdriver to remove the 10, 4mm screws holding the plastic frame in place.

  4. Samsung Galaxy SIII Mini VE Rear Camera Replacement: 手順 4、 2の画像 1 Samsung Galaxy SIII Mini VE Rear Camera Replacement: 手順 4、 2の画像 2
    • Using an opening tool, gently separate the plastic framing from the phone.

  5. Samsung Galaxy SIII Mini VE Rear Camera Replacement, Removing Circuit Board: 手順 5、 3の画像 1 Samsung Galaxy SIII Mini VE Rear Camera Replacement, Removing Circuit Board: 手順 5、 3の画像 2 Samsung Galaxy SIII Mini VE Rear Camera Replacement, Removing Circuit Board: 手順 5、 3の画像 3
    • Unhook the two electrical connections at the bottom of the phone using your fingernail or a spudger.

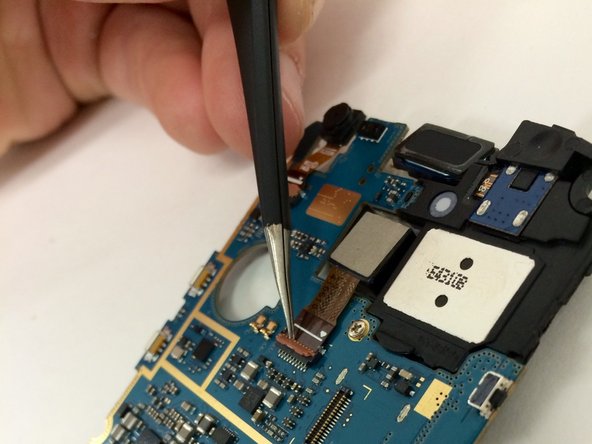
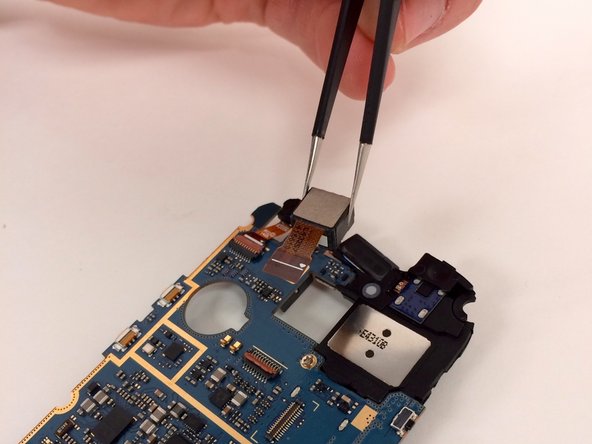
    • Next, use the spudger and tweezers to remove the speaker at the top of the phone.

    • Once the 3 components have detached, the circuit board should release from the phone except for 1 connection on the underside.

    • Detach this connection using the spudger.

  6. Samsung Galaxy SIII Mini VE Rear Camera Replacement, Removing Camera: 手順 6、 3の画像 1 Samsung Galaxy SIII Mini VE Rear Camera Replacement, Removing Camera: 手順 6、 3の画像 2 Samsung Galaxy SIII Mini VE Rear Camera Replacement, Removing Camera: 手順 6、 3の画像 3
    • Flip the holding tab to the open position.

    • Gently, separate the rear camera and the motherboard.

終わりに

To reassemble your device, follow these instructions in reverse order.

作成者

2人の作成者と共同で作成されました。

Megan

メンバー登録日: 10/23/14

1,186 ポイント

6のガイドは作成済み

チーム

Michigan Tech, Team 1-8, Lauer Fall 2014 Michigan Tech, Team 1-8, Lauer Fall 2014人のメンバー

MTU-LAUER-F14S1G8

3 メンバー

6のガイドは作成済み

0 件のコメント

コメントを追加

統計データ:

過去 24時間: 0

過去 7 日: 0

過去 30 日: 0

今までの合計 1,117