メインコンテンツにスキップ

Samsung Galaxy S9 Back Cover Replacement

アーカイブされたガイド
このガイドは将来的な使用のためにのみ保存されてます。ご自身の修理作業には更新バージョンをご利用ください。

必要な工具と部品

  1. Samsung Galaxy S9 Back Cover Replacement, Back Cover: 手順 1、 1の画像 1
    • Heat the iOpener in the microwave for 30-60 seconds.

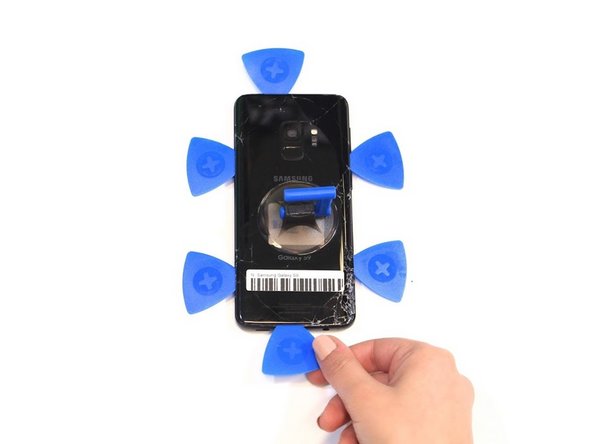
    • Apply the iOpener to the backside edge and let it sit for 2-3 minutes.

  2. Samsung Galaxy S9 Back Cover Replacement: 手順 2、 1の画像 1
    • Press the suction handle firmly on to the back cover.

    • Insert an opening pick between the back cover and the device's body while pulling upwards on the suction handle.

  3. Samsung Galaxy S9 Back Cover Replacement: 手順 3、 2の画像 1 Samsung Galaxy S9 Back Cover Replacement: 手順 3、 2の画像 2
    • Apply more opening picks to the edges of the phone, heating the other sides as needed.

    • Be patient. This step requires quite a bit of work. The adhesive is difficult to melt, making it time-consuming to remove the back of the phone.

    • Because the back panel is made of glass, inserting and sliding the opening picks is likely to crack the glass. If the glass does shatter, please cover it with packing tape to protect your hands from the sharp edges and fragments.

  4. Samsung Galaxy S9 Back Cover Replacement: 手順 4、 3の画像 1 Samsung Galaxy S9 Back Cover Replacement: 手順 4、 3の画像 2 Samsung Galaxy S9 Back Cover Replacement: 手順 4、 3の画像 3
    • Use the iFixit opening tool to separate the back cover from the rest of the device.

  5. Samsung Galaxy S9 Back Cover Replacement: 手順 5、 1の画像 1
    • Remove the back cover.

終わりに

To reassemble your device, follow these instructions in reverse order.

作成者

3人の作成者と共同で作成されました。

Ani Svadjian

メンバー登録日: 01/24/19

928 ポイント

2のガイドは作成済み

チーム

Cal Poly, Team S1-G6, White Winter 2019 Cal Poly, Team S1-G6, White Winter 2019人のメンバー

CPSU-WHITE-W19S1G6

4 メンバー

29のガイドは作成済み

0 件のコメント

コメントを追加

統計データ:

過去 24時間: 1

過去 7 日: 5

過去 30 日: 7

今までの合計 80