メインコンテンツにスキップ

このバージョンは誤った内容を含んでいる可能性があります。最新の承認済みスナップショットに切り替えてください。

必要な工具と部品

  1. , バックカバーを温めます: 手順 1、 1の画像 1
    • デバイスを開口すると、防水用シールを破壊します。作業を始める前に、交換用接着シールを準備してください。接着剤を交換せずにデバイスを組み立てる場合、防水機能が失われていますので、ご注意ください。

    • 温めたiOpenerを準備して、デバイス背面の右側端に沿って約2分間載せます。この作業はバックカバーに固定された接着剤を柔らかくします。

    • デバイスが十分温まる様に、 iOpenerを複数回に渡って温めなければなりません。加熱しすぎない様に、iOpenerの使用ガイドを参照してください。

    • ヘアドライヤー、ヒートガン、ホットプレートなども使用できますが、加熱しすぎないようにご注意ください。OLEDディスプレイと内蔵バッテリーは熱によるダメージに弱い性質があります。

  2. , 接着剤を切開します: 手順 2、 2の画像 1 , 接着剤を切開します: 手順 2、 2の画像 2
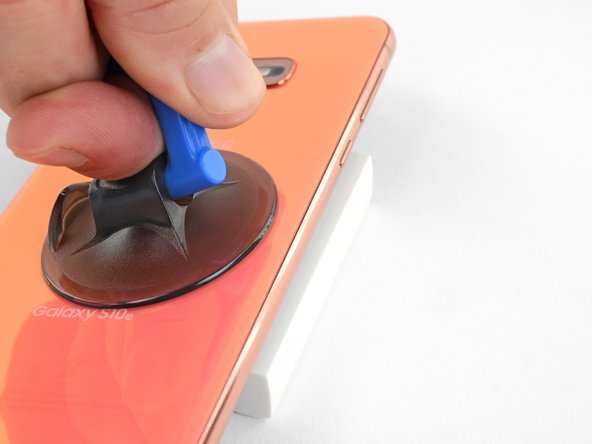
    • 次の手順では、バックカバーに留められた接着剤を切開します。

    • 接着剤が付けられた位置は、画像イメージで確認できます。

    • デバイスの外側から確認できるように、ハイライトされたエリアの接着剤をスライスして切開してください。

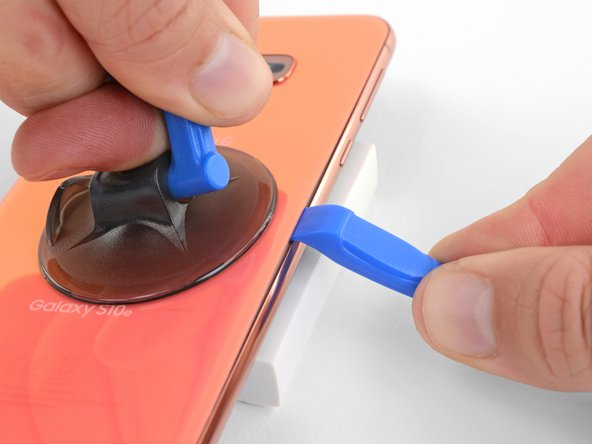
    • デバイス右側、Bixbyのすぐ下に留められた接着剤は大変薄いです。

  3. , 吸盤カップを装着します: 手順 3、 2の画像 1 , 吸盤カップを装着します: 手順 3、 2の画像 2
    • ここに翻訳を挿入する

    • ここに翻訳を挿入する

    • ここに翻訳を挿入する

  4. この手順は未翻訳です。 翻訳を手伝う。

    : 手順 4、 3の画像 1 : 手順 4、 3の画像 2 : 手順 4、 3の画像 3
    • Prop up the heated edge of the phone on something that is about 0.5 inches (13 mm) thick. This will angle the phone so that the opening tool is easier to insert.

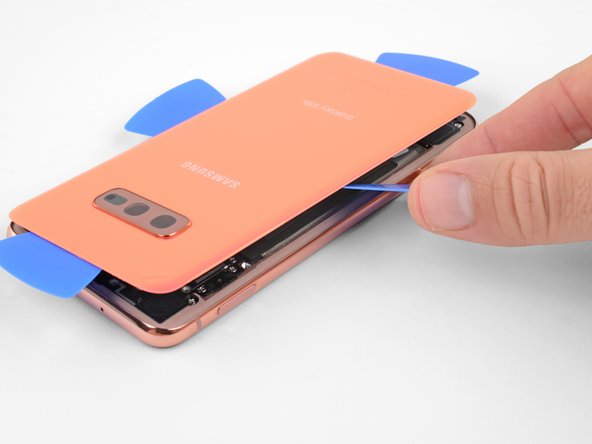
    • Lift the back cover's right edge with your suction cup, opening a slight gap between the back cover and the frame.

    • This may require a significant amount of force. If you have trouble, apply more heat to further soften the adhesive, and try again. The adhesive cools very fast, so you may need to heat it repeatedly.

    • If you're using an iOpener, follow the heating instructions to avoid overheating it, or the gel pack may burst.

    • Press the edge of an opening tool into the gap.
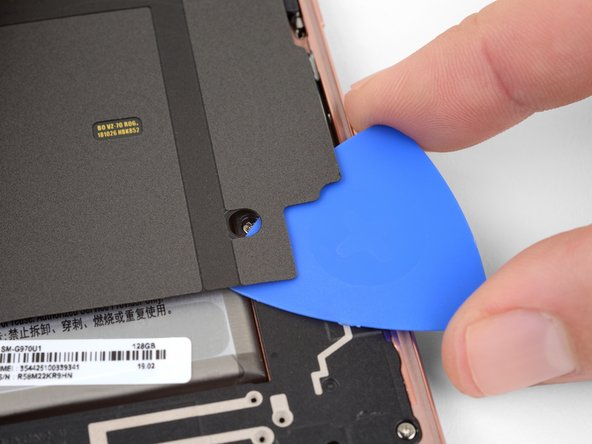
    • The rear glass can break if you use too much force or attempt to pry with metal tools.

  5. この手順は未翻訳です。 翻訳を手伝う。

    : 手順 5、 3の画像 1 : 手順 5、 3の画像 2 : 手順 5、 3の画像 3
    • Slide the opening tool along the right edge of the phone to slice through the adhesive securing the back cover.

  6. この手順は未翻訳です。 翻訳を手伝う。

    : 手順 6、 2の画像 1 : 手順 6、 2の画像 2
    • Insert an opening pick into the edge next to the opening tool. Leave the pick here to prevent the separated glue from re-adhering.

  7. この手順は未翻訳です。 翻訳を手伝う。

    : 手順 7、 1の画像 1
    • Apply a heated iOpener to the top edge of the phone for two minutes.

  8. この手順は未翻訳です。 翻訳を手伝う。

    : 手順 8、 3の画像 1 : 手順 8、 3の画像 2 : 手順 8、 3の画像 3
    • Insert an opening pick near the top right corner of the phone and slide it around the corner and across the top edge of the phone.

    • The glued area is larger here, so you'll need to insert your pick farther into the phone to separate it.

    • Leave the opening pick in place to prevent the adhesive from re-adhering.

  9. この手順は未翻訳です。 翻訳を手伝う。

    : 手順 9、 1の画像 1
    • Apply a heated iOpener to the left edge of the phone for two minutes.

  10. この手順は未翻訳です。 翻訳を手伝う。

    : 手順 10、 3の画像 1 : 手順 10、 3の画像 2 : 手順 10、 3の画像 3
    • Insert a new opening pick near the top left corner and slide it along the left edge of the phone.

    • Again, leave the opening pick in place in the left edge of the phone to prevent the adhesive from resealing.

  11. : 手順 11、 1の画像 1
    • スマートフォンの底部端に温めたiOpenerを2分間置きます。

  12. この手順は未翻訳です。 翻訳を手伝う。

    : 手順 12、 3の画像 1 : 手順 12、 3の画像 2 : 手順 12、 3の画像 3
    • Insert an opening pick near a bottom corner of the phone, and slide it along the bottom edge of the phone to separate the adhesive there.

    • The glued area is larger here, so you'll need to insert your pick farther into the phone to fully separate it.

  13. この手順は未翻訳です。 翻訳を手伝う。

    : 手順 13、 3の画像 1 : 手順 13、 3の画像 2 : 手順 13、 3の画像 3
    • Use the opening picks to very carefully pry up the back cover.

    • If you encounter any resistance, stop prying and use an opening pick to cut any remaining adhesive.

    • Remove the back cover.

  14. この手順は未翻訳です。 翻訳を手伝う。

    : 手順 14、 1の画像 1
    • Follow this guide to reinstall the back cover and replace the adhesive.

    • Be sure to turn on your phone and test your repair before installing new adhesive and resealing the phone.

    • If desired, you may reinstall the back cover without replacing the adhesive. Remove any large chunks of adhesive that might prevent the back cover from sitting down flush. After installation, heat the back cover and apply pressure to secure it. It won't be waterproof, but the leftover adhesive is usually more than strong enough to hold.

  15. この手順は未翻訳です。 翻訳を手伝う。

    : 手順 15、 1の画像 1
    • Remove the eight 3.9 mm Phillips screws securing the upper midframe to the phone.

  16. この手順は未翻訳です。 翻訳を手伝う。

    : 手順 16、 2の画像 1 : 手順 16、 2の画像 2
    • Slide an opening pick under the bottom right corner of the upper midframe to separate the adhesive holding it to the lower midframe.

  17. この手順は未翻訳です。 翻訳を手伝う。

    : 手順 17、 2の画像 1 : 手順 17、 2の画像 2
    • Insert the point of a spudger in the small cutout on the right edge of the plastic part of the upper midframe, near the Bixby button.

    • Use the point of the spudger to pry the midframe up from the phone chassis.

  18. この手順は未翻訳です。 翻訳を手伝う。

    : 手順 18、 1の画像 1
    • Lift the midframe by the plastic section and remove it from the phone.

    • To reinstall, first insert the top edge of the assembly into the phone's frame, and then gently press down on the rest of the assembly to snap it into place.

  19. この手順は未翻訳です。 翻訳を手伝う。

    : 手順 19、 2の画像 1 : 手順 19、 2の画像 2
    • Use the flat end of a spudger to pry the battery connector straight up from its socket and disconnect it.

  20. この手順は未翻訳です。 翻訳を手伝う。

    : 手順 20、 2の画像 1 : 手順 20、 2の画像 2
    この手順で使用する道具:
    iFixit Adhesive Remover
    $19.99
    購入する
    • This step can be completed using either adhesive remover or high concentration (over 90%) isopropyl alcohol.

    • Prop the bottom edge of the phone up to angle the phone so that the adhesive remover will run from the bottom of the battery toward the top.

    • Apply isopropyl alcohol or adhesive remover along the bottom edge of the battery. Allow it to sit for several minutes to allow the adhesive to weaken.

  21. この手順は未翻訳です。 翻訳を手伝う。

    : 手順 21、 2の画像 1 : 手順 21、 2の画像 2
    • Use the flat end of a spudger to carefully pry the battery out of the phone.

    • Try your best not to deform the battery during this process. Soft-shell lithium-ion batteries can leak dangerous chemicals, catch fire, or even explode if damaged. Do not use excessive force or pry at the battery with metal tools.

    • If you encounter significant resistance or the battery starts to deform, repeat the last step to further dissolve the adhesive.

  22. この手順は未翻訳です。 翻訳を手伝う。

    : 手順 22、 2の画像 1 : 手順 22、 2の画像 2
    • Remove the battery.

    • Do not reuse the battery after it has been removed, as doing so is a potential safety hazard. Replace it with a new battery.

    • To install a new battery and adhesive, follow this guide.

ゴール

39 の人々がこのガイドを完成させました。

作成者

4人の作成者と共同で作成されました。

Adam O'Camb

メンバー登録日: 04/11/15

196,194 ポイント

416のガイドは作成済み

12 件のコメント

I was going to publish this guide but somebody did it already for me. Thanks!

By the way the color of that phone in the guide is hideous in my opinion.

Dinan Blueje - 返信

When you say “moderate” difficulty, how what’s making it difficult or where is the risk coming from? With the right tools, patience, and even a small bit of experience replacing a screen in an admittedly easy Nokia Lumia phone, what could go wrong, and what would you recommend?

Mark Stretton - 返信

Hi Mark, the hardest part of this guide is dealing with all the adhesive without damaging anything. The back cover and the battery are both heavily glued down. To get the back cover off without cracking it, I’d recommend plenty of heat and very patient and gentle prying. If the prying gets really tough, try heating the back a little more. Removing the battery can be tough as well, but using adhesive remover helps a lot. Follow the steps in the guide and make sure you give the adhesive remover a few minutes to soak in. If prying gets difficult, add a little more adhesive remover and wait a couple minutes before continuing. Hope that helps!

Adam O'Camb -

We ran into the problem of the octa not seperating with the back glass. We were using the AoD JIG. What do u recommend as the next step in that instance?

rfralin - 返信

If I buy the kit from ifixit, are the battery going to be relatively new? or the batteries have been seating in shelves since OEM days.

Reaz Tahmidur Rahman - 返信

コメントを追加

統計データ:

過去 24時間: 83

過去 7 日: 542

過去 30 日: 2,212

今までの合計 104,234