メインコンテンツにスキップ

Samsung Galaxy Rush Front Camera Replacement

必要な工具と部品

  1. Samsung Galaxy Rush Front Camera Replacement, Front Camera: 手順 1、 2の画像 1 Samsung Galaxy Rush Front Camera Replacement, Front Camera: 手順 1、 2の画像 2
    • Looking at the back of your phone, use your finger to remove back cover.

  2. Samsung Galaxy Rush Front Camera Replacement: 手順 2、 2の画像 1 Samsung Galaxy Rush Front Camera Replacement: 手順 2、 2の画像 2
    • Remove the battery,

  3. Samsung Galaxy Rush Front Camera Replacement: 手順 3、 1の画像 1
    • With a small phillips-head screw driver, remove the six screws holding the back panel in place.

  4. Samsung Galaxy Rush Front Camera Replacement: 手順 4、 2の画像 1 Samsung Galaxy Rush Front Camera Replacement: 手順 4、 2の画像 2
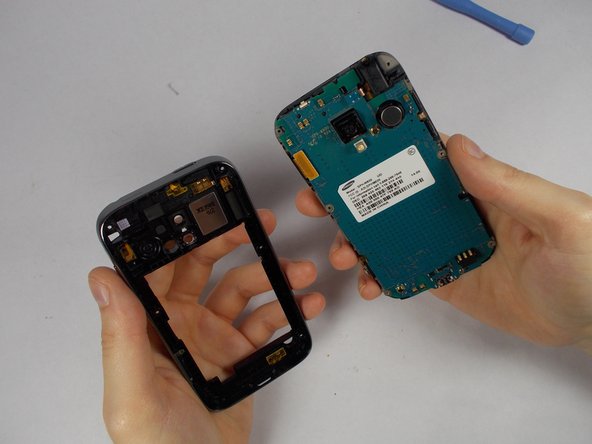
    • Use the pry tool to pry the back panel from the rest of the phone. Pry from the edge closest to the screen for simplicity.

  5. Samsung Galaxy Rush Front Camera Replacement: 手順 5、 2の画像 1 Samsung Galaxy Rush Front Camera Replacement: 手順 5、 2の画像 2
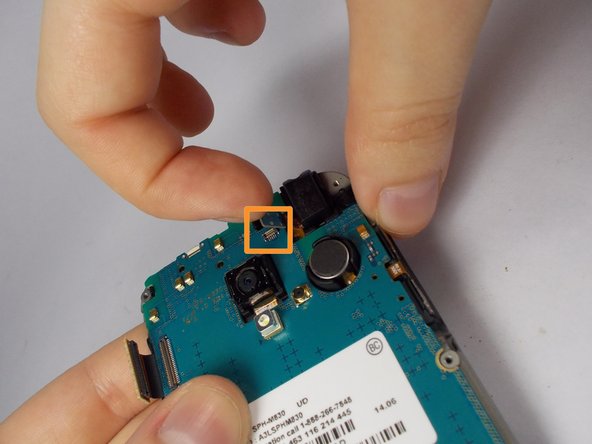
    • Using tweezers, gently lift connectors from motherboard.

    • A connector will be on the upper left

    • The second connector is located towards the top of the phone. Above the camera. It comes off with ease.

  6. Samsung Galaxy Rush Front Camera Replacement: 手順 6、 2の画像 1 Samsung Galaxy Rush Front Camera Replacement: 手順 6、 2の画像 2
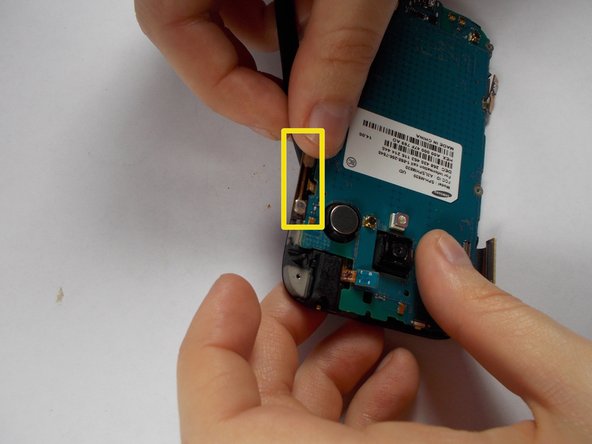
    • Use the tweezers to carefully remove the 2 adhesive orange ribbons.

    • These stay attached to the motherboard so be careful not to break them.

    • They are on the side of the phone.

  7. Samsung Galaxy Rush Front Camera Replacement: 手順 7、 1の画像 1
    • Use a philips-head screwdriver to remove the single screw on the bottom of the phone. Located to the right of the charging port.

  8. Samsung Galaxy Rush Front Camera Replacement: 手順 8、 1の画像 1
    • Lift the motherboard upwards separating it from your screen.

  9. Samsung Galaxy Rush Front Camera Replacement: 手順 9、 1の画像 1
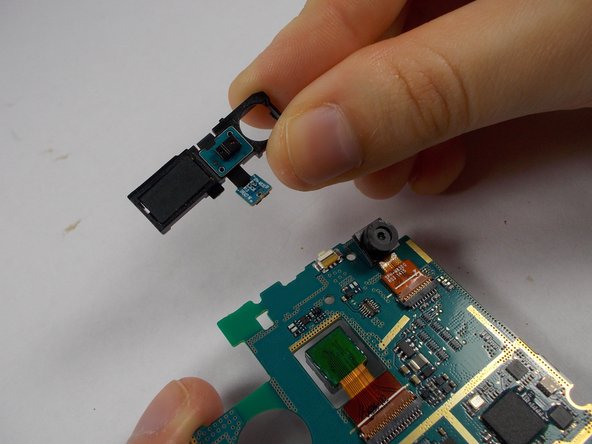
    • Hold motherboard so that the circuits face away from you

    • Pop off the two black tabs on the upper most part of the motherboard.

  10. Samsung Galaxy Rush Front Camera Replacement: 手順 10、 1の画像 1
    • Flip the motherboard over so that the circuits are now facing your direction.

  11. Samsung Galaxy Rush Front Camera Replacement: 手順 11、 2の画像 1 Samsung Galaxy Rush Front Camera Replacement: 手順 11、 2の画像 2
    • Lift and remove the connecting tab

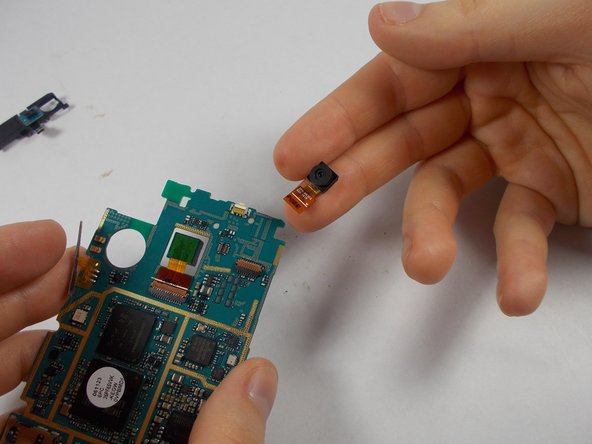
  12. Samsung Galaxy Rush Front Camera Replacement: 手順 12、 2の画像 1 Samsung Galaxy Rush Front Camera Replacement: 手順 12、 2の画像 2
    • Gently take the front camera with two fingers and pull upwards. A wiggle may help.

終わりに

To reassemble your device, follow these instructions in reverse order.

作成者

6人の作成者と共同で作成されました。

Matthew

メンバー登録日: 10/22/14

1 ポイント

2のガイドは作成済み

チーム

UMass Dartmouth, Team 6-4, Vijaybhaskar Fall 2014 UMass Dartmouth, Team 6-4, Vijaybhaskar Fall 2014人のメンバー

UMASSD-VIJAYBHASKAR-F14S6G4

3 メンバー

5のガイドは作成済み

0 件のコメント

コメントを追加

統計データ:

過去 24時間: 0

過去 7 日: 0

過去 30 日: 0

今までの合計 181