はじめに
The headphone jack is the place where headphones are inserted into the phone to redirect the sound from the speaker to external headphones. If you are experiencing an issue, check to make sure the headphones are not the source. If you experience issues with multiple headphones in the same jack, you may consider replacing the jack. The headphone jack is connected to the vibrator and can be removed by gently pulling on the assembly.
必要な工具と部品
-
-
Insert your fingernail or a plastic tool into the opening near the headphone jack on top of the phone.
-
Gently pry apart the rear case from the midframe and remove.
-
-
-
Insert your fingernail, or a plastic tool, into the crevice on the lower left side of the back side.
-
Gently pry the battery from the back of the phone.
-
-
-
-
With the Phillips head screwdriver, remove all seven 4.0 mm screws, highlighted in red, from the rear case.
-
Insert your finger or an opening tool underneath the midframe and gently pry apart from the phone.
-
-
-
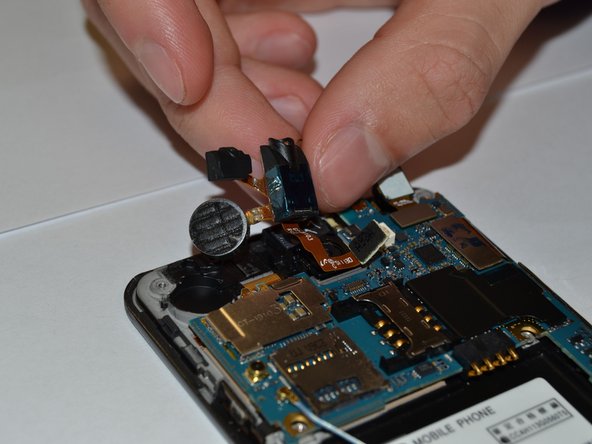
The headphone jack is located near the top left side of the motherboard.
-
To remove the headphone jack, gently pull on the area indicated in red until it detaches from the motherboard.
-


To reassemble your device, follow these instructions in reverse order.
To reassemble your device, follow these instructions in reverse order.
4 の人々がこのガイドを完成させました。
チーム

Clemson, Team 3-3, Benson Fall 2014 Clemson, Team 3-3, Benson Fall 2014人のメンバー
CLEM-BENSON-F14S3G3
5 メンバー
8のガイドは作成済み