メインコンテンツにスキップ

Samsung Galaxy Prevail 2 Rear Facing Camera Replacement

必要な工具と部品

  1. Samsung Galaxy Prevail 2 Rear Facing Camera Replacement, Removing Back Casing: 手順 1、 3の画像 1 Samsung Galaxy Prevail 2 Rear Facing Camera Replacement, Removing Back Casing: 手順 1、 3の画像 2 Samsung Galaxy Prevail 2 Rear Facing Camera Replacement, Removing Back Casing: 手順 1、 3の画像 3
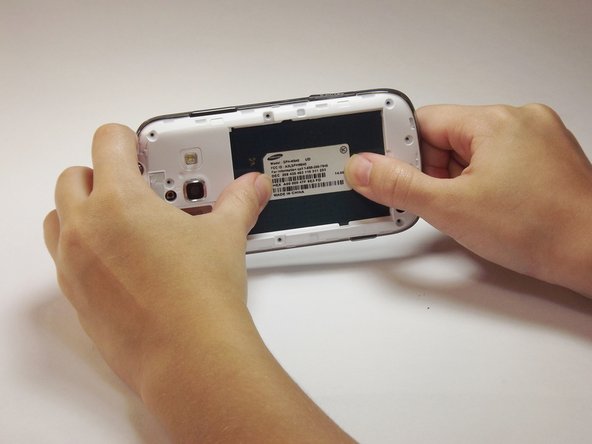
    • Using your finger nails or the spudger; pry the plastic casing open, and pull away from the body of the phone.

  2. Samsung Galaxy Prevail 2 Rear Facing Camera Replacement, Remove Battery: 手順 2、 3の画像 1 Samsung Galaxy Prevail 2 Rear Facing Camera Replacement, Remove Battery: 手順 2、 3の画像 2 Samsung Galaxy Prevail 2 Rear Facing Camera Replacement, Remove Battery: 手順 2、 3の画像 3
    • Gently pull the battery out of the phone.

  3. Samsung Galaxy Prevail 2 Rear Facing Camera Replacement, Remove Screws: 手順 3、 2の画像 1 Samsung Galaxy Prevail 2 Rear Facing Camera Replacement, Remove Screws: 手順 3、 2の画像 2
    • Unscrew all of the screws.

    • Be sure to set the screws aside in a safe place.

  4. Samsung Galaxy Prevail 2 Rear Facing Camera Replacement, Pry Off Back Of Phone: 手順 4、 3の画像 1 Samsung Galaxy Prevail 2 Rear Facing Camera Replacement, Pry Off Back Of Phone: 手順 4、 3の画像 2 Samsung Galaxy Prevail 2 Rear Facing Camera Replacement, Pry Off Back Of Phone: 手順 4、 3の画像 3
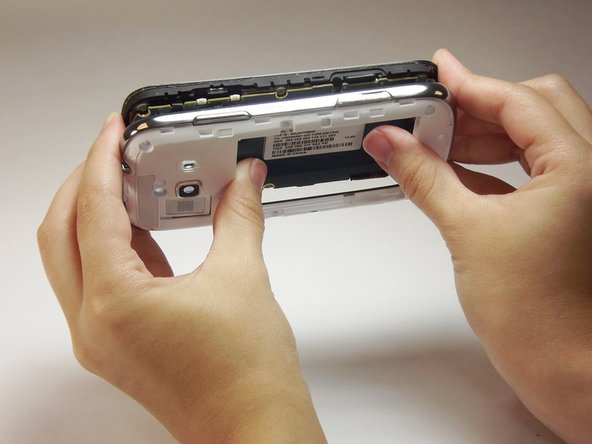
    • Insert the plastic prying tool between the silver frame and the white face of the phone to pry off the front frame.

    • Make sure to pry around the entire frame before attempting to loosen it.

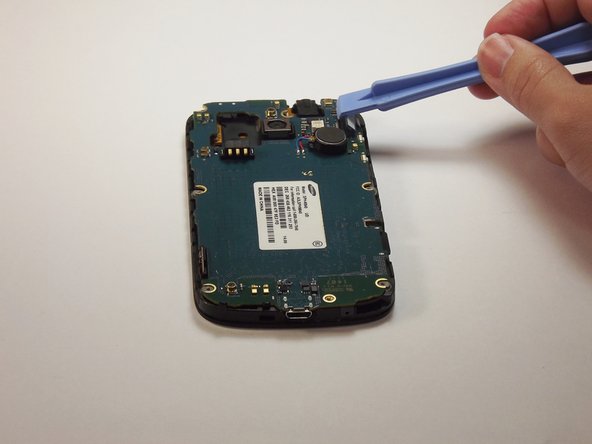
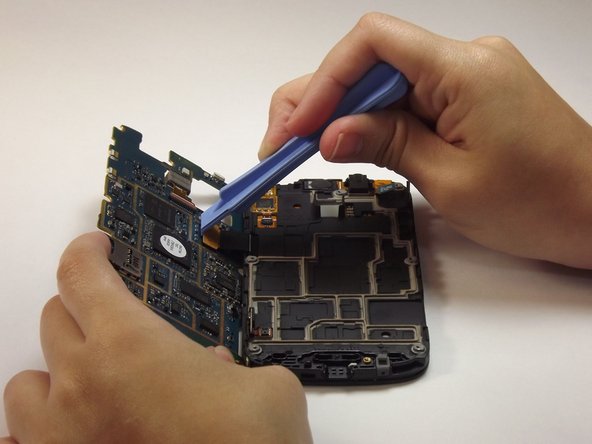
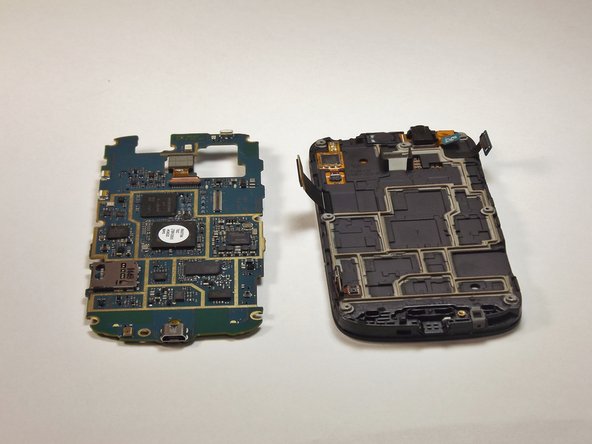
    • Push the motherboard out using your thumbs as shown

  5. Samsung Galaxy Prevail 2 Rear Facing Camera Replacement, Open Up The Motherboard: 手順 5、 3の画像 1 Samsung Galaxy Prevail 2 Rear Facing Camera Replacement, Open Up The Motherboard: 手順 5、 3の画像 2 Samsung Galaxy Prevail 2 Rear Facing Camera Replacement, Open Up The Motherboard: 手順 5、 3の画像 3
    • Lift the flap up using the plastic prying tool.

  6. Samsung Galaxy Prevail 2 Rear Facing Camera Replacement, Detach Motherboard: 手順 6、 3の画像 1 Samsung Galaxy Prevail 2 Rear Facing Camera Replacement, Detach Motherboard: 手順 6、 3の画像 2 Samsung Galaxy Prevail 2 Rear Facing Camera Replacement, Detach Motherboard: 手順 6、 3の画像 3
    • Lift the second flap to detach the motherboard completely.

  7. Samsung Galaxy Prevail 2 Rear Facing Camera Replacement, Locate Camera: 手順 7、 3の画像 1 Samsung Galaxy Prevail 2 Rear Facing Camera Replacement, Locate Camera: 手順 7、 3の画像 2 Samsung Galaxy Prevail 2 Rear Facing Camera Replacement, Locate Camera: 手順 7、 3の画像 3
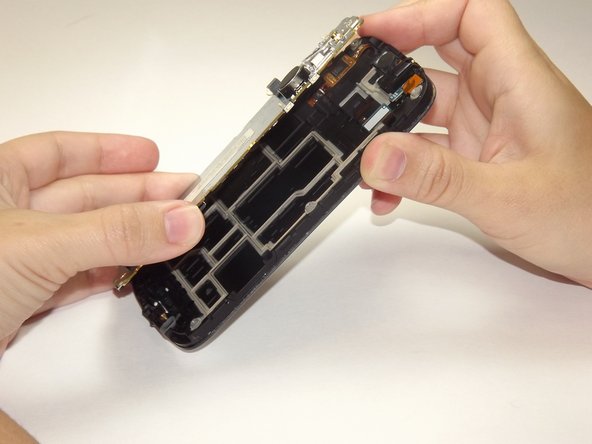
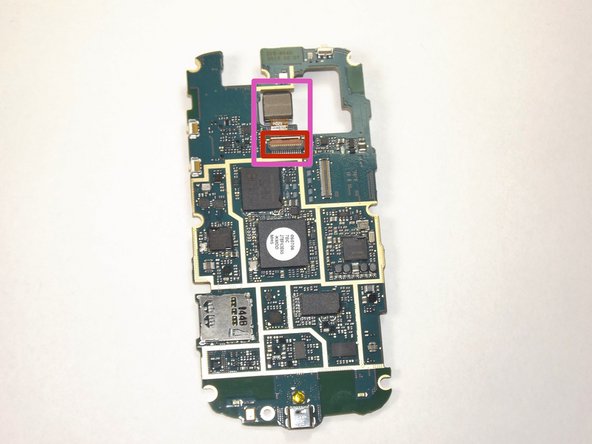
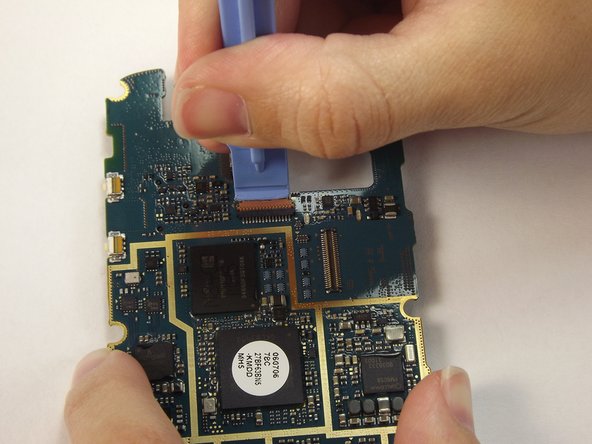
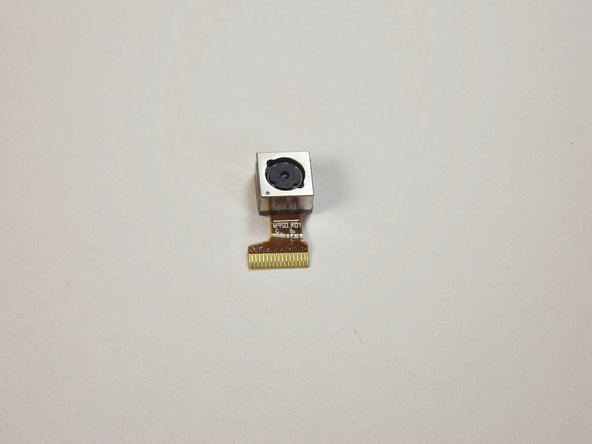
    • With plastic prying tool, lift the flap connected to the camera (indicated in red) to remove it.

    • Be sure that you are looking at the back face of the motherboard.

  8. Samsung Galaxy Prevail 2 Rear Facing Camera Replacement, Detach Camera: 手順 8、 3の画像 1 Samsung Galaxy Prevail 2 Rear Facing Camera Replacement, Detach Camera: 手順 8、 3の画像 2 Samsung Galaxy Prevail 2 Rear Facing Camera Replacement, Detach Camera: 手順 8、 3の画像 3
    • Carefully lift and remove the camera from its position.

終わりに

To reassemble your device, follow these instructions in reverse order.

8 の人々がこのガイドを完成させました。

作成者

4人の作成者と共同で作成されました。

Alexandra Hernandez

メンバー登録日: 10/08/14

741 ポイント

3のガイドは作成済み

チーム

USF Tampa, Team 14-4, Leahy Fall 2014 USF Tampa, Team 14-4, Leahy Fall 2014人のメンバー

USFT-LEAHY-F14S14G4

4 メンバー

5のガイドは作成済み

0 件のコメント

コメントを追加

統計データ:

過去 24時間: 0

過去 7 日: 0

過去 30 日: 1

今までの合計 1,394