メインコンテンツにスキップ

Samsung Galaxy Nexus Main Display Glass Replacement

必要な工具と部品

  1. Samsung Galaxy Nexus Main Display Glass Replacement, Removing Back Cover: 手順 1、 1の画像 1
    • Open the back cover of the phone with your fingers or use the plastic opening tools to pry the back cover off of the phone.

    • Remove the battery by prying it free from the divot at the bottom.

    • Store the back cover and the battery in a safe place, such as a bowl, until you are ready to re-install them.

  2. Samsung Galaxy Nexus Main Display Glass Replacement: 手順 2、 1の画像 1
    • Remove the four 4.5 mm Phillips screws from the rear of the phone.

  3. Samsung Galaxy Nexus Main Display Glass Replacement: 手順 3、 2の画像 1 Samsung Galaxy Nexus Main Display Glass Replacement: 手順 3、 2の画像 2
    • Flip the phone over so that the screen faces upward.

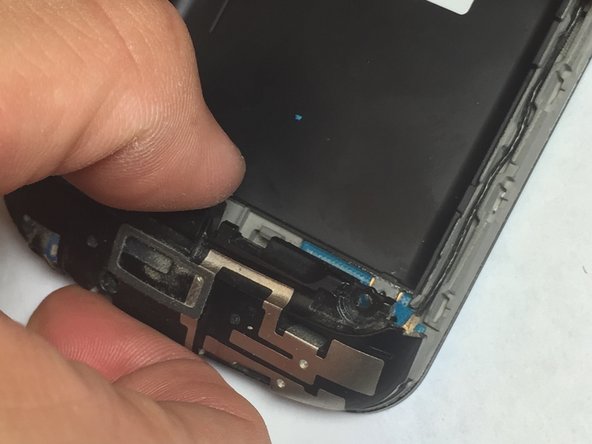
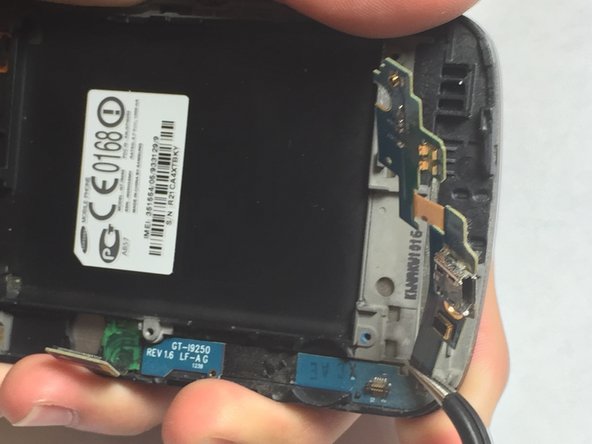
    • Insert a plastic opening tool into the seam between the screen and the outer case. Work the plastic opening tool around the phone without removing it from the seam.

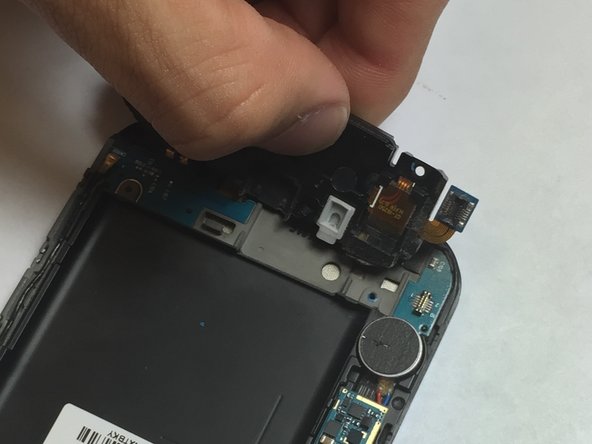
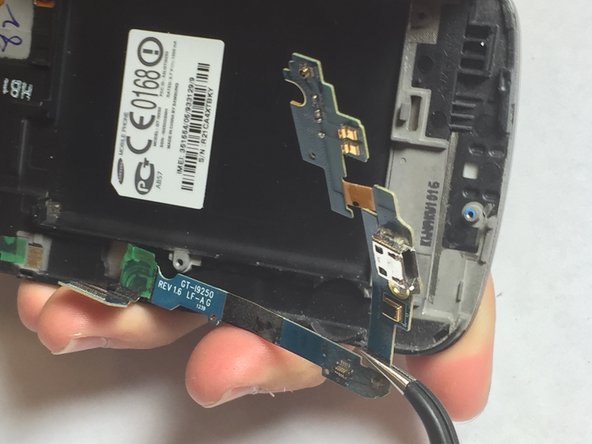
    • Slowly pry the outer case from the screen.

    • Work carefully. Excessive force can easily damage the case.

    It helps a lot to pry from the inside of the casing. After all the screws are out, the plastic is very loosely held together.

    Arvind Vasudevan - 返信

  4. Samsung Galaxy Nexus Main Display Glass Replacement: 手順 4、 3の画像 1 Samsung Galaxy Nexus Main Display Glass Replacement: 手順 4、 3の画像 2 Samsung Galaxy Nexus Main Display Glass Replacement: 手順 4、 3の画像 3
    • Remove a single 4 mm Phillips #00 screw from the bottom of the phone.

    • Lift up the flat connector from its socket on the motherboard.

    • Lift the entire headphone jack assembly from the phone.

  5. Samsung Galaxy Nexus Main Display Glass Replacement: 手順 5、 2の画像 1 Samsung Galaxy Nexus Main Display Glass Replacement: 手順 5、 2の画像 2
    • Disconnect the two ribbon cables from the motherboard.

  6. Samsung Galaxy Nexus Main Display Glass Replacement: 手順 6、 1の画像 1
    • Using tweezers or a spudger, lift the vibrator motor from its recess in the midframe.

  7. Samsung Galaxy Nexus Main Display Glass Replacement: 手順 7、 2の画像 1 Samsung Galaxy Nexus Main Display Glass Replacement: 手順 7、 2の画像 2
    • Using tweezers, gently disconnect the antenna cable from its socket on the motherboard.

  8. Samsung Galaxy Nexus Main Display Glass Replacement: 手順 8、 2の画像 1 Samsung Galaxy Nexus Main Display Glass Replacement: 手順 8、 2の画像 2
    • Use tweezers to pull the motherboard out of the phone.

    • Work carefully. Depending on the model, the underside of the motherboard may still have ribbon cables connecting it to the display assembly.

    Is this a bug that there are no images on step 5/6? the text reads "Detach the highlighted cables" so I assume there should be an image?

    Herbert - 返信

  9. Samsung Galaxy Nexus Main Display Glass Replacement: 手順 9、 3の画像 1 Samsung Galaxy Nexus Main Display Glass Replacement: 手順 9、 3の画像 2 Samsung Galaxy Nexus Main Display Glass Replacement: 手順 9、 3の画像 3
    • Starting near the USB port, use your tweezers to pull the small daughterboard from the phone.

終わりに

To reassemble your device, follow these instructions in reverse order.

13 の人々がこのガイドを完成させました。

作成者

10人の作成者と共同で作成されました。

Carmine Tenaglia

メンバー登録日: 09/15/13

320 ポイント

1ガイドが承認済み

チーム

Oakland University, Team 1-17, Ruszkiewicz Fall 2013 Oakland University, Team 1-17, Ruszkiewicz Fall 2013人のメンバー

OAK-RUSZKIEWICZ-F13S1G17

1 メンバー

1のガイドは作成済み

2 件のコメント

with this guide , I found this repair easy to do. Thank you Tom G.

Thomas Giles - 返信

Deberían d3 poner los diagramas eléctricos para reparar gracias

manchadoshow - 返信

コメントを追加

統計データ:

過去 24時間: 0

過去 7 日: 0

過去 30 日: 1

今までの合計 20,671