メインコンテンツにスキップ

Samsung Galaxy Nexus Front Camera Lens Replacement

必要な工具と部品

  1. Samsung Galaxy Nexus Front Camera Lens Replacement, Back of Phone: 手順 1、 1の画像 1
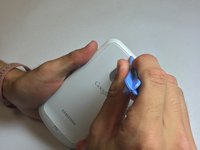
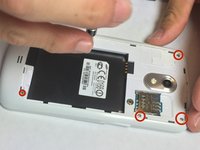
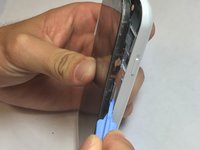
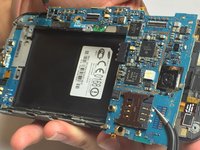
    • You must open the back of the phone to access the battery. To do this use the plastic opening tools or your fingernail and insert it into the divot.

  2. Samsung Galaxy Nexus Front Camera Lens Replacement, Removal of Back Cover: 手順 2、 3の画像 1 Samsung Galaxy Nexus Front Camera Lens Replacement, Removal of Back Cover: 手順 2、 3の画像 2 Samsung Galaxy Nexus Front Camera Lens Replacement, Removal of Back Cover: 手順 2、 3の画像 3
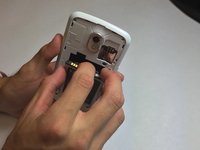
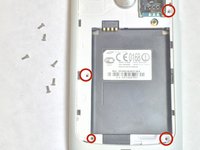
    • Remove the back cover of the phone by moving the prying tool or your fingernail away from the phone while it is still in the divot.

  3. Samsung Galaxy Nexus Front Camera Lens Replacement, Removal of Battery: 手順 3、 3の画像 1 Samsung Galaxy Nexus Front Camera Lens Replacement, Removal of Battery: 手順 3、 3の画像 2 Samsung Galaxy Nexus Front Camera Lens Replacement, Removal of Battery: 手順 3、 3の画像 3
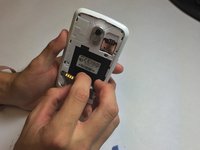
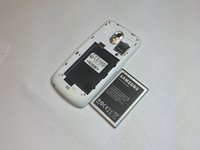
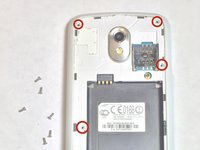
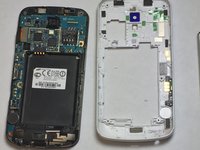
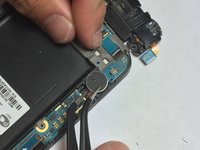
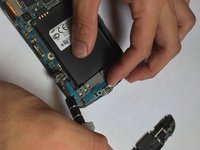
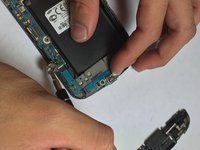
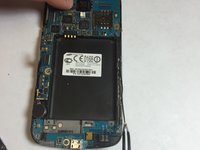
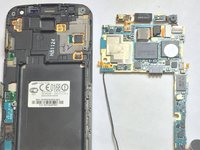
    • Insert your finger into the divot of the battery and pull the battery towards yourself to remove.

    • This is when a new battery will be inserted.
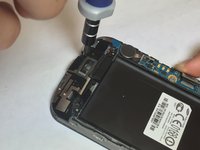
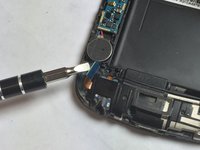
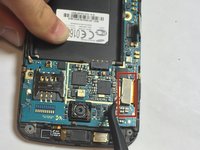
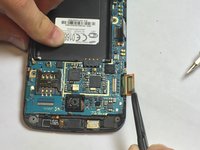
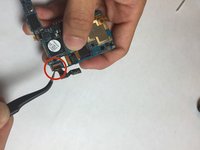
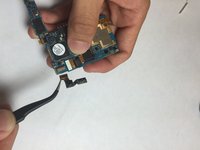
  4. Samsung Galaxy Nexus Front Camera Lens Replacement, Motherboard: 手順 4、 3の画像 1 Samsung Galaxy Nexus Front Camera Lens Replacement, Motherboard: 手順 4、 3の画像 2 Samsung Galaxy Nexus Front Camera Lens Replacement, Motherboard: 手順 4、 3の画像 3
    • Remove 4.4 mm screws using a PH # 000 as indicated on the picture.

  5. Samsung Galaxy Nexus Front Camera Lens Replacement: 手順 5、 3の画像 1 Samsung Galaxy Nexus Front Camera Lens Replacement: 手順 5、 3の画像 2 Samsung Galaxy Nexus Front Camera Lens Replacement: 手順 5、 3の画像 3
    • After removing the screws be sure to turn the phone right side up.

    • Insert your plastic opening tool between the screen and the outer case. Move the opening tool around the phone without removing it from in between the screen and the shell of the phone.

    • Pop the screen out of the outer shell. Be cautious not to damage the control board or the screen.

  6. Samsung Galaxy Nexus Front Camera Lens Replacement, Removing Control Board: 手順 6、 2の画像 1 Samsung Galaxy Nexus Front Camera Lens Replacement, Removing Control Board: 手順 6、 2の画像 2
    • Unscrew 4.4mm with a PH #000 marked screw.

  7. Samsung Galaxy Nexus Front Camera Lens Replacement: 手順 7、 2の画像 1 Samsung Galaxy Nexus Front Camera Lens Replacement: 手順 7、 2の画像 2
    • With the flat head screw driver pull up the blue connector.

  8. Samsung Galaxy Nexus Front Camera Lens Replacement: 手順 8、 3の画像 1 Samsung Galaxy Nexus Front Camera Lens Replacement: 手順 8、 3の画像 2 Samsung Galaxy Nexus Front Camera Lens Replacement: 手順 8、 3の画像 3
    • With you finger or prying tool pull back bottom module.

  9. Samsung Galaxy Nexus Front Camera Lens Replacement: 手順 9、 3の画像 1 Samsung Galaxy Nexus Front Camera Lens Replacement: 手順 9、 3の画像 2 Samsung Galaxy Nexus Front Camera Lens Replacement: 手順 9、 3の画像 3
    • Remove the internal battery using tweezers or your flat head screw driver.

    • There is glue at the bottom keeping battery and chassis stuck together.

  10. Samsung Galaxy Nexus Front Camera Lens Replacement: 手順 10、 2の画像 1 Samsung Galaxy Nexus Front Camera Lens Replacement: 手順 10、 2の画像 2
    • Peel the display connector strip off the main circuit board using the tweezers.

    • Peel the USB connector strip off the main circuit board using the tweezers.

  11. Samsung Galaxy Nexus Front Camera Lens Replacement: 手順 11、 3の画像 1 Samsung Galaxy Nexus Front Camera Lens Replacement: 手順 11、 3の画像 2 Samsung Galaxy Nexus Front Camera Lens Replacement: 手順 11、 3の画像 3
    • Remove the antenna using either your fingers or tweezers.

  12. Samsung Galaxy Nexus Front Camera Lens Replacement: 手順 12、 3の画像 1 Samsung Galaxy Nexus Front Camera Lens Replacement: 手順 12、 3の画像 2 Samsung Galaxy Nexus Front Camera Lens Replacement: 手順 12、 3の画像 3
    • Using tweezers, pull the top circuit board off.

    • Depending on your model, there may be ribbon cable connectors attached to the underside of the board. Be careful not to rip them out of the sockets when removing the board.

  13. Samsung Galaxy Nexus Front Camera Lens Replacement, Front Camera Lens: 手順 13、 3の画像 1 Samsung Galaxy Nexus Front Camera Lens Replacement, Front Camera Lens: 手順 13、 3の画像 2 Samsung Galaxy Nexus Front Camera Lens Replacement, Front Camera Lens: 手順 13、 3の画像 3
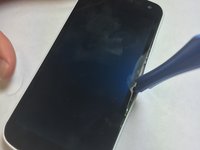
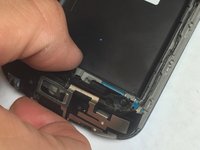
    • Use the tweezers flip up the circuit for the front camera.

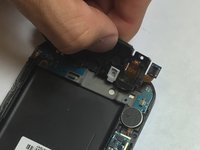
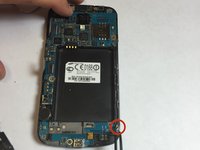
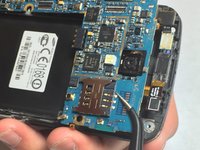
    • Use the tweezers pull out the front camera.

終わりに

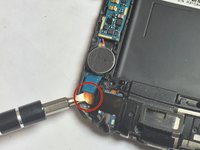
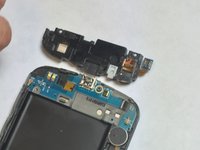
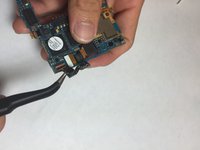
To reassemble your device, follow these instructions in reverse order.

4 の人々がこのガイドを完成させました。

作成者

3人の作成者と共同で作成されました。

Dae Young Yoon

メンバー登録日: 09/22/14

226 ポイント

1ガイドが承認済み

チーム

USF Tampa, Team 4-6, Brown Fall 2014 USF Tampa, Team 4-6, Brown Fall 2014人のメンバー

USFT-BROWN-F14S4G6

3 メンバー

1のガイドは作成済み

0 件のコメント

コメントを追加

統計データ:

過去 24時間: 0

過去 7 日: 1

過去 30 日: 4

今までの合計 782