メインコンテンツにスキップ

Samsung Galaxy M51 Screen Replacement

必要な工具と部品

  1. Samsung Galaxy M51 Screen Replacement, How to remove the SIM Tray: 手順 1、 3の画像 1 Samsung Galaxy M51 Screen Replacement, How to remove the SIM Tray: 手順 1、 3の画像 2 Samsung Galaxy M51 Screen Replacement, How to remove the SIM Tray: 手順 1、 3の画像 3
    • Insert a SIM eject tool into the small hole on the SIM card tray on the left edge of the phone.

    • Press firmly to eject the tray.

    • Remove the SIM card tray.

    • When reinserting the cards, make sure to properly orient them in the tray.

  2. Samsung Galaxy M51 Screen Replacement, Heat an iOpener: 手順 2、 1の画像 1
    • Before beginning this procedure, completely power off your phone.

    • Prepare an iOpener and apply it to the back cover for at least two minutes.

    • A hair dryer, heat gun, or hot plate may also be used, but be careful not to overheat the phone—the display and internal battery are both susceptible to heat damage.

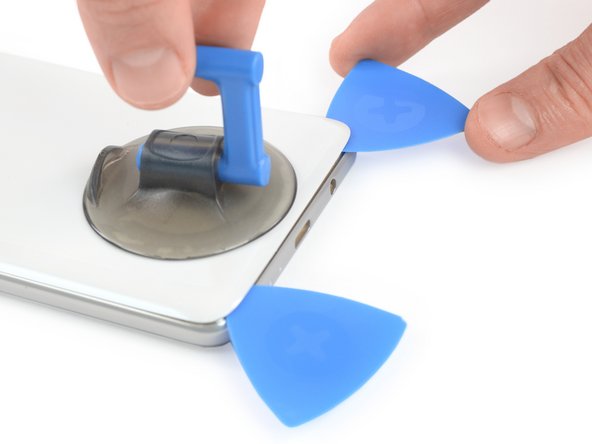
  3. Samsung Galaxy M51 Screen Replacement, Create an opening gap: 手順 3、 3の画像 1 Samsung Galaxy M51 Screen Replacement, Create an opening gap: 手順 3、 3の画像 2 Samsung Galaxy M51 Screen Replacement, Create an opening gap: 手順 3、 3の画像 3
    • Apply a suction handle to the back cover, as close to the USB-C port as possible.

    • Lift the back cover's bottom edge with your suction handle, opening a slight gap between the back cover and the frame.

    • Insert the tip of an opening pick in the gap you created.

    • Slide the opening pick to the bottom left corner and leave it there.

  4. Samsung Galaxy M51 Screen Replacement, Slice through the adhesive: 手順 4、 2の画像 1 Samsung Galaxy M51 Screen Replacement, Slice through the adhesive: 手順 4、 2の画像 2
    • Insert a second opening pick and slide it from the bottom left corner to the bottom right corner to cut the adhesive.

    • Leave the opening picks in place to prevent the adhesive from resealing.

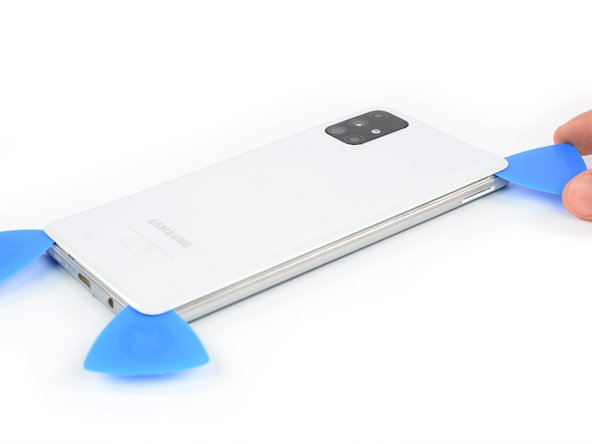
  5. Samsung Galaxy M51 Screen Replacement: 手順 5、 2の画像 1 Samsung Galaxy M51 Screen Replacement: 手順 5、 2の画像 2
    • Insert a third opening pick under the bottom right corner of the back cover.

    • If you have any trouble, apply more heat to further soften the adhesive. Follow the iOpener instructions to avoid overheating.

    • Slide it along the right edge of the phone to the top right corner to cut the adhesive.

    • Leave the opening pick in the top right corner to prevent the adhesive from resealing.

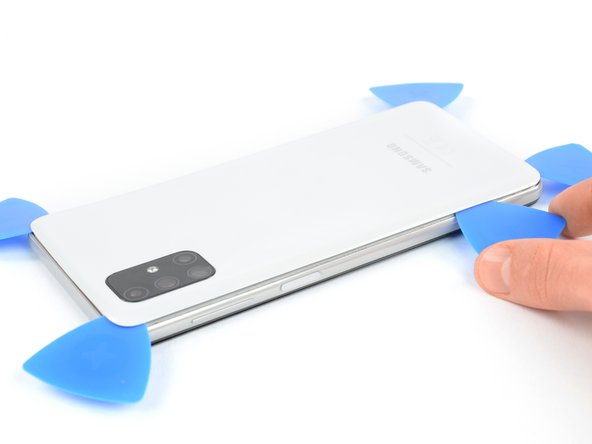
  6. Samsung Galaxy M51 Screen Replacement: 手順 6、 2の画像 1 Samsung Galaxy M51 Screen Replacement: 手順 6、 2の画像 2
    • Insert a fourth opening pick under the top right corner.

    • Slide it along the top edge to the left corner to cut the adhesive.

    • Leave the opening pick in its place to prevent the adhesive from resealing.

  7. Samsung Galaxy M51 Screen Replacement: 手順 7、 2の画像 1 Samsung Galaxy M51 Screen Replacement: 手順 7、 2の画像 2
    • Insert a fifth opening pick on the top left corner and slide it along the edge to cut the remaining adhesive.

  8. Samsung Galaxy M51 Screen Replacement, Remove the back cover: 手順 8、 1の画像 1
    • Remove the back cover.

  9. Samsung Galaxy M51 Screen Replacement, Disconnect the fingerprint sensor: 手順 9、 2の画像 1 Samsung Galaxy M51 Screen Replacement, Disconnect the fingerprint sensor: 手順 9、 2の画像 2
    • Use the pointy end of a spudger to disconnect the fingerprint sensor from the motherboard.

  10. Samsung Galaxy M51 Screen Replacement, Remove the screws: 手順 10、 1の画像 1
    • Remove the 15 4.0 mm-long Phillips #00 screws securing the midframe.

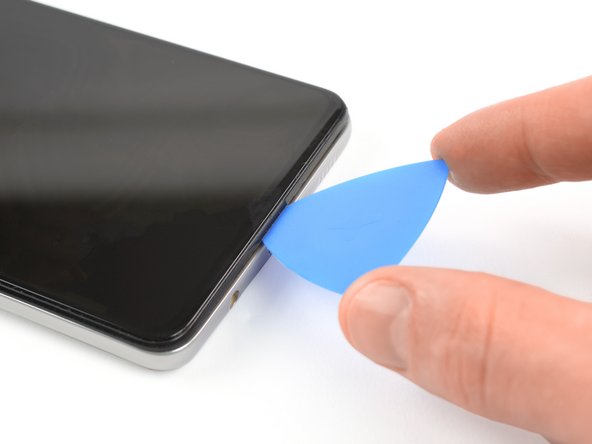
  11. Samsung Galaxy M51 Screen Replacement, Release the plastic clips: 手順 11、 3の画像 1 Samsung Galaxy M51 Screen Replacement, Release the plastic clips: 手順 11、 3の画像 2 Samsung Galaxy M51 Screen Replacement, Release the plastic clips: 手順 11、 3の画像 3
    • The midframe is held by plastic clips.

    • Insert an opening pick between midframe and display near the usb-c port.

    • Slide the opening pick to bottom right corner to release the plastic clips.

  12. Samsung Galaxy M51 Screen Replacement: 手順 12、 3の画像 1 Samsung Galaxy M51 Screen Replacement: 手順 12、 3の画像 2 Samsung Galaxy M51 Screen Replacement: 手順 12、 3の画像 3
    • Slide the opening pick along the right edge to release the plastic clips.

  13. Samsung Galaxy M51 Screen Replacement: 手順 13、 3の画像 1 Samsung Galaxy M51 Screen Replacement: 手順 13、 3の画像 2 Samsung Galaxy M51 Screen Replacement: 手順 13、 3の画像 3
    • Slide the opening pick along the top edge to release the midframe from the plastic clips.

  14. Samsung Galaxy M51 Screen Replacement: 手順 14、 3の画像 1 Samsung Galaxy M51 Screen Replacement: 手順 14、 3の画像 2 Samsung Galaxy M51 Screen Replacement: 手順 14、 3の画像 3
    • Slide the opening pick along the left edge to release the plastic clips.

  15. Samsung Galaxy M51 Screen Replacement, Remove the midframe: 手順 15、 1の画像 1
    • Remove the midframe.

  16. Samsung Galaxy M51 Screen Replacement, Battery Disconnect: 手順 16、 2の画像 1 Samsung Galaxy M51 Screen Replacement, Battery Disconnect: 手順 16、 2の画像 2
    • Use the flat end of a spudger to disconnect the battery.

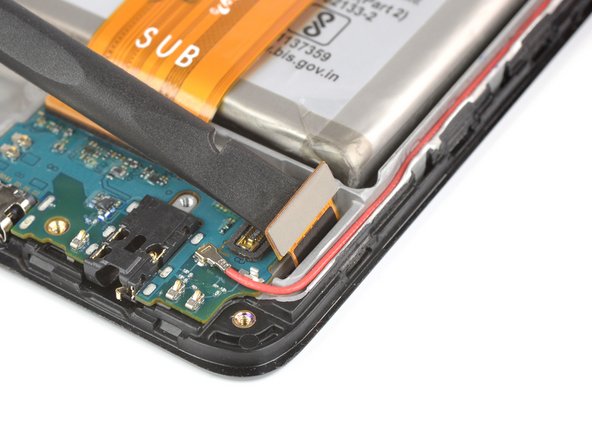
  17. Samsung Galaxy M51 Screen Replacement, Disconnect the screen: 手順 17、 2の画像 1 Samsung Galaxy M51 Screen Replacement, Disconnect the screen: 手順 17、 2の画像 2
    • Use the flat end of a spudger to disconnect the display cable from the daughterboard.

  18. Samsung Galaxy M51 Screen Replacement, Heat an iOpener: 手順 18、 1の画像 1
    • Prepare an iOpener and apply it to the display for at least two minutes to loosen the adhesive beneath.

    • The adhesive is placed on the edges of the display. Make sure that the iOpener covers all edges and repeat the heating process if necessary.

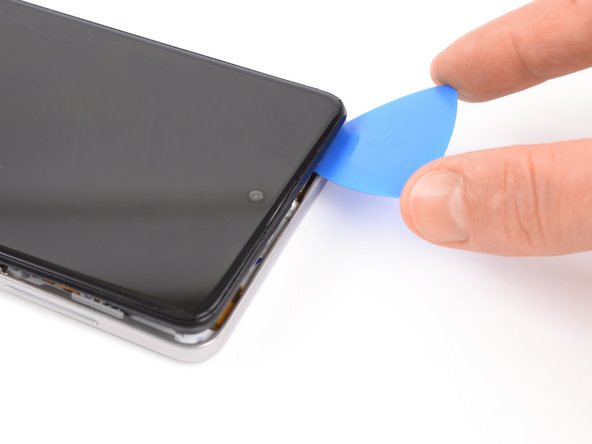
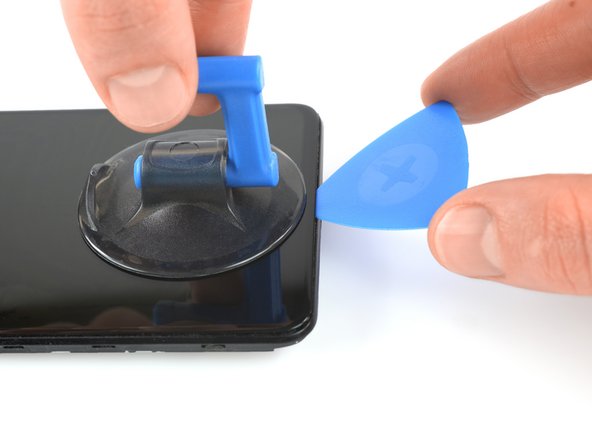
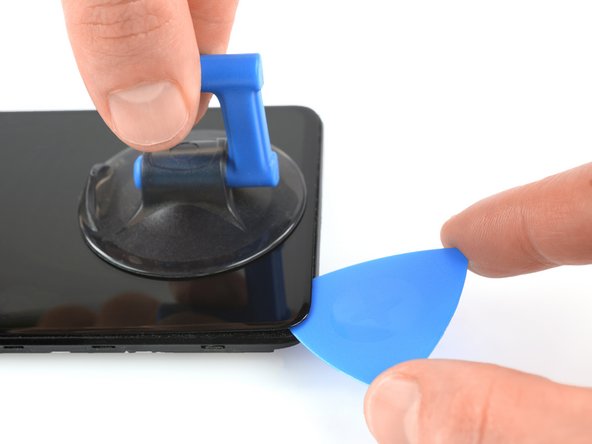
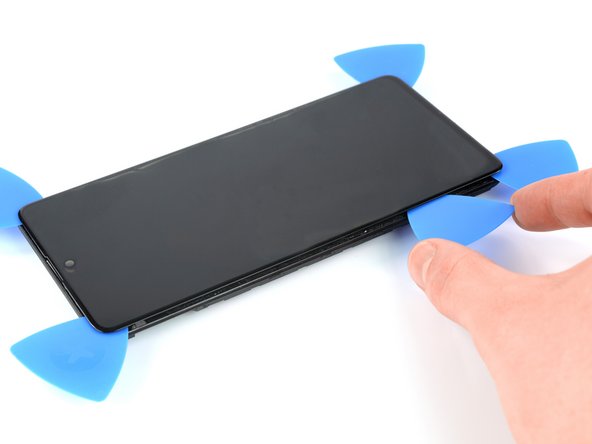
  19. Samsung Galaxy M51 Screen Replacement, Create an opening gap: 手順 19、 3の画像 1 Samsung Galaxy M51 Screen Replacement, Create an opening gap: 手順 19、 3の画像 2 Samsung Galaxy M51 Screen Replacement, Create an opening gap: 手順 19、 3の画像 3
    • Apply a suction handle near the bottom edge.

    • If the screen is cracked, the suction cup may not stick. Try lifting it with strong tape, or superglue the suction cup in place and allow it to cure so you can proceed.

    • Pull up on the suction up with strong, steady force to create a gap.

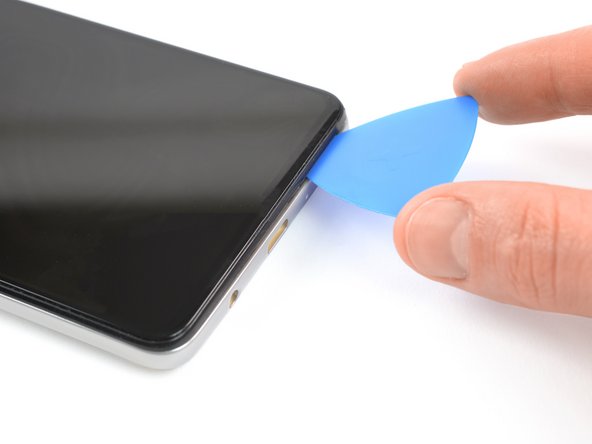
    • Insert an opening pick into the gap between display and the frame.

    • Slide the opening pick to the bottom left corner and leave it there.

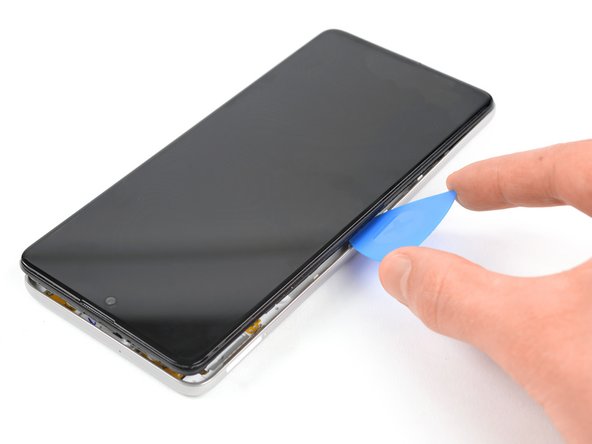
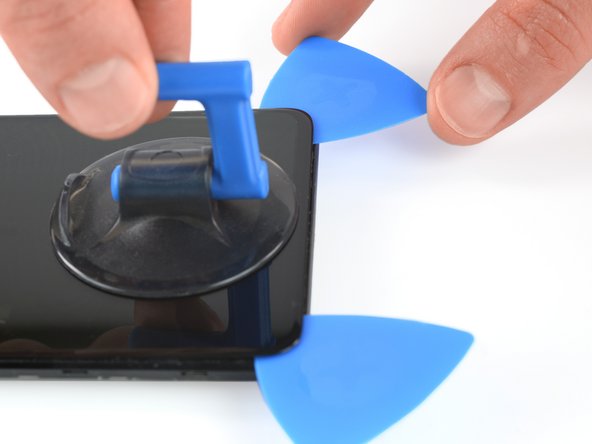
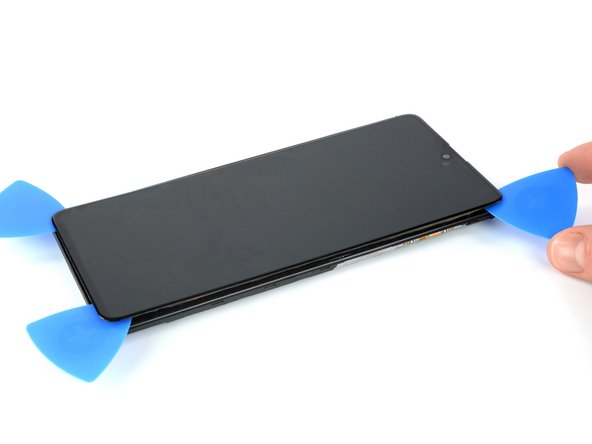
  20. Samsung Galaxy M51 Screen Replacement, Slice through the adhesive: 手順 20、 2の画像 1 Samsung Galaxy M51 Screen Replacement, Slice through the adhesive: 手順 20、 2の画像 2
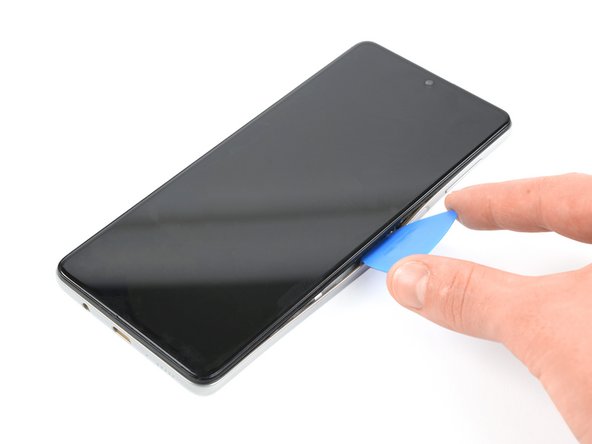
    • Insert a second opening pick and slide it to the bottom right corner to cut the adhesive.

    • Leave the opening pick in its place to prevent the adhesive from resealing.

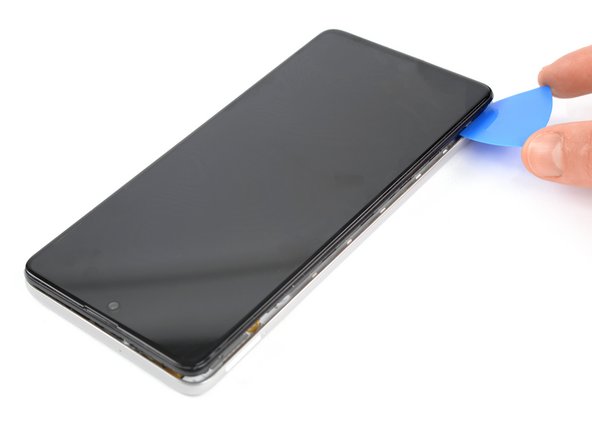
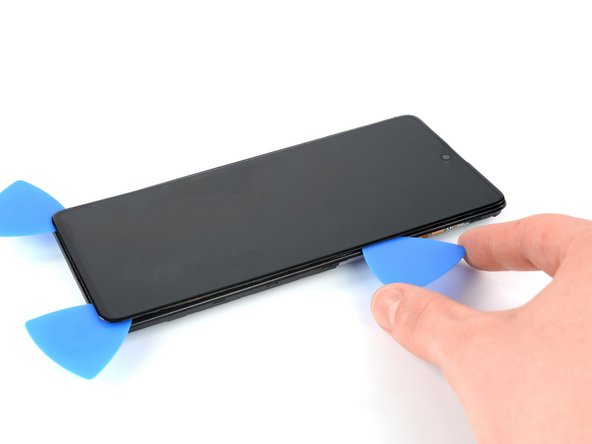
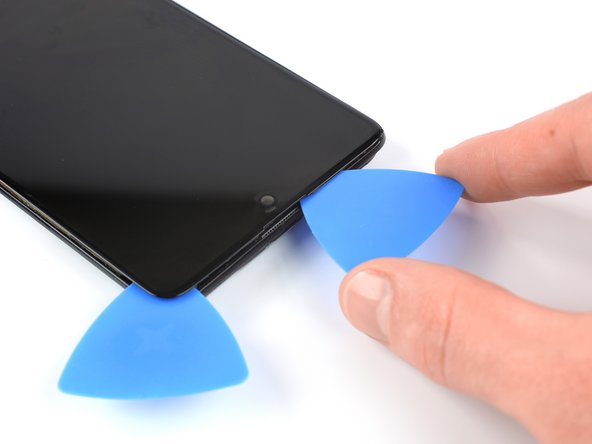
  21. Samsung Galaxy M51 Screen Replacement: 手順 21、 3の画像 1 Samsung Galaxy M51 Screen Replacement: 手順 21、 3の画像 2 Samsung Galaxy M51 Screen Replacement: 手順 21、 3の画像 3
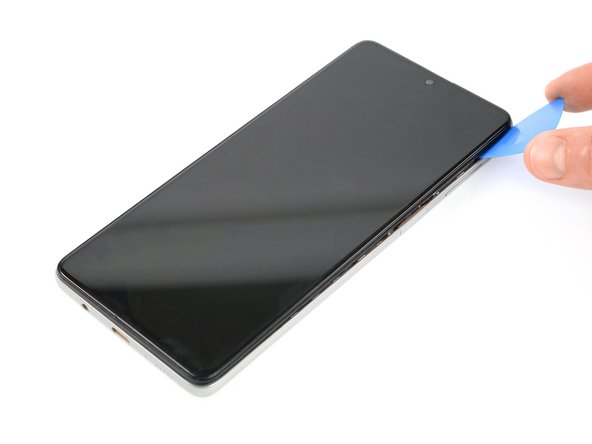
    • Insert a third opening pick and slide it along the left edge to cut the adhesive.

    • Leave the opening pick on the top right corner.

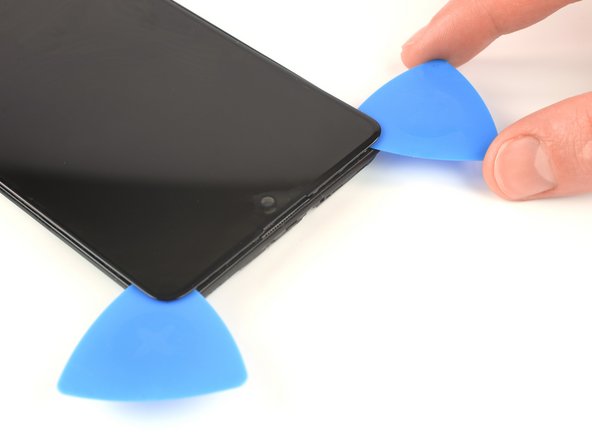
  22. Samsung Galaxy M51 Screen Replacement: 手順 22、 3の画像 1 Samsung Galaxy M51 Screen Replacement: 手順 22、 3の画像 2 Samsung Galaxy M51 Screen Replacement: 手順 22、 3の画像 3
    • You may need to reheat and reapply the iOpener several times to get the phone warm enough to cut the adhesive. Follow the iOpener instructions to avoid overheating.

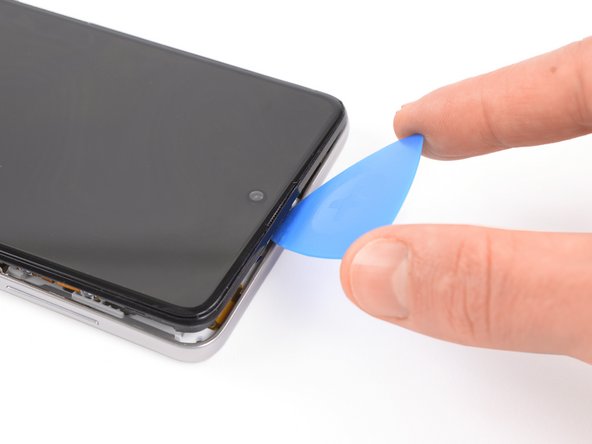
    • Insert a fourth opening pick and slide it to the top left corner to cut the adhesive.

    • Leave the opening pick in its place to prevent the adhesive from resealing.

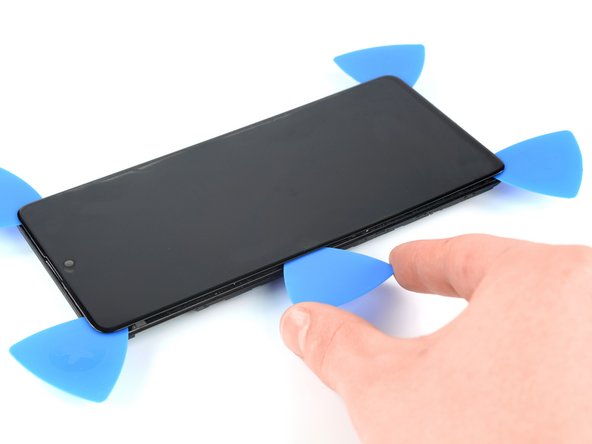
  23. Samsung Galaxy M51 Screen Replacement: 手順 23、 3の画像 1 Samsung Galaxy M51 Screen Replacement: 手順 23、 3の画像 2 Samsung Galaxy M51 Screen Replacement: 手順 23、 3の画像 3
    • Insert a fifth opening pick and slide it along the left edge to cut the remaining adhesive.

  24. Samsung Galaxy M51 Screen Replacement: 手順 24、 3の画像 1 Samsung Galaxy M51 Screen Replacement: 手順 24、 3の画像 2 Samsung Galaxy M51 Screen Replacement: 手順 24、 3の画像 3
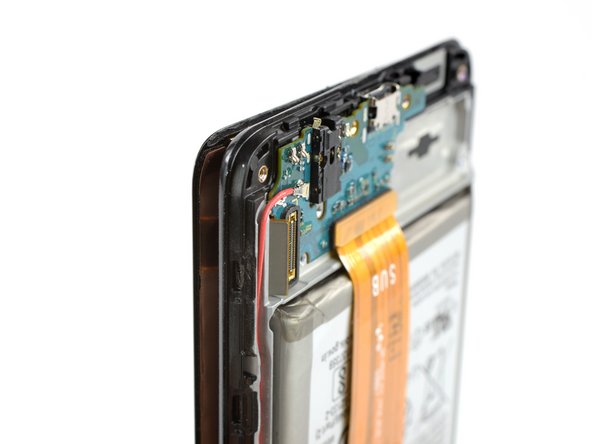
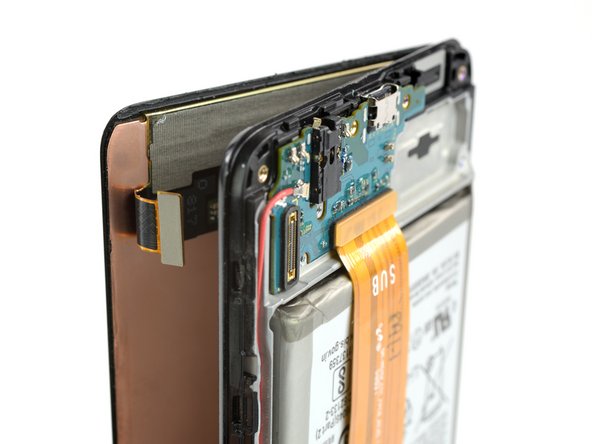
    • Thread the display cable through the frame.

  25. Samsung Galaxy M51 Screen Replacement: 手順 25、 1の画像 1
    • Remove the display.

終わりに

If possible, turn on your device and test your repair before installing new adhesive and resealing.

Compare your new replacement part to the original part—you may need to transfer remaining components or remove adhesive backings from the new part before installing.

To reassemble your device, follow these instructions in reverse order. Apply new adhesive where necessary after cleaning the relevant areas with isopropyl alcohol (>90%).

The best way to secure the new screen is to apply a sheet of custom-cut double-sided tape to the back of the screen.

Take your e-waste to an R2 or e-Stewards certified recycler.

Repair didn’t go as planned? Try some basic troubleshooting, or ask our Answers community for help.

8 の人々がこのガイドを完成させました。

作成者

1人の作成者と共同作成されました。

Adriana Zwink

メンバー登録日: 12/18/19

48,076 ポイント

167のガイドは作成済み

チーム

iFixit iFixit人のメンバー

Staff

135 メンバー

16,732のガイドは作成済み

9 件のコメント

Vielen Dank, für diese Anleitung! Ich würde auch gerne diese Anleitung nutzen, um mein kaputtes Display selbst zu tauschen, jedoch finde ich in den Weiten des Internets kein Ersatzglas für das M51. Kann mir jemand einen passenden link nennen? Da ich nichts passendes gefunden habe, wäre meine nächste Frage, ob das Display vom S20 Plus kompatibel wäre, da es die gleichen Maße misst..?Vielen Dank im voraus!

Vg

Marv

Marv Zockt - 返信

Hi,

such mal nach einem M515 Display-Glas. Das ist kompatibel.

Mfg

Mr. Jingels -

Merci beaucoup !

Grâce à vous j’ai pu changer moi même l’écran de la collègue amie de ma mère et elle va être très heureuse !

Vous apportez de la joie, et vos tutos sont vraiment de qualité bravo !

Antoine

Antoine HIEZELY - 返信

Is a71 screen compatible with m51?

abodeabodeabode60 - 返信

Humko abhi sikna hai

shanihasnain912 - 返信

Good explaining amazing with images I understood very clearly

manik.kosana - 返信

Very good explaining with images I learnt how to replace display of samsung

manik.kosana - 返信

Hi, thank you!

Adriana Zwink -

Hi, thank you for the guide. However there is one thing I am not sure about: is there any recommendation about what kind of adhesive to use? Unfortunately ifixit don't seem to have an adhesive kit for this phone.

Is something like Zhanlida T-8000 or B-7000 glue something that would work fine?

Thanks

Oliver Stolz - 返信

コメントを追加

統計データ:

過去 24時間: 5

過去 7 日: 80

過去 30 日: 209

今までの合計 11,182