メインコンテンツにスキップ

Samsung Galaxy J7 Screen Assembly Replacement

必要な工具と部品

  1. Samsung Galaxy J7 Screen Assembly Replacement, Back Cover: 手順 1、 2の画像 1 Samsung Galaxy J7 Screen Assembly Replacement, Back Cover: 手順 1、 2の画像 2
    • Remove the back of the device by pulling on the tab in the top left.

  2. Samsung Galaxy J7 Screen Assembly Replacement, Battery: 手順 2、 2の画像 1 Samsung Galaxy J7 Screen Assembly Replacement, Battery: 手順 2、 2の画像 2
    • Pull out the battery by pulling on the bottom left slit under the battery.

  3. Samsung Galaxy J7 Screen Assembly Replacement, Midframe: 手順 3、 1の画像 1
    • Using the Phillips #000 screwdriver, remove ten 4.2 mm screws.

  4. Samsung Galaxy J7 Screen Assembly Replacement: 手順 4、 3の画像 1 Samsung Galaxy J7 Screen Assembly Replacement: 手順 4、 3の画像 2 Samsung Galaxy J7 Screen Assembly Replacement: 手順 4、 3の画像 3
    • Lift up the back of the device with the iFixit opening tool and disconnect it from the front.

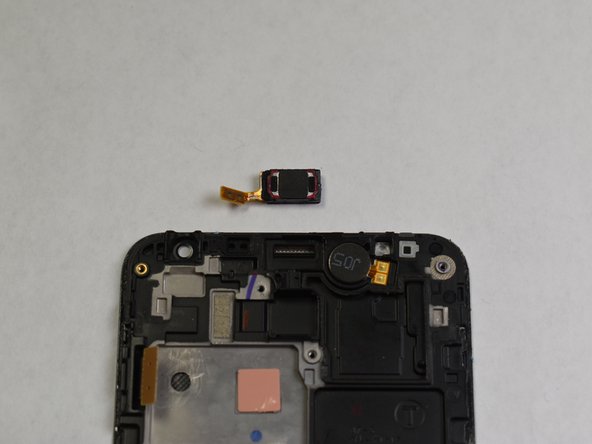
  5. Samsung Galaxy J7 Screen Assembly Replacement, Screen Assembly: 手順 5、 2の画像 1 Samsung Galaxy J7 Screen Assembly Replacement, Screen Assembly: 手順 5、 2の画像 2
    • Gently lift up the speaker piece and disconnect it from the panel.

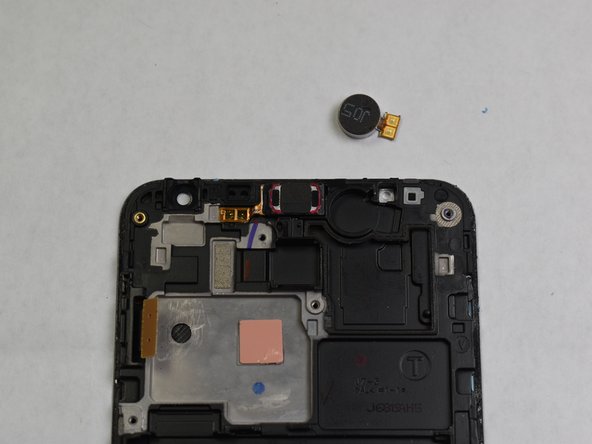
  6. Samsung Galaxy J7 Screen Assembly Replacement: 手順 6、 2の画像 1 Samsung Galaxy J7 Screen Assembly Replacement: 手順 6、 2の画像 2
    • Gently lift up the tab of the motor.

    • Remove the motor from the panel completely to disconnect it.

  7. Samsung Galaxy J7 Screen Assembly Replacement: 手順 7、 1の画像 1
    • Reverse these steps with your new phone screen to replace it.

終わりに

To reassemble your device, follow these instructions in reverse order.

11 の人々がこのガイドを完成させました。

作成者

5人の作成者と共同で作成されました。

Gabriel Arellano

メンバー登録日: 02/05/19

450 ポイント

2のガイドは作成済み

チーム

コメント 1 件

I replaced the broken screen....before I saw this. Now my phone will not turn on. what should I do? ruth.fnp@gmail.com

Ruth Thomas - 返信

コメントを追加

統計データ:

過去 24時間: 9

過去 7 日: 27

過去 30 日: 103

今までの合計 10,810