メインコンテンツにスキップ

Samsung Galaxy J3 Eclipse Audio Jack Replacement

必要な工具と部品

  1. Samsung Galaxy J3 Eclipse Audio Jack Replacement, Battery: 手順 1、 1の画像 1
    • Flip the phone face down on its screen.

  2. Samsung Galaxy J3 Eclipse Audio Jack Replacement: 手順 2、 3の画像 1 Samsung Galaxy J3 Eclipse Audio Jack Replacement: 手順 2、 3の画像 2 Samsung Galaxy J3 Eclipse Audio Jack Replacement: 手順 2、 3の画像 3
    • Pull up on the small indention on the right side edge and remove the back portion of the phone.

  3. Samsung Galaxy J3 Eclipse Audio Jack Replacement: 手順 3、 3の画像 1 Samsung Galaxy J3 Eclipse Audio Jack Replacement: 手順 3、 3の画像 2 Samsung Galaxy J3 Eclipse Audio Jack Replacement: 手順 3、 3の画像 3
    • After removing the back of the device, locate the slot below the bottom right corner of the battery and use the tip of your finger to remove it.

  4. Samsung Galaxy J3 Eclipse Audio Jack Replacement, Display Assembly: 手順 4、 1の画像 1
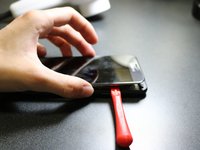
    • Use a heat gun or hair dryer to heat up the front edges of the phone for about two minutes. Stay approximately six inches away from the screen to prevent phone damage.

    • Do not apply heat to any one edge of the phone for longer than a few seconds. Instead, use a continuous motion around the phone's edges.

  5. Samsung Galaxy J3 Eclipse Audio Jack Replacement: 手順 5、 2の画像 1 Samsung Galaxy J3 Eclipse Audio Jack Replacement: 手順 5、 2の画像 2
    この手順で使用する道具:
    Plastic Cards
    $2.99
    購入する
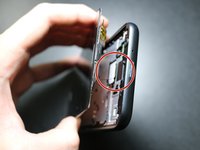
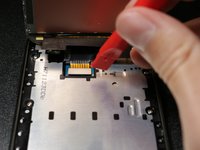
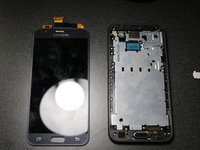
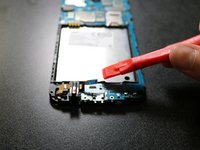
    • While the screen adhesive is still warm and flexible, insert a pry tool or plastic card between the glass display and the frame of the phone.

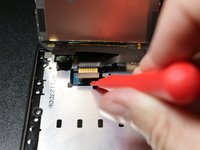
    • Slowly slide another pry tool around all the edges of the phone in order to break the adhesive's bond to the display.

    • When using the pry tool, do not use too much force or the phone's internals could be damaged.

    • Do not insert your tool more than 1cm into the top edge of the phone to avoid damaging the fragile cables.

  6. Samsung Galaxy J3 Eclipse Audio Jack Replacement: 手順 6、 3の画像 1 Samsung Galaxy J3 Eclipse Audio Jack Replacement: 手順 6、 3の画像 2 Samsung Galaxy J3 Eclipse Audio Jack Replacement: 手順 6、 3の画像 3
    • Gently lift lower side and loosen all edges to hinge screen up from bottom.

    • Do not try to completely remove the display from the frame yet. Simply try to loosen up all the edges.

  7. Samsung Galaxy J3 Eclipse Audio Jack Replacement: 手順 7、 3の画像 1 Samsung Galaxy J3 Eclipse Audio Jack Replacement: 手順 7、 3の画像 2 Samsung Galaxy J3 Eclipse Audio Jack Replacement: 手順 7、 3の画像 3
    • Use your prying tool to slowly pry up on the bottom right corner of the white cable guard, exposing a thin ribbon cable connector.

  8. Samsung Galaxy J3 Eclipse Audio Jack Replacement: 手順 8、 3の画像 1 Samsung Galaxy J3 Eclipse Audio Jack Replacement: 手順 8、 3の画像 2 Samsung Galaxy J3 Eclipse Audio Jack Replacement: 手順 8、 3の画像 3
    • Pry up the ribbon cable connector revealed from under the cable guard and remove the display from the device.

    • Clean the residue from the phone edges before re-assembling phone with new screen.

  9. Samsung Galaxy J3 Eclipse Audio Jack Replacement, Audio Jack: 手順 9、 3の画像 1 Samsung Galaxy J3 Eclipse Audio Jack Replacement, Audio Jack: 手順 9、 3の画像 2 Samsung Galaxy J3 Eclipse Audio Jack Replacement, Audio Jack: 手順 9、 3の画像 3
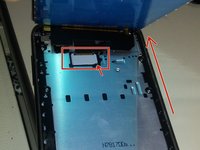
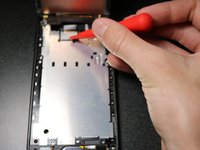
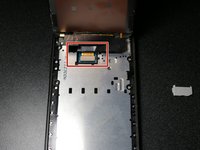
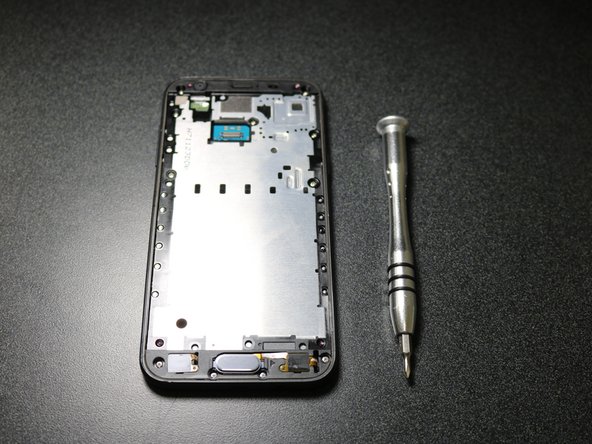
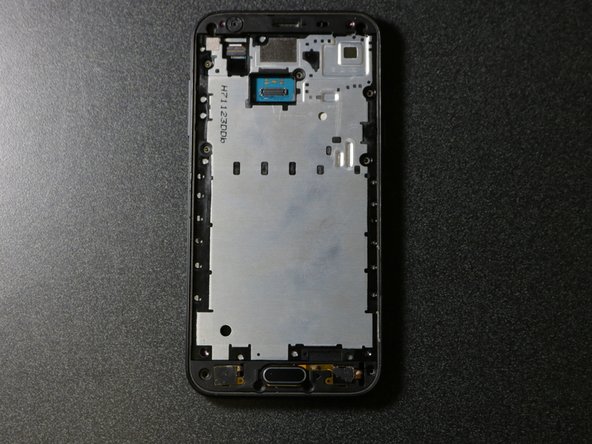
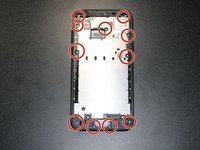
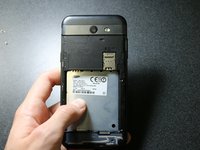
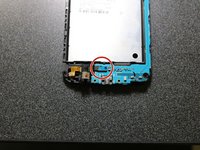
    • Locate all eleven screws attaching the metal plate to the frame, and remove them using a PH00 screwdriver bit.

    • Keep track of the eleven screws they are essential to close the phone back again.

  10. Samsung Galaxy J3 Eclipse Audio Jack Replacement: 手順 10、 2の画像 1 Samsung Galaxy J3 Eclipse Audio Jack Replacement: 手順 10、 2の画像 2
    • While holding the phone , flip it to the back side and use your two thumbs to push on the metal area where the battery was, this should release the back frame from the device.

  11. Samsung Galaxy J3 Eclipse Audio Jack Replacement: 手順 11、 2の画像 1 Samsung Galaxy J3 Eclipse Audio Jack Replacement: 手順 11、 2の画像 2
    • Locate the blue ribbon cable attached just below the battery slot . This is the connector for your audio jack.

    • Use your pry tool to release the cable from the motherboard

終わりに

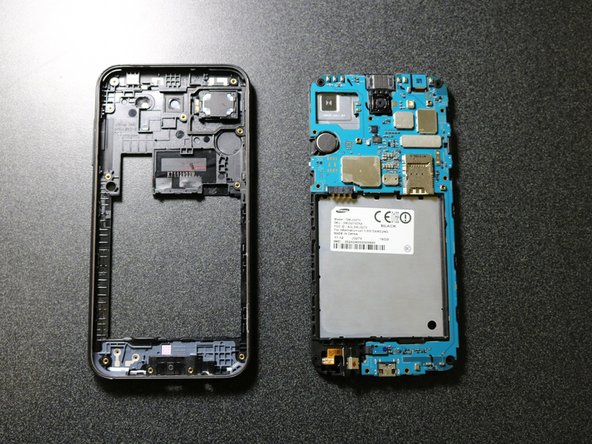
To reassemble your device, follow these instructions in reverse order.

2 の人々がこのガイドを完成させました。

作成者

2人の作成者と共同で作成されました。

Chandler Casey

メンバー登録日: 09/21/18

792 ポイント

5のガイドは作成済み

チーム

University of North Texas, Team S2-G4, Riccardelli Fall 2018 University of North Texas, Team S2-G4, Riccardelli Fall 2018人のメンバー

UNT-RICCARDELLI-F18S2G4

4 メンバー

5のガイドは作成済み

0 件のコメント

コメントを追加

統計データ:

過去 24時間: 0

過去 7 日: 0

過去 30 日: 3

今までの合計 854