メインコンテンツにスキップ

Samsung Galaxy Gear Battery Replacement

必要な工具と部品

  1. Samsung Galaxy Gear Battery Replacement, Display Housing: 手順 1、 1の画像 1
    • Use a T5 Torx screwdriver to remove the four 4.0 mm screws on the back of the device.

    • Be sure your device is turned off.

  2. Samsung Galaxy Gear Battery Replacement: 手順 2、 1の画像 1
    • Use a plastic opening tool to separate the display housing from from the device.

    • To ensure you don't damage your device, insert the opening tool and slide it the entire length of the gap on both sides of the device.

  3. Samsung Galaxy Gear Battery Replacement: 手順 3、 2の画像 1 Samsung Galaxy Gear Battery Replacement: 手順 3、 2の画像 2
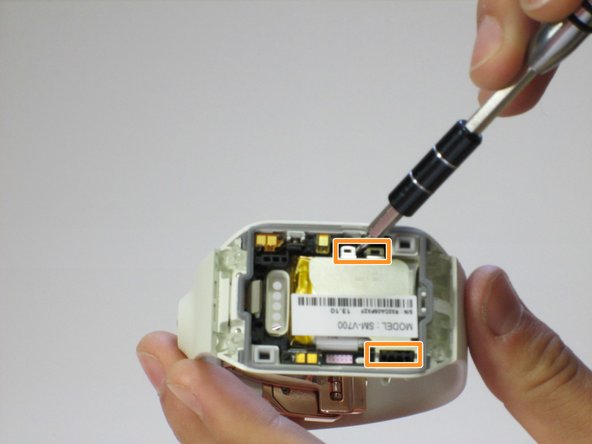
    • Gently pry back the metal flap on top of the connector.

    • Locate the two 2.0 mm black screws and unscrew using a Phillips PH00 bit. The connector will detach from the device.

  4. Samsung Galaxy Gear Battery Replacement, Battery: 手順 4、 2の画像 1 Samsung Galaxy Gear Battery Replacement, Battery: 手順 4、 2の画像 2
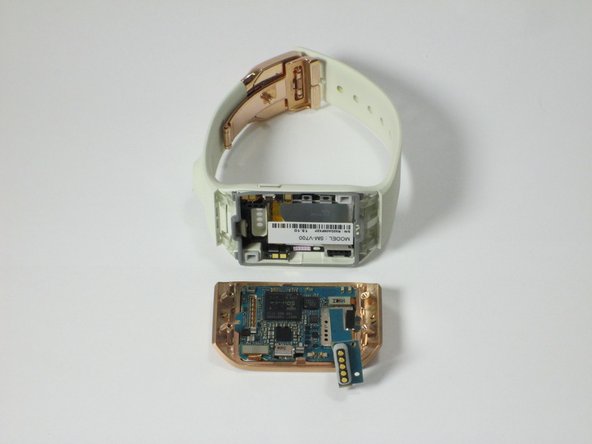
    • After separating the LCD/motherboard from the actual watch itself, the watch should be in two separate pieces.

    • You will only need the watch/strap component so you can set aside the LCD/motherboard component.

  5. Samsung Galaxy Gear Battery Replacement: 手順 5、 3の画像 1 Samsung Galaxy Gear Battery Replacement: 手順 5、 3の画像 2 Samsung Galaxy Gear Battery Replacement: 手順 5、 3の画像 3
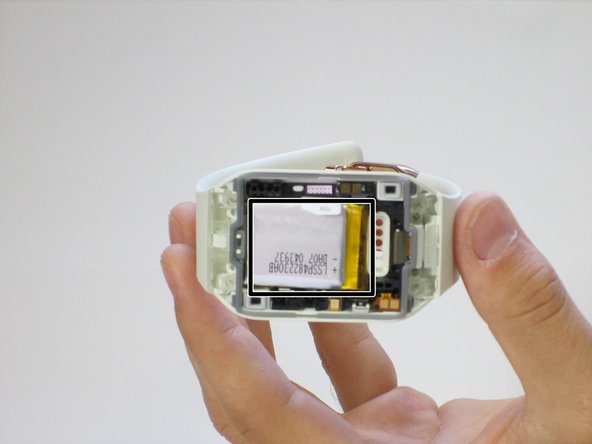
    • Look for the metal bracket that covers and secures the battery in place.

    • Loosen the bracket by prying underneath the metal plating with the plastic opening tool. Remove the bracket and set it to the side.

    • The battery should now be exposed.

  6. Samsung Galaxy Gear Battery Replacement: 手順 6、 3の画像 1 Samsung Galaxy Gear Battery Replacement: 手順 6、 3の画像 2 Samsung Galaxy Gear Battery Replacement: 手順 6、 3の画像 3
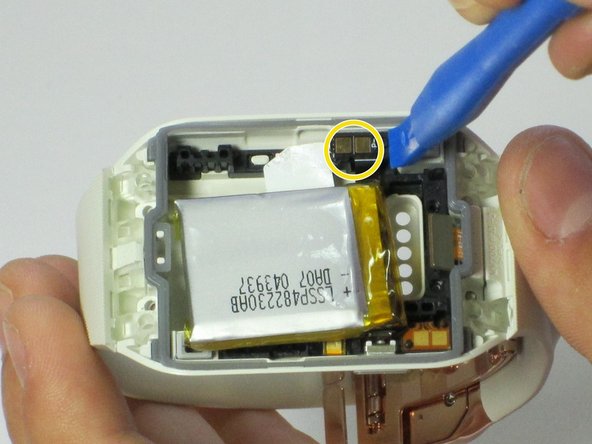
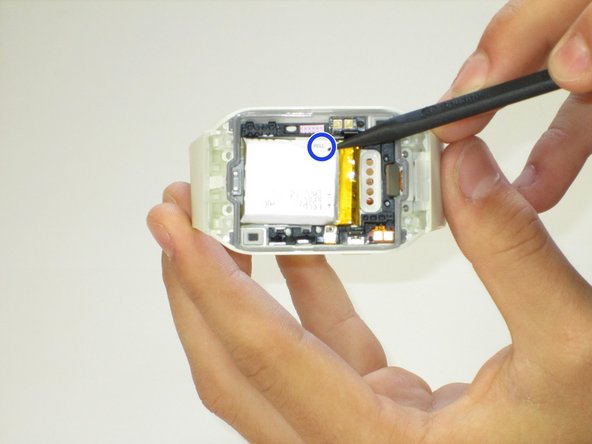
    • Notice the leads attached to the base of the watch. You will need to remove this before you pull the battery out.

    • Using the plastic opening tool, pry underneath the leads and disconnect it from the back of the watch.

    • Slowly tug on the "PULL" tag and remove the battery from the watch.

終わりに

To reassemble your device, follow these instructions in reverse order.

11 の人々がこのガイドを完成させました。

作成者

7人の作成者と共同で作成されました。

Edward Yi

メンバー登録日: 04/11/16

424 ポイント

1ガイドが承認済み

チーム

Cal Poly, Team 1-9, Maness Spring 2016 Cal Poly, Team 1-9, Maness Spring 2016人のメンバー

CPSU-MANESS-S16S1G9

4 メンバー

7のガイドは作成済み

4 件のコメント

WHERE DO I GET A NEW bATTERY & THE TOOLS; IS A COMPLETE KIT AVAILABLE?

rbilello - 返信

where do I get the battery & tools

steve ellis - 返信

“Parts

No parts required.”

I think a battery is required!

cyberjoe3d - 返信

Thank you very much

Adam P NYC

bori0916adam - 返信

コメントを追加

統計データ:

過去 24時間: 0

過去 7 日: 3

過去 30 日: 22

今までの合計 13,302