メインコンテンツにスキップ

Samsung Galaxy Fame S6812i Midframe Replacement

必要な工具と部品

  1. Samsung Galaxy Fame S6812i Midframe Replacement, Remove back cover: 手順 1、 1の画像 1
    • Start by removing the back cover by using your thumbnail to pry the cover off the midframe.

  2. Samsung Galaxy Fame S6812i Midframe Replacement: 手順 2、 3の画像 1 Samsung Galaxy Fame S6812i Midframe Replacement: 手順 2、 3の画像 2 Samsung Galaxy Fame S6812i Midframe Replacement: 手順 2、 3の画像 3
    • Note: one of the screws is hidden under a plastic sticker.

    • Remove the five 4 mm screws with a Phillips#00 screwdriver.

  3. Samsung Galaxy Fame S6812i Midframe Replacement: 手順 3、 1の画像 1
    • Remove the battery with plastic opening tool

  4. Samsung Galaxy Fame S6812i Midframe Replacement, Separating the midframe: 手順 4、 2の画像 1 Samsung Galaxy Fame S6812i Midframe Replacement, Separating the midframe: 手順 4、 2の画像 2
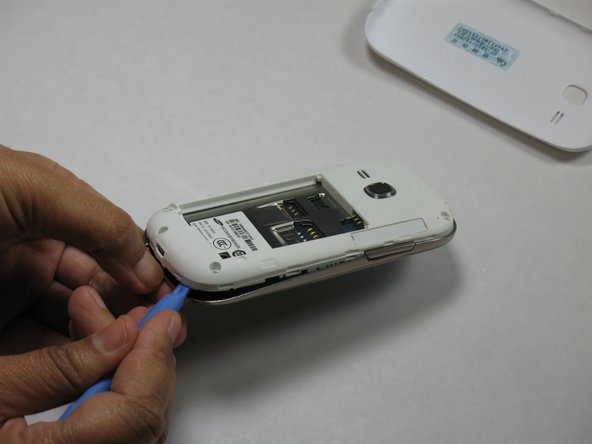
    • Using the plastic opening tool pry into the bezel to remove the mid-frame

    • Continue moving the plastic opening tool around the mid-frame to separate it from the display assembly.

    • Be gentle the plastic mounting clips are very fragile. Pay extra attention when working around the volume button.

  5. Samsung Galaxy Fame S6812i Midframe Replacement, Final step: 手順 5、 1の画像 1
    • Once you have separated the mid-frame it should look like this.

    • Replace the old mid-frame with the new one and follow the steps in reverse.

終わりに

To reassemble your device, follow these instructions in reverse order.

ある他の人がこのガイドを完成しました。

作成者

2人の作成者と共同で作成されました。

Charles

メンバー登録日: 10/07/14

133 ポイント

2のガイドは作成済み

チーム

USF Tampa, Team 8-2, Leahy Fall 2014 USF Tampa, Team 8-2, Leahy Fall 2014人のメンバー

USFT-LEAHY-F14S8G2

4 メンバー

5のガイドは作成済み

0 件のコメント

コメントを追加

統計データ:

過去 24時間: 0

過去 7 日: 0

過去 30 日: 1

今までの合計 562