メインコンテンツにスキップ

Samsung Galaxy Alpha Front Camera Replacement

必要な工具と部品

  1. Samsung Galaxy Alpha Front Camera Replacement, Removing the Back Panel: 手順 1、 3の画像 1 Samsung Galaxy Alpha Front Camera Replacement, Removing the Back Panel: 手順 1、 3の画像 2 Samsung Galaxy Alpha Front Camera Replacement, Removing the Back Panel: 手順 1、 3の画像 3
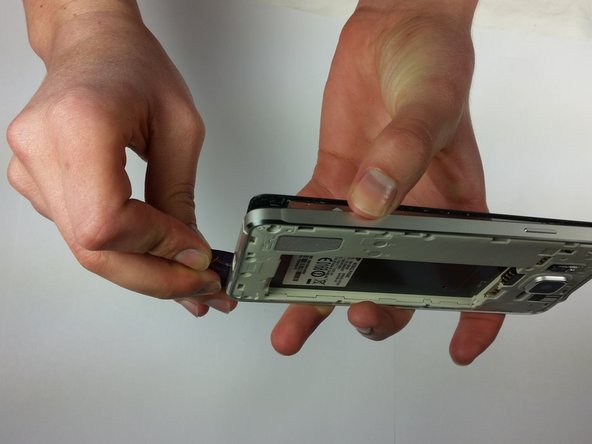
    • On the back panel of the phone, find the slot that is on the top left side next to the flashlight.

    • Insert your fingernail or prying tool into the slot and lift up to slightly open the top left corner of the back panel.

    • Slide your fingernail or prying tool around the outer edge of the back panel to fully release it from the phone.

  2. Samsung Galaxy Alpha Front Camera Replacement, Battery: 手順 2、 2の画像 1 Samsung Galaxy Alpha Front Camera Replacement, Battery: 手順 2、 2の画像 2
    • Make sure the device is powered down before moving forward.

    • Since the NFC antenna is glued to the battery, make sure the replacement also includes one.

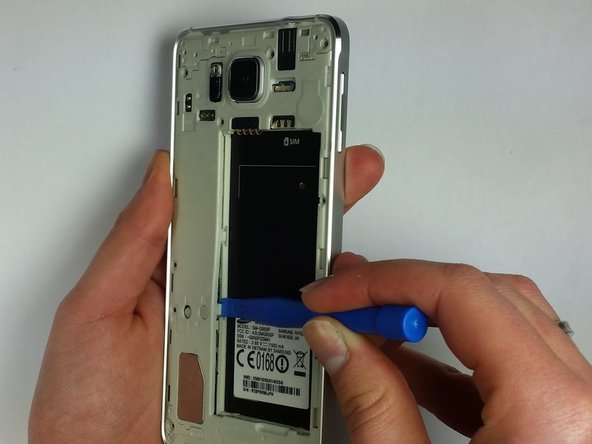
    • Locate the slot at the base of the battery and insert your thumb.

    • Push slightly toward the battery and out, away from the phone to free the battery.

    • To remove the back panel of the device, first find the slot next to the flashlight. Then insert your fingernail or prying tool into the slot and lift gently, around the perimeter, to fully remove the panel.

    • Make sure your device is powered down before proceeding.

    • An NFC antenna is including with the battery, so ensure that the replacement has one.

    • Locate slot at the base of the battery and insert your thumb.

    • Push up/toward the battery while lifting up and away to release from slot.

  3. Samsung Galaxy Alpha Front Camera Replacement, Remove Screws Holding Back Case: 手順 5、 1の画像 1
    • This step is not needed for replacing the screen. Skip this step if you're only replacing the screen. This step is important for accessing other components.

    • Use a JIS #000 screwdriver to remove all twelve 3mm screws that surround the back of the phone.

  4. Samsung Galaxy Alpha Front Camera Replacement, Use iOpener To Heat Adhesive: 手順 6、 1の画像 1
    • Heat your iOpener in the microwave for 30 seconds.

    • Place the iOpener on the front screen. Move the iOpener so all parts of the screen are heated evenly.

    • After multiple heating cycles, proceed to next step.

    • Make sure screen is thoroughly heated before moving forward. More heat cycles makes removal easier.

  5. Samsung Galaxy Alpha Front Camera Replacement, Use an Opening Pick to Pry Off the Screen: 手順 7、 2の画像 1 Samsung Galaxy Alpha Front Camera Replacement, Use an Opening Pick to Pry Off the Screen: 手順 7、 2の画像 2
    • Ensure you have thoroughly heated the adhesive before attempting to pry the screen off.

    • Do NOT press on the back of the phone while attempting to lift the screen. This will create cracks in the glass.

    • At the bottom of the touch screen, under the menu buttons, there are connections that can be easily broken. When taking the adhesive off the bottom section, work carefully to prevent damage.

    • Slide opening pick around perimeter of the glass. Make sure not to push edge too far under the screen.

  6. Samsung Galaxy Alpha Front Camera Replacement: 手順 8、 3の画像 1 Samsung Galaxy Alpha Front Camera Replacement: 手順 8、 3の画像 2 Samsung Galaxy Alpha Front Camera Replacement: 手順 8、 3の画像 3
    • Gently pry the screen up and lift off.

    • Make sure to lift the top of the screen only, so you don't break the button connections on the bottom of the phone.

  7. Samsung Galaxy Alpha Front Camera Replacement, Remove Inner Back Panel: 手順 9、 3の画像 1 Samsung Galaxy Alpha Front Camera Replacement, Remove Inner Back Panel: 手順 9、 3の画像 2 Samsung Galaxy Alpha Front Camera Replacement, Remove Inner Back Panel: 手順 9、 3の画像 3
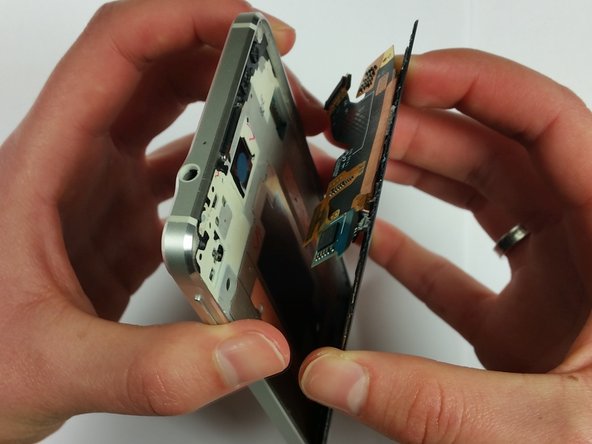
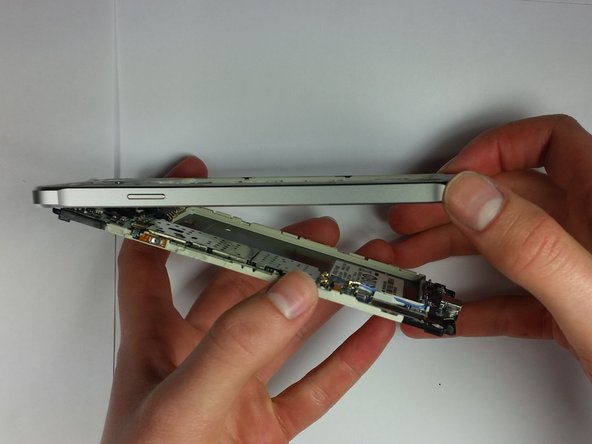
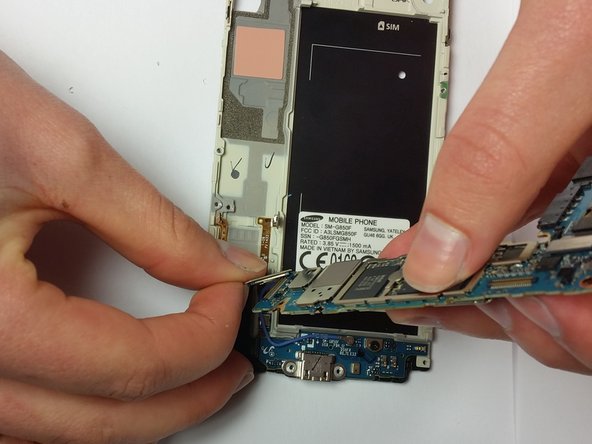
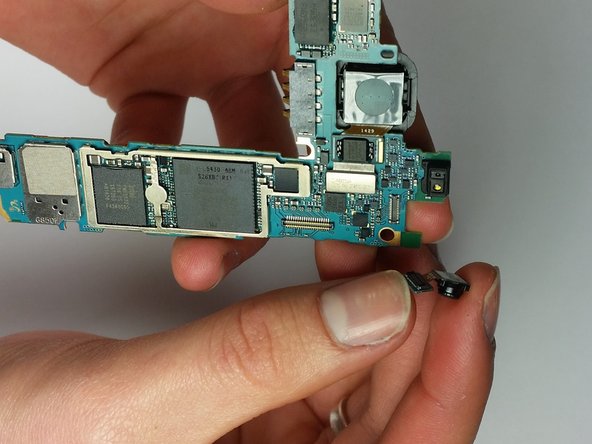
    • Find the plastic clips on the side of the battery slot.

    • Using a Plastic Opening Tool, release the clips by pulling up inside the crevasse in the plastic walls and separate the two pieces.

    • For this step you will want to use two tools. One to pull up and the other to hold the gap open.

  8. Samsung Galaxy Alpha Front Camera Replacement: 手順 10、 1の画像 1
    • Using the Phillips #00 screwdriver remove the two 3mm screws.

  9. Samsung Galaxy Alpha Front Camera Replacement: 手順 11、 1の画像 1
    • Using your fingers or a Metal Tweezer, apply slight pressure and pry up each of the four pin connectors shown in the picture.

  10. Samsung Galaxy Alpha Front Camera Replacement: 手順 12、 1の画像 1
    • Finally, remove the last connector that is attached by a blue cable.

  11. Samsung Galaxy Alpha Front Camera Replacement: 手順 13、 2の画像 1 Samsung Galaxy Alpha Front Camera Replacement: 手順 13、 2の画像 2
    • Find the end of the blue piece shown in the picture and gently lift the top of the part away from the casing.

  12. Samsung Galaxy Alpha Front Camera Replacement: 手順 14、 2の画像 1 Samsung Galaxy Alpha Front Camera Replacement: 手順 14、 2の画像 2
    • Locate the small camera on the upper part of the piece.

    • Using a tool or your finger, apply slight pressure to pop the front camera out of place.

終わりに

To reassemble your device, follow these instructions in reverse order.

6 の人々がこのガイドを完成させました。

作成者

4人の作成者と共同で作成されました。

Jon Brausch

メンバー登録日: 01/20/15

1,524 ポイント

2のガイドは作成済み

チーム

Cal Poly, Team 20-17, Maness Winter 2015 Cal Poly, Team 20-17, Maness Winter 2015人のメンバー

CPSU-MANESS-W15S20G17

4 メンバー

5のガイドは作成済み

0 件のコメント

コメントを追加

統計データ:

過去 24時間: 0

過去 7 日: 0

過去 30 日: 2

今までの合計 4,834