メインコンテンツにスキップ

Samsung Galaxy A8 (2018) Display Replacement

必要な工具と部品

  1. Samsung Galaxy A8  (2018) Display Replacement, Display: 手順 1、 1の画像 1
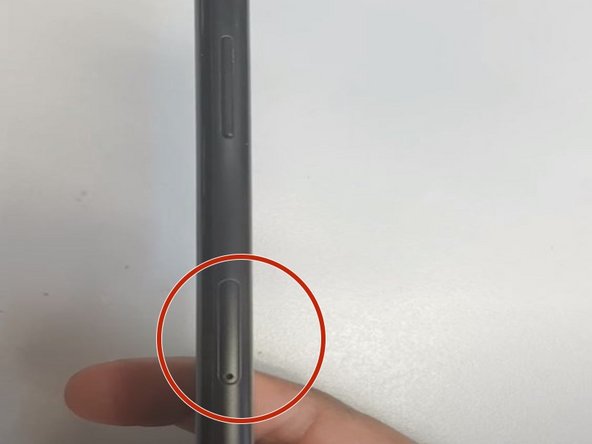
    • Before proceeding to change the screen of your Galaxy A8 (2018), press and hold the power button to turn off your device.

  2. Samsung Galaxy A8  (2018) Display Replacement: 手順 2、 1の画像 1
    • Insert the SIM Card Ejection tool into the small hole and remove the SIM Card tray.

  3. Samsung Galaxy A8  (2018) Display Replacement: 手順 3、 3の画像 1 Samsung Galaxy A8  (2018) Display Replacement: 手順 3、 3の画像 2 Samsung Galaxy A8  (2018) Display Replacement: 手順 3、 3の画像 3
    この手順で使用する道具:
    Plastic Cards
    $2.99
    購入する
    • Using a hairdryer, heat up the back of the device to loosen the adhesive.

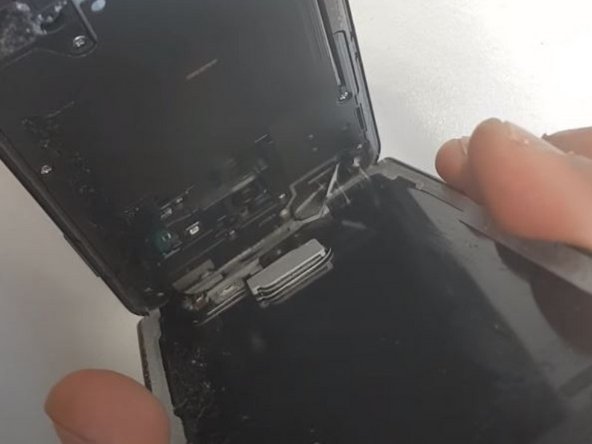
    • Gently insert a plastic card and opening pick between the glass and frame to create an opening. Carefully separate the rear glass from the rest of the device.

    • Be careful not to overheat the rear glass since it is very fragile.

  4. Samsung Galaxy A8  (2018) Display Replacement: 手順 4、 2の画像 1 Samsung Galaxy A8  (2018) Display Replacement: 手順 4、 2の画像 2
    • Using a pair of tweezers, disconnect the clip connecting camera and motherboard.

    • Lift the back panel off of the chassis of the device.

  5. Samsung Galaxy A8  (2018) Display Replacement: 手順 5、 3の画像 1 Samsung Galaxy A8  (2018) Display Replacement: 手順 5、 3の画像 2 Samsung Galaxy A8  (2018) Display Replacement: 手順 5、 3の画像 3
    • Use the P2 Pentalobe screwdriver to remove the 14 (0.8mm) screws.

    • Use the Phillips #0 screwdriver to remove the rest of the four 1.5mm screws.

    • Gently leverage with the spudger under the top antenna to lift it.

    • Continue with the spudger to lift and extract the NFC antenna.

  6. Samsung Galaxy A8  (2018) Display Replacement: 手順 6、 3の画像 1 Samsung Galaxy A8  (2018) Display Replacement: 手順 6、 3の画像 2 Samsung Galaxy A8  (2018) Display Replacement: 手順 6、 3の画像 3
    • Disconnect the battery using the spudger.

    • Gently lift the speaker and pull it out of the slot.

    • Disconnect the display cables from the device.

  7. Samsung Galaxy A8  (2018) Display Replacement: 手順 7、 3の画像 1 Samsung Galaxy A8  (2018) Display Replacement: 手順 7、 3の画像 2 Samsung Galaxy A8  (2018) Display Replacement: 手順 7、 3の画像 3
    • To soften the adhesive that binds the display panel to the chassis, heat the front panel with the hairdryer for a few seconds

    • To create an opening, insert the opening pick gently between the screen and the chassis

    • Gently slide the plastic card around the screen to take it off the chassis.

    • Be careful not to overheat the centre of the display panel as this can damage it.

終わりに

To reassemble your device, follow these instructions in reverse order.

12 の人々がこのガイドを完成させました。

作成者

4人の作成者と共同で作成されました。

Prayanshu Singla

メンバー登録日: 01/22/21

428 ポイント

1ガイドが承認済み

チーム

York University, Team S14-G27, Melo-Thaiss Winter 2021 York University, Team S14-G27, Melo-Thaiss Winter 2021人のメンバー

YORK-MELO-THAISS-W21S14G27

1 メンバー

4のガイドは作成済み

コメント 1 件

My microphone isnt working please help

alpadarkshadow - 返信

コメントを追加

統計データ:

過去 24時間: 4

過去 7 日: 52

過去 30 日: 173

今までの合計 7,849