メインコンテンツにスキップ

Samsung Galaxy A20 I/O Board Replacement

必要な工具と部品

  1. Samsung Galaxy A20 I/O Board Replacement, Back Cover: 手順 1、 3の画像 1 Samsung Galaxy A20 I/O Board Replacement, Back Cover: 手順 1、 3の画像 2 Samsung Galaxy A20 I/O Board Replacement, Back Cover: 手順 1、 3の画像 3
    • Unplug and power off the device before beginning.

    • Remove the SIM card and the SIM card tray.

    • Use an iOpener or heat gun to warm the adhesive that secures the back cover.

    • Insert an opening pick in the seam between the back cover and chassis while the adhesive is warm.

    • Slide the pick around the entire perimeter.

    • If you encounter notable resistance, reheat the adhesive. Do not attempt to sever cold adhesive.

    • Remove the back cover.

  2. Samsung Galaxy A20 I/O Board Replacement, I/O Board: 手順 2、 2の画像 1 Samsung Galaxy A20 I/O Board Replacement, I/O Board: 手順 2、 2の画像 2
    • Remove all thirteen 3.6 mm Phillips screws that secure the midframe.

    • Use an opening pick to pry up and lift out the midframe.

  3. Samsung Galaxy A20 I/O Board Replacement: 手順 3、 1の画像 1
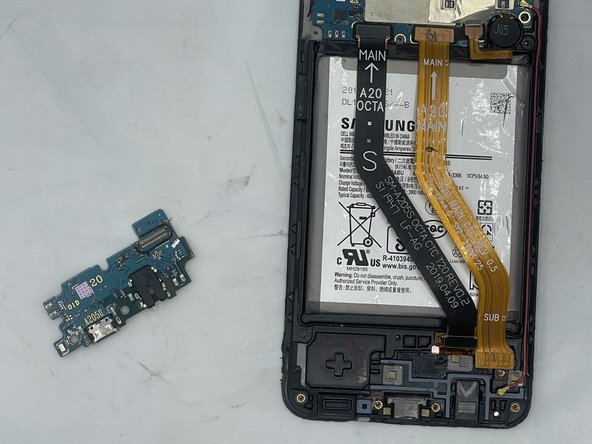
    • Use an opening tool to gently pry up the press connectors on both ends of the two ribbon cables.

    • Use an opening tool to gently pry up the press connectors on both ends of the two ribbon cables.

  4. Samsung Galaxy A20 I/O Board Replacement: 手順 4、 2の画像 1 Samsung Galaxy A20 I/O Board Replacement: 手順 4、 2の画像 2
    • Disconnect the red antenna cable from the I/O board.

    • Use an opening pick to pry up and remove the I/O board.

終わりに

To reassemble your device, follow these instructions in reverse order.

作成者

3人の作成者と共同で作成されました。

Tori Berman

メンバー登録日: 02/05/24

448 ポイント

4のガイドは作成済み

チーム

University of North Texas, Team 2-2, Kilpatrick Spring 2024 University of North Texas, Team 2-2, Kilpatrick Spring 2024人のメンバー

UNT-KILPATRICK-S24S2G2

5 メンバー

5のガイドは作成済み

0 件のコメント

コメントを追加

統計データ:

過去 24時間: 1

過去 7 日: 11

過去 30 日: 12

今までの合計 26