はじめに
The Samsung Epix's keyboard is an important part of the device, as it is crucial to its functionality. If your keyboard becomes unresponsive or worn out, this tutorial will walk you through the replacement process, allowing you to swiftly and efficiently restore your device's functionality. Follow each step carefully and store any tools or screws in a secure container, as these components are critical to the device's structural integrity. Carefully handle all parts to prevent damage and enable a smooth replacement operation.
Before You Begin:
- Prepare your workspace: Clear a space in which you may operate comfortably and without interruption.
- Turn off your phone and make sure it is disconnected from the charger.
This article will walk you through the process of securely replacing your Samsung Epix keyboard and restoring it to like-new condition. Let us get going!
必要な工具と部品
-
-
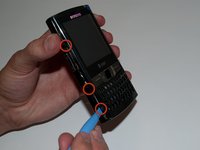
Just below the phone's camera, press the button and hold it
-
While the button is held down, slide the back panel off to remove it completely.
-
-
-
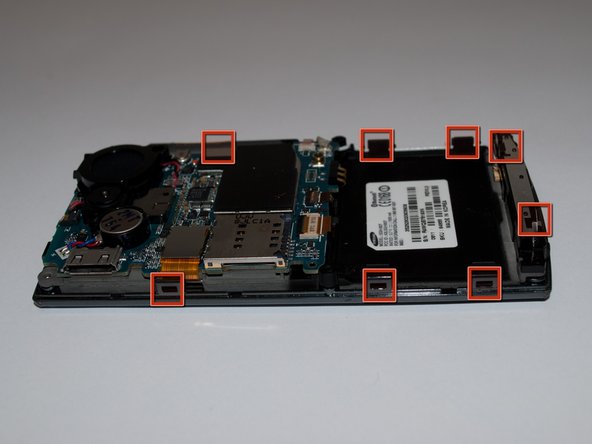
Using a plastic prying tool, remove the screw cover in the top left corner of the phone by lifting it up.
-
-


To reassemble your device, follow these instructions in reverse order.
2 の人々がこのガイドを完成させました。
チーム

Cal Poly, Team 15-15, Regan Spring 2011 Cal Poly, Team 15-15, Regan Spring 2011人のメンバー
CPSU-REGAN-S11S15G15
5 メンバー
5のガイドは作成済み