メインコンテンツにスキップ

Samsung DVD-HD850 Player Rubber Band Replacement

必要な工具と部品

  1. Samsung DVD-HD850 Player Rubber Band Replacement, Cover: 手順 1、 1の画像 1
    • with the front of the device facing you, turn the device 180 degrees so the back panel of the device is facing you

  2. Samsung DVD-HD850 Player Rubber Band Replacement, Locate and remove screws: 手順 2、 1の画像 1
    • locate the three (3) screws on the back panel of the device that are implanted in the device

    • to remove the screws, use the tool(s) listed above (right underneath the introduction) and twist the screws counter-clockwise to remove them from the device

  3. Samsung DVD-HD850 Player Rubber Band Replacement, Remove Cover: 手順 3、 1の画像 1
    • to remove the cover of the device, pull the cover towards the back of the device until it is completely removed so you can see the insides of the device

  4. Samsung DVD-HD850 Player Rubber Band Replacement, Locate and Remove The Disk Tray: 手順 4、 1の画像 1
    • *NOTE* remember to never connect to power when working on electrical components

    • Find and locate the disk tray it is located top right hand side of the component when the back of the device ( dvd player ) is facing you.

  5. Samsung DVD-HD850 Player Rubber Band Replacement, Removing The Data Strips: 手順 5、 1の画像 1
    • Locate and gently remove the data strips on the tray. There are three in total, two on the left hand side and one on the right.

  6. Samsung DVD-HD850 Player Rubber Band Replacement, Removing The Screws: 手順 6、 3の画像 1 Samsung DVD-HD850 Player Rubber Band Replacement, Removing The Screws: 手順 6、 3の画像 2 Samsung DVD-HD850 Player Rubber Band Replacement, Removing The Screws: 手順 6、 3の画像 3
    • As noted by the red circles, locate and remove the screws one at a time

  7. Samsung DVD-HD850 Player Rubber Band Replacement, Disk Tray Removal: 手順 7、 1の画像 1
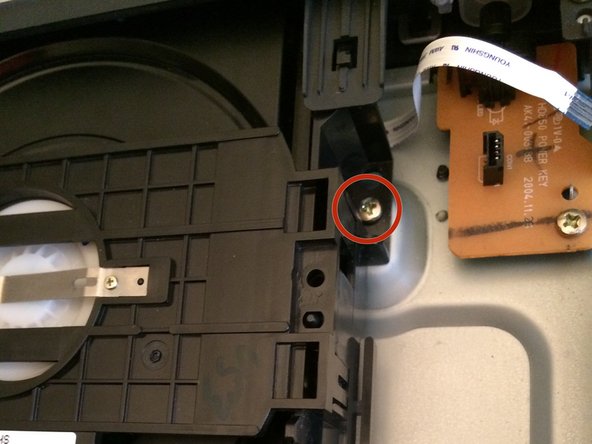
    • After removing the clips slowly incline the disk drive towards you and unclip it from the two (2) brackets located on the top

    • Be careful not to push too much pressure on the brackets since they tend to break easily

  8. Samsung DVD-HD850 Player Rubber Band Replacement, Success!: 手順 8、 1の画像 1
    • Congrats! You have sucessfully have taken out the disk drive

  9. Samsung DVD-HD850 Player Rubber Band Replacement, Disk Tray Preparation: 手順 9、 1の画像 1
    • remember to never connect the device to a power source when working on electrical components on/in the device

    • It it recommended to buy the Elastic Rubber Band needed for this repair guide first, you can buy the band at this link: http://www.ebay.com/itm/100-Latex-Elasti... the name of the specific rubber band for this device is located at the top of this repair guide

  10. Samsung DVD-HD850 Player Rubber Band Replacement, Locate the White Spindle: 手順 10、 1の画像 1
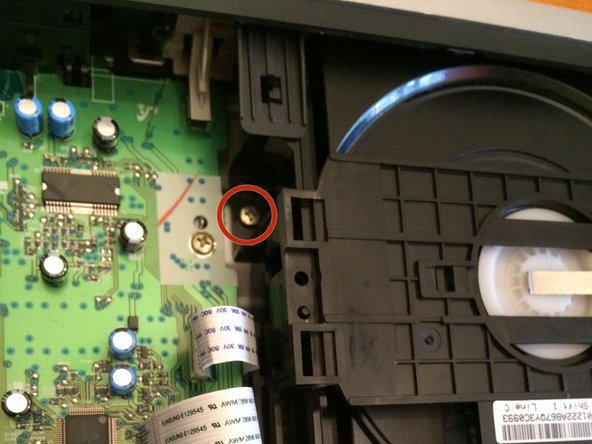
    • Locate the small white spindle on the face of the tray (the face is where the DVD name is edged on the front) and turn the spindle counterclockwise (with the screw driver listed under "tools" or something similar) until the tray begins to open

  11. Samsung DVD-HD850 Player Rubber Band Replacement, Opening The Disk Tray: 手順 11、 2の画像 1 Samsung DVD-HD850 Player Rubber Band Replacement, Opening The Disk Tray: 手順 11、 2の画像 2
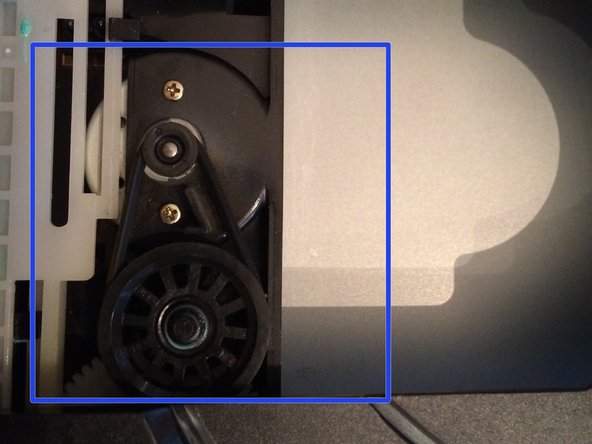
    • Once the tray is opened, locate the rubber band, as noted by the blue box, and remove and replace it by pulling it out of the mechanism

  12. Samsung DVD-HD850 Player Rubber Band Replacement, Rubber Band Replacement: 手順 12、 2の画像 1 Samsung DVD-HD850 Player Rubber Band Replacement, Rubber Band Replacement: 手順 12、 2の画像 2
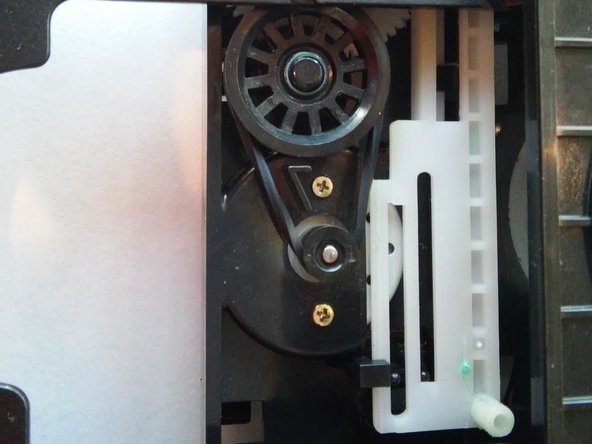
    • Once removed, replace the band with one you have bought, or have on-hand and and insert it into its rightful place

終わりに

To reassemble your device, follow these instructions in reverse order.

作成者

4人の作成者と共同で作成されました。

Carlos

メンバー登録日: 10/16/14

354 ポイント

3のガイドは作成済み

チーム

UMass Dartmouth, Team 1-6, Duarte Fall 2014 UMass Dartmouth, Team 1-6, Duarte Fall 2014人のメンバー

UMASSD-DUARTE-F14S1G6

3 メンバー

7のガイドは作成済み

0 件のコメント

コメントを追加

統計データ:

過去 24時間: 0

過去 7 日: 1

過去 30 日: 6

今までの合計 645