メインコンテンツにスキップ

Samsung Chromebook XE550C22 Back Panel Replacement

必要な工具と部品

  1. Samsung Chromebook XE550C22 Back Panel Replacement, Back Panel: 手順 1、 3の画像 1 Samsung Chromebook XE550C22 Back Panel Replacement, Back Panel: 手順 1、 3の画像 2 Samsung Chromebook XE550C22 Back Panel Replacement, Back Panel: 手順 1、 3の画像 3
    • Turn the power off before beginning this step.

    • Using the spudger, remove the four 1/2 inch skid pads from the back of the laptop.

  2. Samsung Chromebook XE550C22 Back Panel Replacement: 手順 2、 2の画像 1 Samsung Chromebook XE550C22 Back Panel Replacement: 手順 2、 2の画像 2
    • Remove the eight 7mm screws using the J0 Screwdriver.

  3. Samsung Chromebook XE550C22 Back Panel Replacement: 手順 3、 3の画像 1 Samsung Chromebook XE550C22 Back Panel Replacement: 手順 3、 3の画像 2 Samsung Chromebook XE550C22 Back Panel Replacement: 手順 3、 3の画像 3
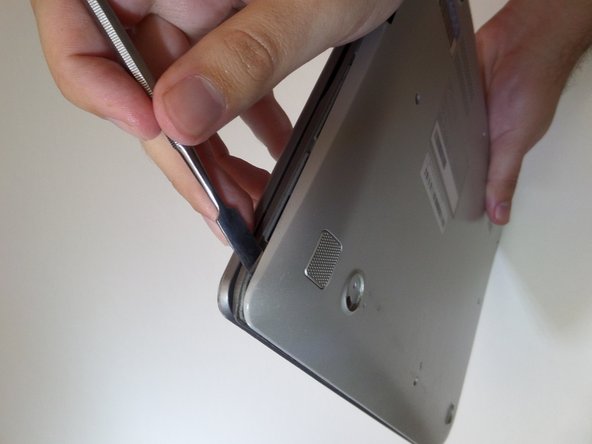
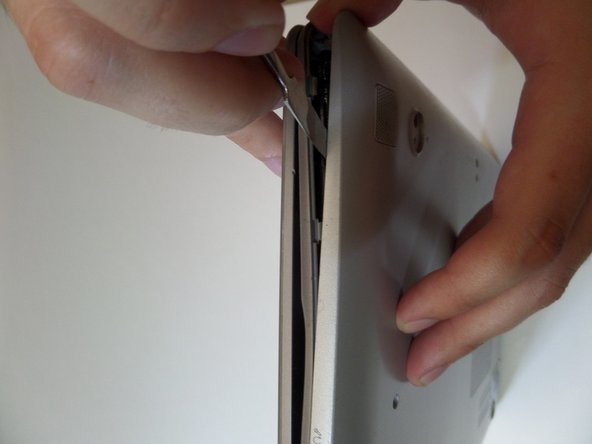
    • Starting at the center front of the laptop, insert the metal spudger between the keyboard panel and the bottom panel, separating the bottom panel from the laptop.

    • Continue prying around the sides to release more brackets.

  4. Samsung Chromebook XE550C22 Back Panel Replacement: 手順 4、 2の画像 1 Samsung Chromebook XE550C22 Back Panel Replacement: 手順 4、 2の画像 2
    • After deconnecting all the brackets, pull the back panel away from the laptop.

    • Note: The back panel has some flex to it, don't be afraid to use some force.

終わりに

To reassemble your device, follow these instructions in reverse order.

3 の人々がこのガイドを完成させました。

作成者

2人の作成者と共同で作成されました。

Brenna Wolfe

メンバー登録日: 09/11/17

541 ポイント

3のガイドは作成済み

チーム

CSU Fullerton, Team S2-G7, Bruce Fall 2017 CSU Fullerton, Team S2-G7, Bruce Fall 2017人のメンバー

CSUF-BRUCE-F17S2G7

3 メンバー

14のガイドは作成済み

0 件のコメント

コメントを追加

統計データ:

過去 24時間: 0

過去 7 日: 1

過去 30 日: 5

今までの合計 446