メインコンテンツにスキップ

Samsung Blackjack Speaker Replacement

必要な工具と部品

  1. Samsung Blackjack Speaker Replacement, Battery Cover: 手順 1、 3の画像 1 Samsung Blackjack Speaker Replacement, Battery Cover: 手順 1、 3の画像 2 Samsung Blackjack Speaker Replacement, Battery Cover: 手順 1、 3の画像 3
    • Hold the device with the screen facing away from you and the camera towards you.

    • Place your thumb on the bottom half of the phone and slide the cover off while gently pushing down on the cover.

  2. Samsung Blackjack Speaker Replacement, Battery: 手順 2、 2の画像 1 Samsung Blackjack Speaker Replacement, Battery: 手順 2、 2の画像 2
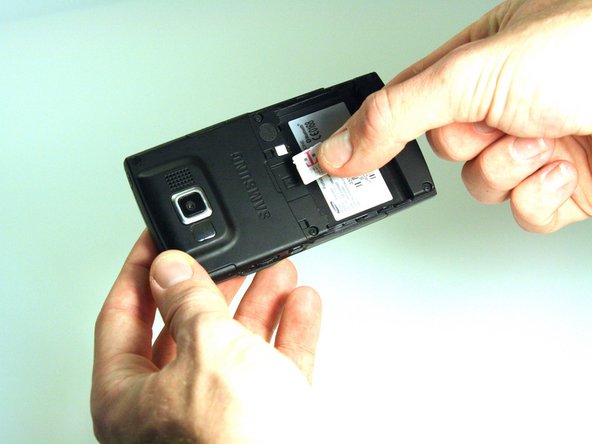
    • Place your fingers on both sides of the bottom of the battery and lift upwards.

    • Pull the battery away from the phone.

  3. Samsung Blackjack Speaker Replacement, SIM Card: 手順 3、 3の画像 1 Samsung Blackjack Speaker Replacement, SIM Card: 手順 3、 3の画像 2 Samsung Blackjack Speaker Replacement, SIM Card: 手順 3、 3の画像 3
    • Place your thumb on the SIM card.

    • Slide the card out of the slot.

  4. Samsung Blackjack Speaker Replacement, Back Phone Casing: 手順 4、 2の画像 1 Samsung Blackjack Speaker Replacement, Back Phone Casing: 手順 4、 2の画像 2
    • Use the spudger to remove the rubber stoppers from the top of the cover.

    • Use the Phillips 00 screw driver to remove the screws from each of the four corners and the two on sides (six total).

  5. Samsung Blackjack Speaker Replacement: 手順 5、 3の画像 1 Samsung Blackjack Speaker Replacement: 手順 5、 3の画像 2 Samsung Blackjack Speaker Replacement: 手順 5、 3の画像 3
    • Use the spudger to loosen and separate the front and back covers.

    • Pick up the back cover once loosened.

    • The front and back covers will be attached to each other by a gold wire.

    • Remove the gold wire connecting the back cover to the motherboard to completely separate the covers.

  6. Samsung Blackjack Speaker Replacement, Motherboard: 手順 6、 2の画像 1 Samsung Blackjack Speaker Replacement, Motherboard: 手順 6、 2の画像 2
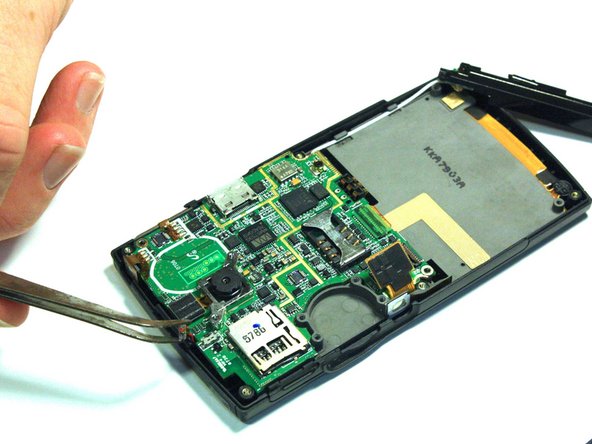
    • Use the spudger to unsnap the black rectangular connection from the motherboard.

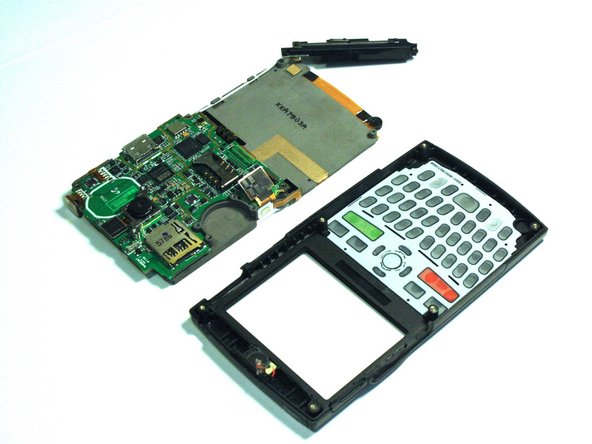
    • Use the Phillips 00 screwdriver to remove all of the screws that hold the motherboard in place.

  7. Samsung Blackjack Speaker Replacement: 手順 7、 2の画像 1 Samsung Blackjack Speaker Replacement: 手順 7、 2の画像 2
    • Use the tweezers to unsnap the connection between the motherboard and the speaker. The speaker is attached to the front casing.

  8. Samsung Blackjack Speaker Replacement: 手順 8、 2の画像 1 Samsung Blackjack Speaker Replacement: 手順 8、 2の画像 2
    • Once all of the connections have been snapped off of the motherboard, the motherboard can be removed.

    • Lift up on the motherboard and it will come free of the front casing.

  9. Samsung Blackjack Speaker Replacement, Speaker: 手順 9、 2の画像 1 Samsung Blackjack Speaker Replacement, Speaker: 手順 9、 2の画像 2
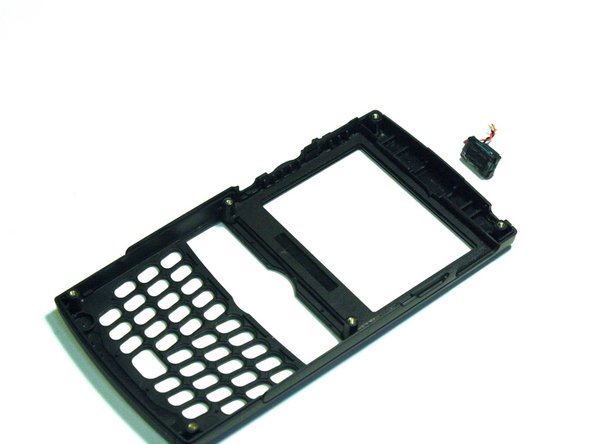
    • Use the spudger to wedge between the speaker and the speaker's casing.

    • Use the spudger to pry on the speaker until it comes free from the casing.

終わりに

To reassemble your device, follow these instructions in reverse order.

作成者

5人の作成者と共同で作成されました。

Kristin Manna

メンバー登録日: 10/22/12

29 ポイント

10のガイドは作成済み

チーム

Clemson, Team 14-4, Benson Fall 2012 Clemson, Team 14-4, Benson Fall 2012人のメンバー

CLEM-BENSON-F12S14G4

3 メンバー

14のガイドは作成済み

0 件のコメント

コメントを追加

統計データ:

過去 24時間: 0

過去 7 日: 0

過去 30 日: 1

今までの合計 396