メインコンテンツにスキップ

Samsung ATIV Smart PC 500T Front-Facing Camera Replacement

必要な工具と部品

  1. Samsung ATIV Smart PC 500T Front-Facing Camera Replacement, Backplate: 手順 1、 2の画像 1 Samsung ATIV Smart PC 500T Front-Facing Camera Replacement, Backplate: 手順 1、 2の画像 2
    • Remove the stylus from the device.

    • Place the device screen-up on a hard surface, like a table.

  2. Samsung ATIV Smart PC 500T Front-Facing Camera Replacement: 手順 2、 3の画像 1 Samsung ATIV Smart PC 500T Front-Facing Camera Replacement: 手順 2、 3の画像 2 Samsung ATIV Smart PC 500T Front-Facing Camera Replacement: 手順 2、 3の画像 3
    • Insert a plastic pry tool or opening pick between the glass and plastic case.

    • Work your way around the plastic edge, unclipping the backplate.

    • Once the clips are loosened, remove the backplate. Some force may be necessary.

    • Though you may need to use force, be careful of the pry tool slipping and hurting you!

  3. Samsung ATIV Smart PC 500T Front-Facing Camera Replacement, Battery: 手順 3、 3の画像 1 Samsung ATIV Smart PC 500T Front-Facing Camera Replacement, Battery: 手順 3、 3の画像 2 Samsung ATIV Smart PC 500T Front-Facing Camera Replacement, Battery: 手順 3、 3の画像 3
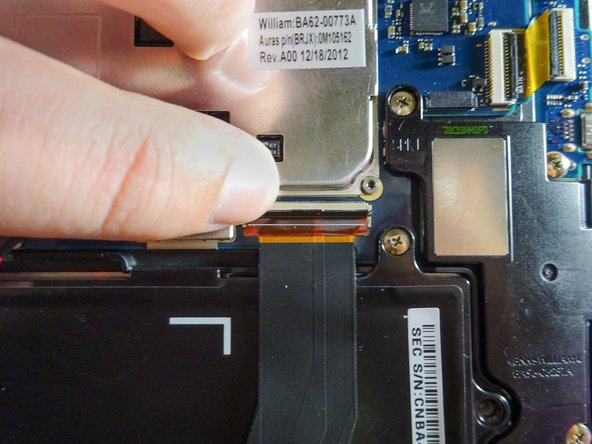
    • Disconnect the three ribbon cables from the motherboard to free the battery.

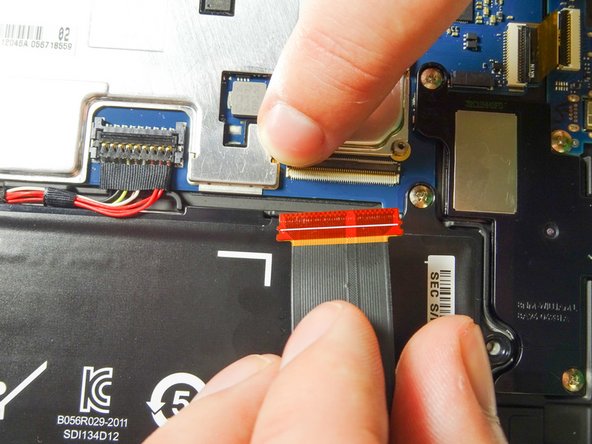
    • Use your finger to lift the flap securing each ZIF connector.

    • Slide the ribbon cable out and towards you. Now it should be completely detached.

    • Repeat with the other two cables.

  4. Samsung ATIV Smart PC 500T Front-Facing Camera Replacement: 手順 4、 3の画像 1 Samsung ATIV Smart PC 500T Front-Facing Camera Replacement: 手順 4、 3の画像 2 Samsung ATIV Smart PC 500T Front-Facing Camera Replacement: 手順 4、 3の画像 3
    • Get a firm hold of the power cable as close to the clip as you can.

    • Pull the power cable up and out of the clip.

  5. Samsung ATIV Smart PC 500T Front-Facing Camera Replacement: 手順 5、 3の画像 1 Samsung ATIV Smart PC 500T Front-Facing Camera Replacement: 手順 5、 3の画像 2 Samsung ATIV Smart PC 500T Front-Facing Camera Replacement: 手順 5、 3の画像 3
    • Remove the six 3.5-mm screws using the Phillips #00 screwdriver.

    • Lift the battery out by hooking your finger under the tab on the top side of the battery and pulling it up and towards you. The battery should come out easily.

  6. Samsung ATIV Smart PC 500T Front-Facing Camera Replacement, Front-Facing Camera: 手順 6、 3の画像 1 Samsung ATIV Smart PC 500T Front-Facing Camera Replacement, Front-Facing Camera: 手順 6、 3の画像 2 Samsung ATIV Smart PC 500T Front-Facing Camera Replacement, Front-Facing Camera: 手順 6、 3の画像 3
    • Gently lift the front-facing camera with your forefinger.

    • Grip the camera with your thumb and forefinger and lift up to remove the camera from the socket at its base.

終わりに

To reassemble your device, follow these instructions in reverse order.

作成者

2人の作成者と共同で作成されました。

Crystal Dinh

メンバー登録日: 09/23/15

1,026 ポイント

4のガイドは作成済み

チーム

Baylor, Team 6-6, Williams Fall 2015 Baylor, Team 6-6, Williams Fall 2015人のメンバー

BU-WILLIAMS-F15S6G6

3 メンバー

10のガイドは作成済み

0 件のコメント

コメントを追加

統計データ:

過去 24時間: 0

過去 7 日: 9

過去 30 日: 15

今までの合計 1,509