メインコンテンツにスキップ

このバージョンは誤った内容を含んでいる可能性があります。最新の承認済みスナップショットに切り替えてください。

必要な工具と部品

  1. この手順は未翻訳です。 翻訳を手伝う。

    : 手順 1、 2の画像 1 : 手順 1、 2の画像 2
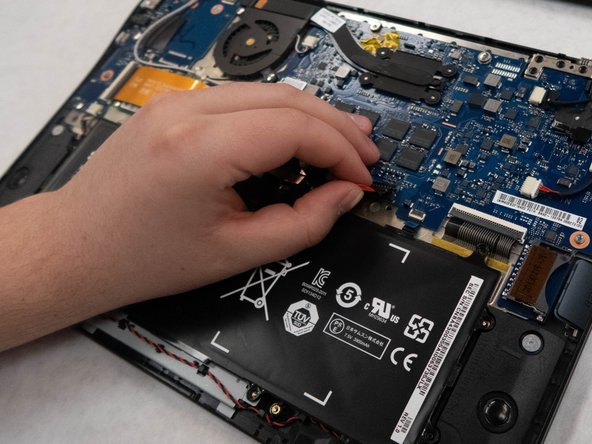
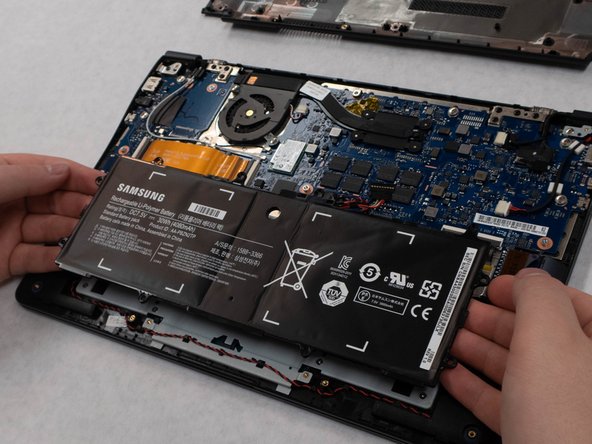
    • Put a protective lining such as a piece of cloth in between the screen and the keyboard when closed to protect your screen when performing this replacement.

    • Turn the laptop upside down to show the screws holding the back cover on.

    • Using the Phillips #0, remove the ten 4mm screws located around the edges and one central.

  2. この手順は未翻訳です。 翻訳を手伝う。

    : 手順 2、 3の画像 1 : 手順 2、 3の画像 2 : 手順 2、 3の画像 3
    • Use two plastic opening tools to separate the back cover from the laptop.

    • This may take some force because the back cover is snapped into place before the screws are used to keep it in place.

  3. この手順は未翻訳です。 翻訳を手伝う。

    : 手順 3、 3の画像 1 : 手順 3、 3の画像 2 : 手順 3、 3の画像 3
    • Using the Phillips #0, remove the seven 5mm screws highlighted in the image.

    • Using your hands, disconnect the battery's main cord from the main motherboard.

    • Using your hands, remove the battery from the computer.

  4. この手順は未翻訳です。 翻訳を手伝う。

    : 手順 4、 3の画像 1 : 手順 4、 3の画像 2 : 手順 4、 3の画像 3
    • Using a Phillips #1, remove the two 3mm screws, one per speaker.

    • Using the nylon spudger, release the black and red wires that connect the two speakers.

  5. この手順は未翻訳です。 翻訳を手伝う。

    : 手順 5、 3の画像 1 : 手順 5、 3の画像 2 : 手順 5、 3の画像 3
    • Using your hands, remove the cord that connects the speakers to the board you are removing.

    • Do not pull on the cord as that might damage it; remove it by pulling on the white wire head.

    • Using your hands remove the speakers from the computer. This may require some force as they are held in place partially by double sided tape.

ゴール

作成者

3人の作成者と共同で作成されました。

Phat Tran

メンバー登録日: 09/16/18

786 ポイント

5のガイドは作成済み

チーム

Washington State, Team S2-G5, Hope Fall 2018 Washington State, Team S2-G5, Hope Fall 2018人のメンバー

WSU-HOPE-F18S2G5

4 メンバー

5のガイドは作成済み

0 件のコメント

コメントを追加

統計データ:

過去 24時間: 0

過去 7 日: 3

過去 30 日: 7

今までの合計 563