メインコンテンツにスキップ

Saeco Vienna Sup 018 Grindstones Replacement

必要な工具と部品

  1. Saeco Vienna Sup 018 Grindstones Replacement, Removing Saeco Vienna Sup 018 Top Cover: 手順 1、 1の画像 1
    • Never forget: Pull the plug out!

    • Remove all attachments such as drawers, water tank, brewing unit.

    • Carefully pull the steam button out. If it is too tight, first loosen the cover (steps 2 to 4), lift slightly and then push the ratchet nose with a small screwdriver.

  2. Saeco Vienna Sup 018 Grindstones Replacement: 手順 2、 1の画像 1
    • The bean container is fixed with two Phillipps screws. Unscrew those.

    • The adjusters of the grinder and the quantity of coffee (if present) can remain.

    • Lift the bean container up und remove it from the device.

  3. Saeco Vienna Sup 018 Grindstones Replacement: 手順 3、 3の画像 1 Saeco Vienna Sup 018 Grindstones Replacement: 手順 3、 3の画像 2 Saeco Vienna Sup 018 Grindstones Replacement: 手順 3、 3の画像 3
    • Remove the single T10 Torx screw on the rear edge of the top cover under the water reservoir.

    • Remove the single Phillipps screw on the rear edge of the top cover under the container of the coffee beans.

    • There are two Phillipps screws on the frontal unterside edge of the top cover. Turn them out.

  4. Saeco Vienna Sup 018 Grindstones Replacement: 手順 4、 1の画像 1
    • Now the cover can be lifted off. Pull backwards, then diagonally forward. Remove the silicone hose from the water tank.

  5. Saeco Vienna Sup 018 Grindstones Replacement, Removal of grinding ring: 手順 5、 3の画像 1 Saeco Vienna Sup 018 Grindstones Replacement, Removal of grinding ring: 手順 5、 3の画像 2 Saeco Vienna Sup 018 Grindstones Replacement, Removal of grinding ring: 手順 5、 3の画像 3
    • Note the blue markings. Turn the outer ring anti clockwise until the blue marks line up to each other.

    • Then the ring can be lifted off. Siphon off all ground coffee immediately.

  6. Saeco Vienna Sup 018 Grindstones Replacement, The grinding cone: 手順 6、 2の画像 1 Saeco Vienna Sup 018 Grindstones Replacement, The grinding cone: 手順 6、 2の画像 2
    • The Phillips screw, which holds the milling cone has a left-hand thread, so "wrong turn" turn! The screw is often hidden under parts of coffee beans.

    • After loosening the screw you can first lift the auger, then carefully the grinding cone. You can see the three balls of the slip clutch. Carefully lift out and keep safely.

  7. Saeco Vienna Sup 018 Grindstones Replacement, Clean: 手順 7、 1の画像 1
    • The driver can be pulled up. Pay attention to the three springs on which the balls of the slip clutch lie, these also safe to store.

    • All parts are thoroughly cleaned and degreased.

  8. Saeco Vienna Sup 018 Grindstones Replacement, Replace grinding ring: 手順 8、 3の画像 1 Saeco Vienna Sup 018 Grindstones Replacement, Replace grinding ring: 手順 8、 3の画像 2 Saeco Vienna Sup 018 Grindstones Replacement, Replace grinding ring: 手順 8、 3の画像 3
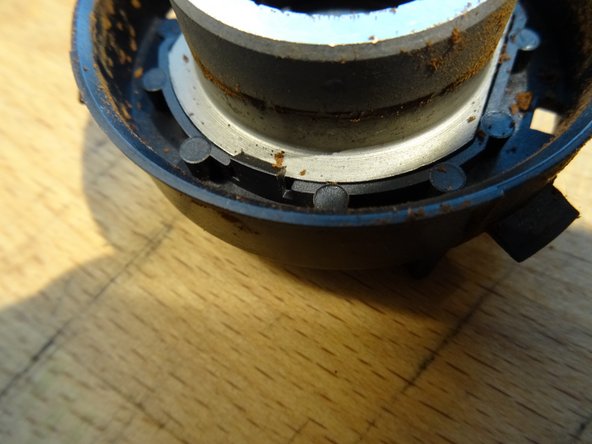
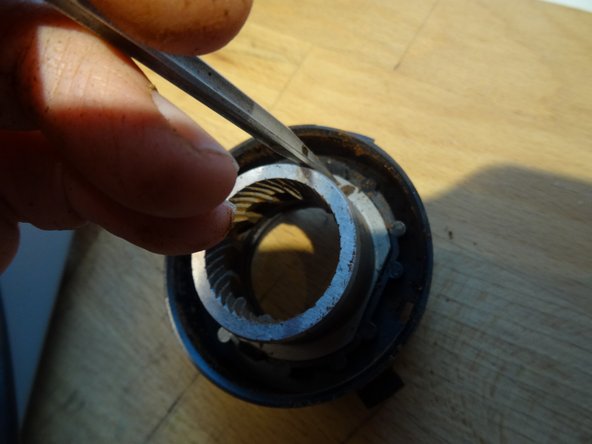
    • The cap of the grinding ring can be removed by pushing the small notches alternately left and right with a screwdriver.

    • The grinding ring is fastened with clamps. Press with the screwdriver to the side, then the Mahlring can be solved.

    • Again, everything is cleaned well, then pressed the new ring and the lid put on.

  9. Saeco Vienna Sup 018 Grindstones Replacement, Exchange cones: 手順 9、 1の画像 1
    • Here are all parts.

    • The driver is reinstated. Then the three feathers and beads inserted. When adjusting the new grinding cone, make sure that the balls are in the recesses on the bottom.

    • Then insert the auger so that it engages correctly in the grooves.

    • Finally, insert the central bolt, push the cone down slightly and tighten the bolt. Reminder: left-hand thread, that is "falschrum".

  10. Saeco Vienna Sup 018 Grindstones Replacement, To adjust: 手順 10、 1の画像 1
    • Note: The thread of the adjusting ring should be well clear of flour dust, this can be achieved by screwing and unscrewing.

    • The mounted grinding ring is inserted. At first, the markers face each other. The outer ring is turned on until a resistance can be felt. So the millstones sit on each other.

    • Then he is turned back about 15 stops. This is about the middle setting of the degree of grinding, but can also be fine-tuned later.

終わりに

Repeat the steps in the reverse order to re-mount the unit.

3 の人々がこのガイドを完成させました。

以下の翻訳者の皆さんにお礼を申し上げます:

de en

100%

VauWehさんは世界中で修理する私たちを助けてくれています! あなたも貢献してみませんか?
翻訳を始める ›

作成者

1人の作成者と共同作成されました。

VauWeh

メンバー登録日: 10/19/15

201,568 ポイント

246のガイドは作成済み

チーム

Repair is War on Entropy Repair is War on Entropy人のメンバー

Community

24 メンバー

1,097のガイドは作成済み

3 件のコメント

I cleaned everything, but still not grinding. The grinding button (middle) just blinking.

rubenabasolo27@gmail.com - 返信

I cleaned everything but still not grinding. The drinding button (middle) just keep blinking

rubenabasolo27@gmail.com - 返信

Proof all functions using the “test mode" (Google “Saeco Vienna Test Mode").

See : https://youtu.be/Ng-zQurYhXA

VauWeh - 返信

コメントを追加

統計データ:

過去 24時間: 1

過去 7 日: 7

過去 30 日: 27

今までの合計 2,788