メインコンテンツにスキップ

SOMNOcomfort and SOMNObalance Ventilator Fuse Replacement

医療機器
この修理ガイドは医療機器メーカーからの是認を得ておらず、iFixitと医療機器メーカーは提携していません。

必要な工具と部品

  1. SOMNOcomfort and SOMNObalance Ventilator Fuse Replacement, How to Open and Close Housing (SOMNOcomfort and SOMNObalance Ventilator): 手順 1、 1の画像 1
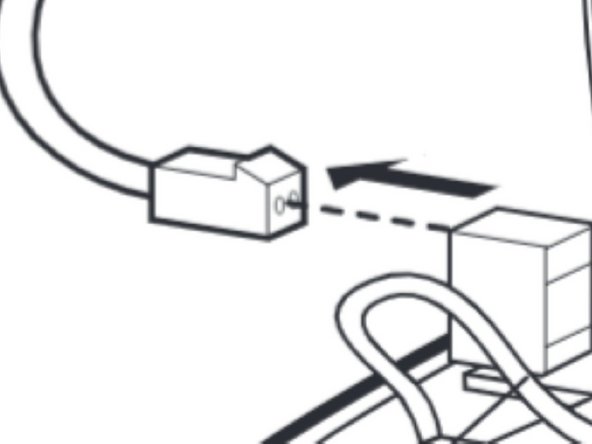
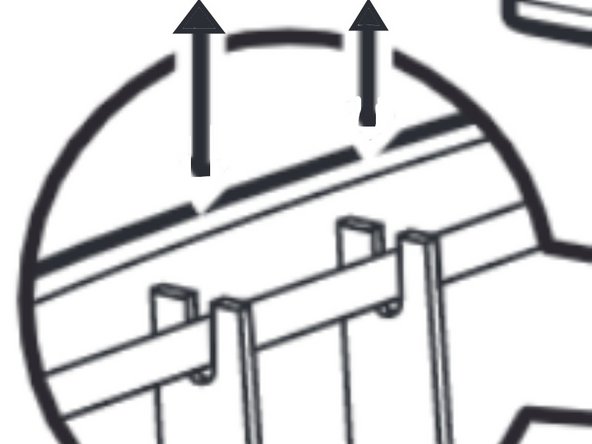
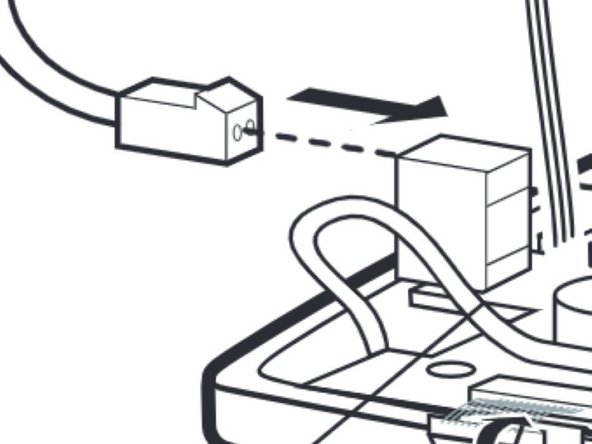
    • Remove the covering cap. (pg. 23)

  2. SOMNOcomfort and SOMNObalance Ventilator Fuse Replacement: 手順 2、 1の画像 1
    • Place the unit upside down on a non-slip surface and remove the six screws. (pg. 23)

  3. SOMNOcomfort and SOMNObalance Ventilator Fuse Replacement: 手順 3、 1の画像 1
    • Remove the lower part of the housing with a swiveling motion away to the side. Note the SOMNOcomfort series uses a shorter circuit board than the balance series ventilator. (pg. 23)

  4. SOMNOcomfort and SOMNObalance Ventilator Fuse Replacement: 手順 4、 3の画像 1 SOMNOcomfort and SOMNObalance Ventilator Fuse Replacement: 手順 4、 3の画像 2 SOMNOcomfort and SOMNObalance Ventilator Fuse Replacement: 手順 4、 3の画像 3
    • Remove the connector (X1) from the circuit board.

    • Pull the connecting cable (64) from its mount.

    • Now set aside the lower part of the housing. (pg. 23)

  5. SOMNOcomfort and SOMNObalance Ventilator Fuse Replacement: 手順 5、 2の画像 1 SOMNOcomfort and SOMNObalance Ventilator Fuse Replacement: 手順 5、 2の画像 2
    • Next, how to close the compartment and reverse the process.

    • Hold the lower part of the housing to the upper part at an angle

    • Attach the connector (X1) to the main circuit board. When doing so the connector’s nub has to point towards the lock. (pg. 24)

  6. SOMNOcomfort and SOMNObalance Ventilator Fuse Replacement: 手順 6、 2の画像 1 SOMNOcomfort and SOMNObalance Ventilator Fuse Replacement: 手順 6、 2の画像 2
    • Properly align the main circuit board inside the unit.

    • Attach the connecting cable (64) to its mount (pg. 24)

  7. SOMNOcomfort and SOMNObalance Ventilator Fuse Replacement: 手順 7、 1の画像 1
    • Place the lower part of the housing on the upper part (47). Please make sure the main circuit board (44) is aligned properly, and that the connecting cable (64) is not being squeezed anywhere. (pg. 24)

  8. SOMNOcomfort and SOMNObalance Ventilator Fuse Replacement: 手順 8、 1の画像 1
    • Now reattach the upper part of the housing by tightening the six screws. (pg. 24)

  9. SOMNOcomfort and SOMNObalance Ventilator Fuse Replacement: 手順 9、 1の画像 1
    • Insert the covering cap. (pg. 24)

  10. SOMNOcomfort and SOMNObalance Ventilator Fuse Replacement, Fuse: 手順 10、 1の画像 1
    • Open the unit (refer to the guide "How to Open and Close Housing")

  11. SOMNOcomfort and SOMNObalance Ventilator Fuse Replacement: 手順 11、 2の画像 1 SOMNOcomfort and SOMNObalance Ventilator Fuse Replacement: 手順 11、 2の画像 2
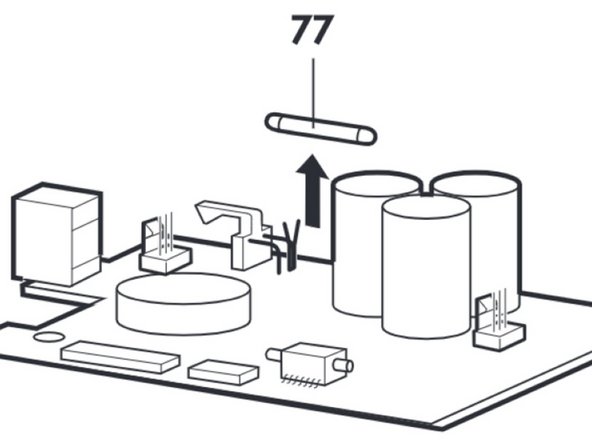
    • Remove the defective fuse(76 or 77) and replace with a new one. (pg. 27)

    • Ensure the correct amperage is used. Use fuses mentioned in the Replacement parts list only. Using other fuses may cause damage to the main circuit board.

    • 76 refers to the fuse in SOMNObalance. 77 refers to the fuse in SOMNOcomfort.

  12. SOMNOcomfort and SOMNObalance Ventilator Fuse Replacement: 手順 12、 1の画像 1
    • Close the Unit (refer to the guide "How to Open and Close Housing").

終わりに

Check that everything is working properly after having successfully replaced the fuse.

作成者

2人の作成者と共同で作成されました。

Katie Steidl

メンバー登録日: 05/04/20

97 ポイント

1ガイドが承認済み

チーム

Cal Poly, Team S1-G3, Zimmerman Spring 2020 Cal Poly, Team S1-G3, Zimmerman Spring 2020人のメンバー

CPSU-ZIMMERMAN-S20S1G3

5 メンバー

10のガイドは作成済み

0 件のコメント

コメントを追加

統計データ:

過去 24時間: 2

過去 7 日: 3

過去 30 日: 3

今までの合計 147