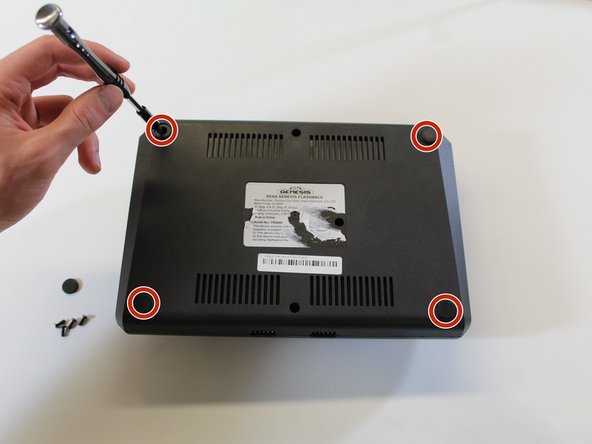
メインコンテンツにスキップ

SEGA Genesis Flashback Back Cover Replacement

必要な工具と部品

  1. SEGA Genesis Flashback Back Cover Replacement, Back Cover: 手順 1、 1の画像 1
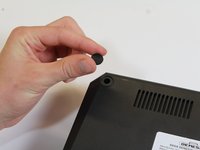
    • Scratch off the right-hand side of the sticker at the center of the bottom case using the spudger until the screw is visible.

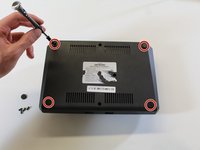
    • Remove this screw with the Phillips #000 screwdriver.

  2. SEGA Genesis Flashback Back Cover Replacement: 手順 2、 1の画像 1
    • Remove the two visible screws on the bottom with the Phillips #000 screwdriver.

  3. SEGA Genesis Flashback Back Cover Replacement: 手順 3、 2の画像 1 SEGA Genesis Flashback Back Cover Replacement: 手順 3、 2の画像 2
    • Use your fingers to peel off the four corner rubber feet on the bottom.

    • Use the Phillips #000 screwdriver to remove the four screws beneath the rubber feet.

  4. SEGA Genesis Flashback Back Cover Replacement: 手順 4、 1の画像 1
    • Flip the case to its upright position.

    • Place one hand on the bottom plate of the case and one on the top plate. Gently pull apart the two plates by tilting the top plate about the front of the device. Treat the front of the device as a hinge.

    • Remove the back cover from the device.

    • Be sure not to rip the wire connection of the LED bulb that is still connected to the bottom plate.

終わりに

To reassemble your device, follow these instructions in reverse order.

ある他の人がこのガイドを完成しました。

作成者

5人の作成者と共同で作成されました。

Viet Nguyen

メンバー登録日: 04/17/18

220 ポイント

2のガイドは作成済み

チーム

Cal Poly, Team S24-G12, Maness Spring 2018 Cal Poly, Team S24-G12, Maness Spring 2018人のメンバー

CPSU-MANESS-S18S24G12

4 メンバー

10のガイドは作成済み

0 件のコメント

コメントを追加

統計データ:

過去 24時間: 0

過去 7 日: 0

過去 30 日: 2

今までの合計 521