はじめに
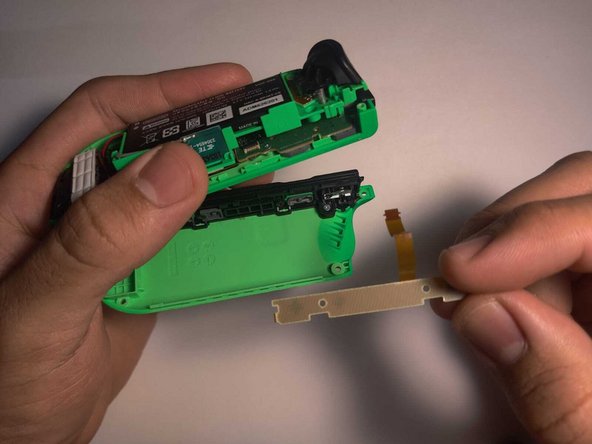
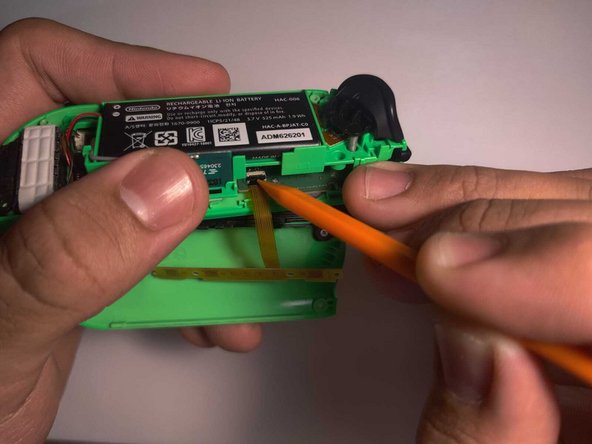
SL/SR ボタンフレキ基板が曲がっていると、SYNC ボタン、LEDランプ、SL/SR ボタンが反応しなくなります。これにより、Nintendo Switchは代わりのジョイコンが無いと遊べなくなってしまいます。
このガイドを使用する前に、ゲーム コンソールのシステム設定に移動し、「コントローラーとセンサー」にて入力デバイスをテストして、ボタンが反応しないことを確認してください。
必要な工具と部品


デバイスを組み立てるには、ステップ 4 から逆の手順で組み立てます。
デバイスを組み立てるには、ステップ 4 から逆の手順で組み立てます。
43 の人々がこのガイドを完成させました。
以下の翻訳者の皆さんにお礼を申し上げます:
100%

Takahiro Yoshinagaさんは世界中で修理する私たちを助けてくれています! あなたも貢献してみませんか?
翻訳を始める ›

チーム

University of Puerto Rico Mayagüez, Team 2-4, Cools Stephens Spring 2022 University of Puerto Rico Mayagüez, Team 2-4, Cools Stephens Spring 2022人のメンバー
UPRM-COOLS STEPHENS-S22S2G4
1 メンバー
7のガイドは作成済み
11 件のコメント
Nice guide. To loosen the battery compartment on my controller I had to remove te battery first. I couldn't see te top 2 screws in step 4. The battery was sticked to the bracket with some tape but removes easily. Underneath the battery were two screws.
Edit: maybe its different because I had to change the button board on the left JoyCon.
Yes! This Guide above shows the right Joycon. As for the left one there are two screws below the battery as you said!
Very helpful step-by-step guide. Thank you.
Had to change the Button Board on the left Joy-con. The screws were also located under the battery in my case. Attention: there 4 screws under the battery, two of which diagonal to each other that hold the battery compartment in place. No need to unscrew all 4.
Will this replacement also fix the LED lights that are now not working on my controllers? And if not, will this be a problem for playing with one Joy-con?
Depends on why your LED´s are not working. For my it was because the SR SL input was not registered, which will be a problem (only) for single joycon use. If its only the LED which is not working, then you should be fine.
Thanks for spreading this knowledge to us.
Thank you! My right button on the side turned unresponsive. I replaced the button board with this guide and fixed it!
Great guide - thank you. i need new eyes though... can barely see the screw heads!